Qualys WAS Credentials
To integrate with Qualys WAS API you need a valid set of user credentials (username and password). It might be advisable to create a user dedicated to API access, which would make it easier to remove access in case of suspected compromise.
Further API access details can be found at https://www.qualys.com/docs/qualys-was-api-user-guide.pdf
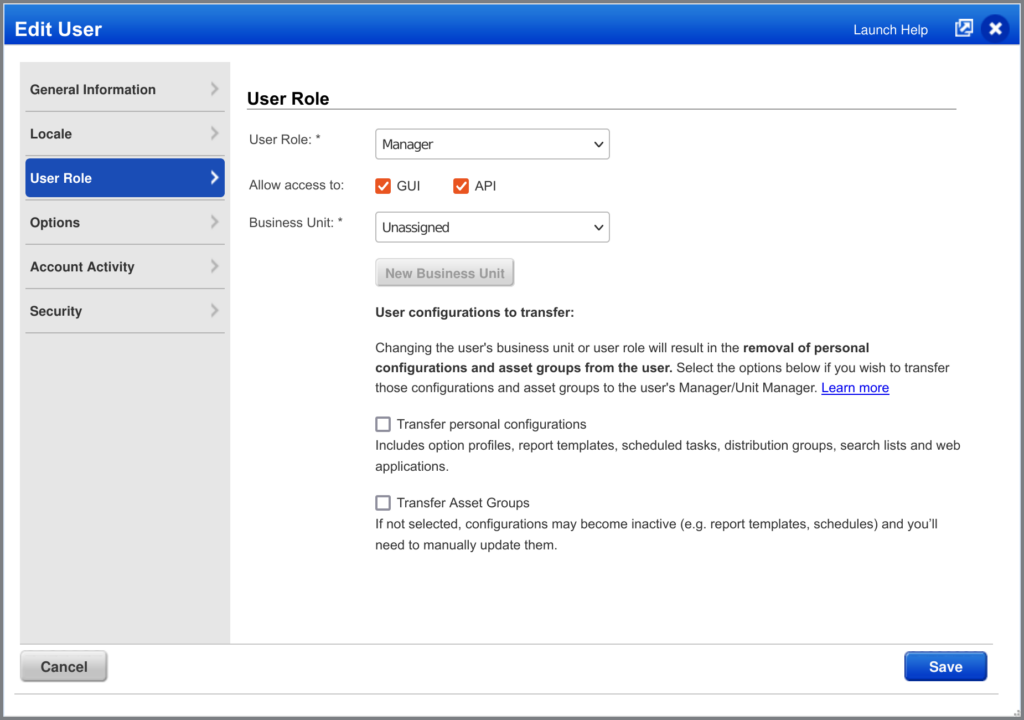
For the user credentials, make sure that the user has “API” access activated (open the user’s menu in the top-right of the screen and go to User Profile > User Role > “Allow access to:”)
Apart from user credentials, you will need your API URL. You can find this information by login into your Qualys WAS account and going to Help > About. The popup will show a list of server domains, including the one for the API (“qualysapi”).
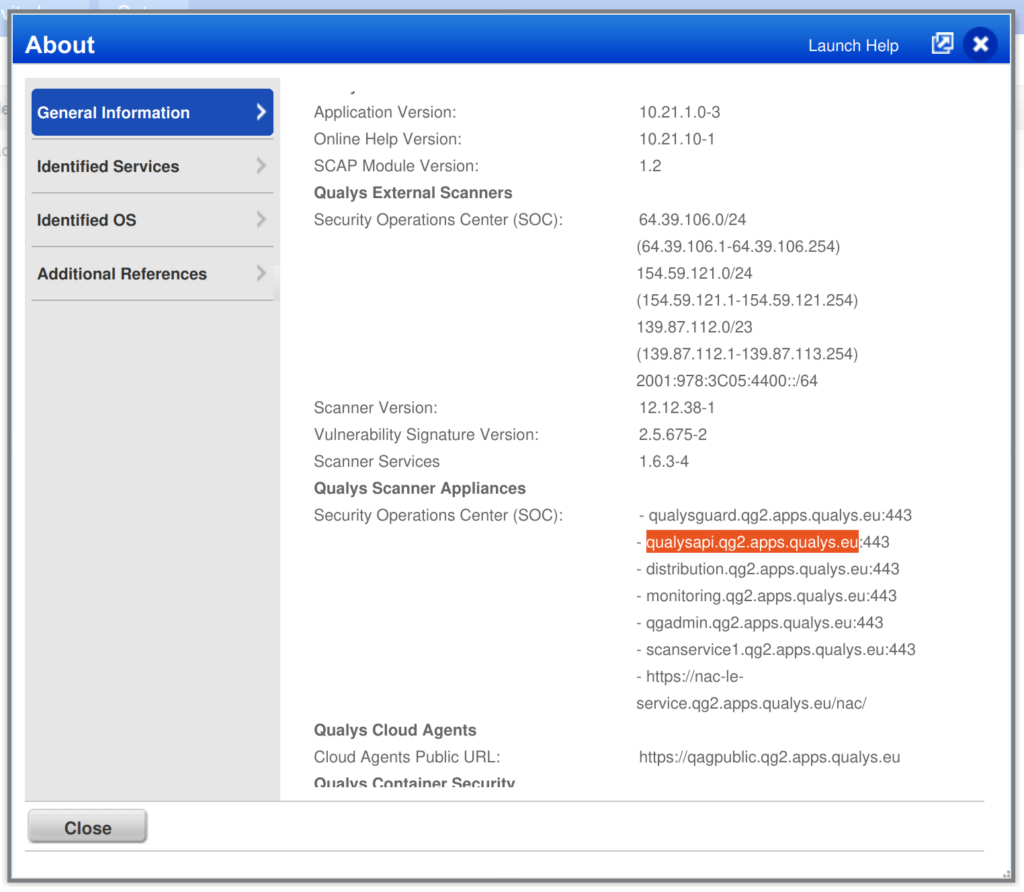
If the domain shown for your account is different than “qualysapi.qg2.apps.qualys.eu” then copy the domain name (without the port number – “:433“) and add “https://” in front of it. For the domain highlighted in the screenshot the resulting URL would be “https://qualysapi.qg2.apps.qualys.eu“.
Create a Qualys WAS Integration
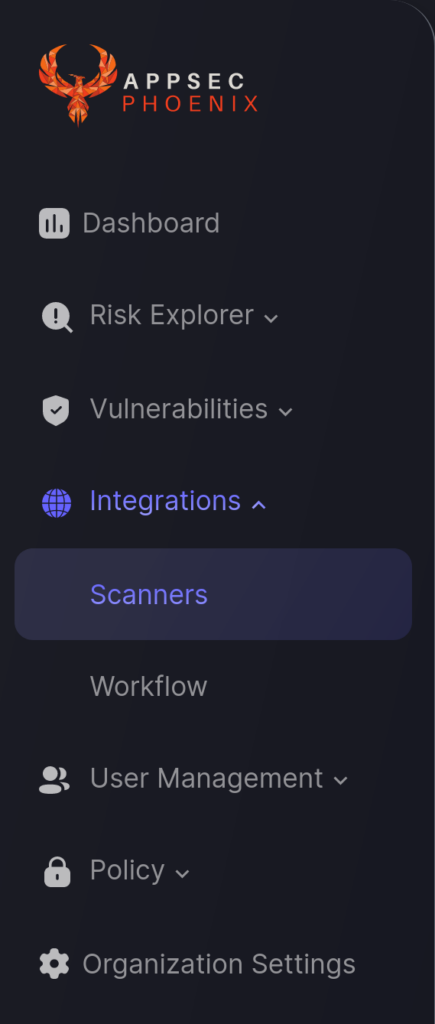
- On the sidebar menu, navigate to the Scanners tab in the Integrations section.
- Click on the “Add Scanner Integration” button on the right side of the page.
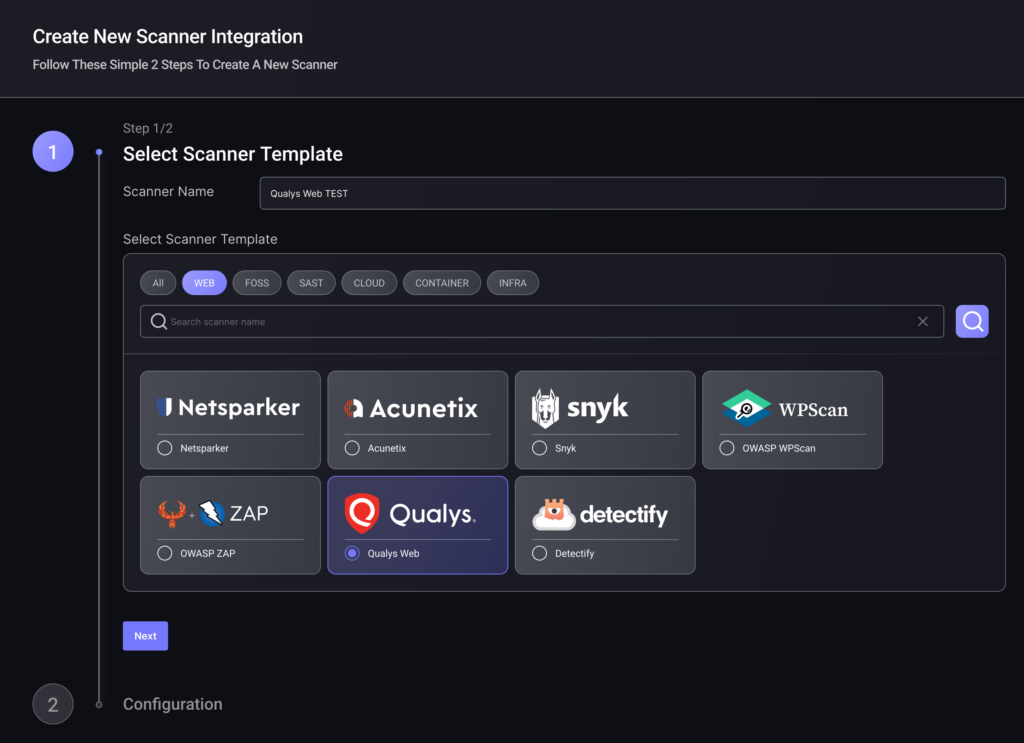
- In the first step, enter a name for this scanner integration and select Qualys WAS from the list of available integrations; then click “Next“.
On the second step you need to provide the required details for the scanner integration. In the case of Qualys WAS you need to provide:
- Server URL: Your API URL from previous steps. If empty, it defaults to “https://qualysapi.qg2.apps.qualys.eu”.
- Username: Enter the username for the user credentials selected to access the API.
- Password: Enter the password for the user credentials selected to access the API.
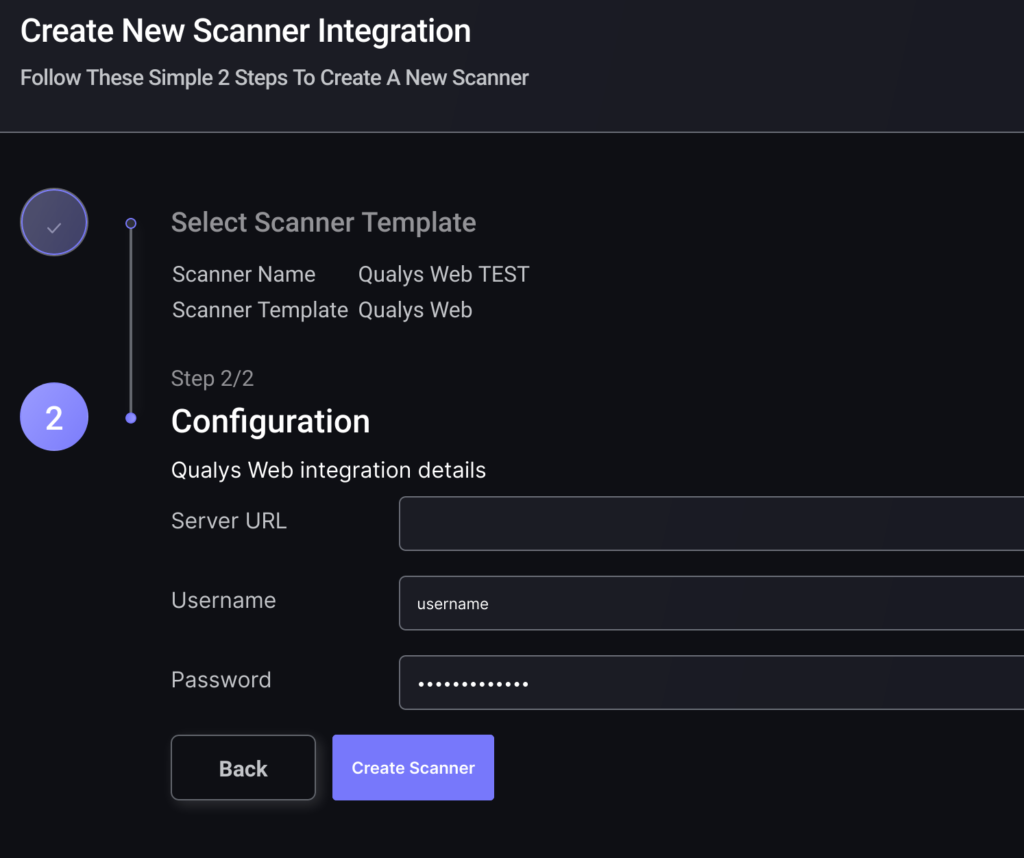
5. To finish the configuration click on “Create Scanner“.
Unless there are issues with the credentials, the new scanner will appear in your list of integrations (under Integrations > Scanners) and the platform will start to collect asset and vulnerability details from all Subscriptions available through the integration credentials.
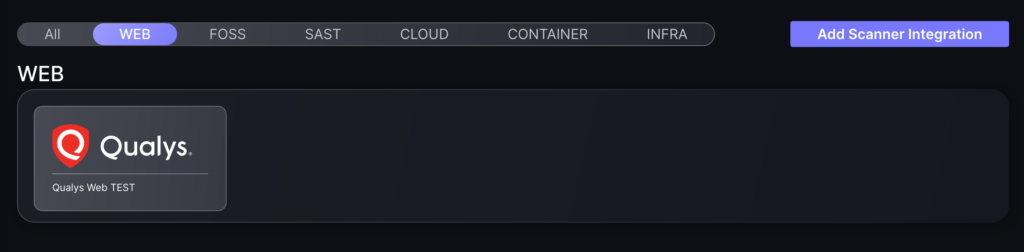
All the scanner’s assets and vulnerabilities will be automatically added to your account’s Default Application, and will be available to start assigning them to user-created Applications as required.