GitHub Credentials
In order to integrate with GitHub CodeQL you’ll need a Personal Access Token. The follow steps guide you through the token creation process.
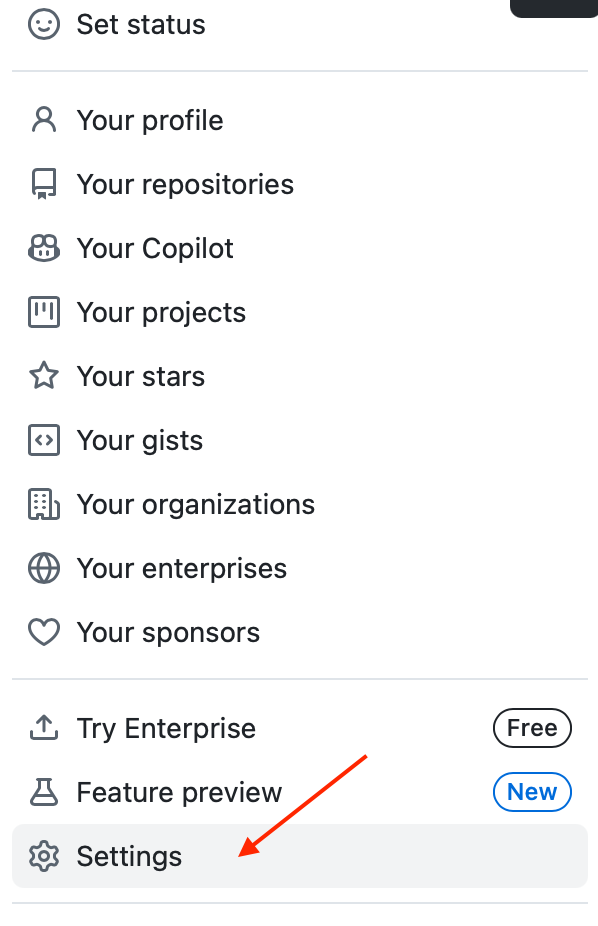
- To create a Personal Access Token, make sure that you are logged in with the user that you want to create the token with, and from the home page click on your profile on the top right hand corner.

- In the right-hand menu select “Settings“. Then navigate to “Developer settings” on the bottom of the left hand menu.
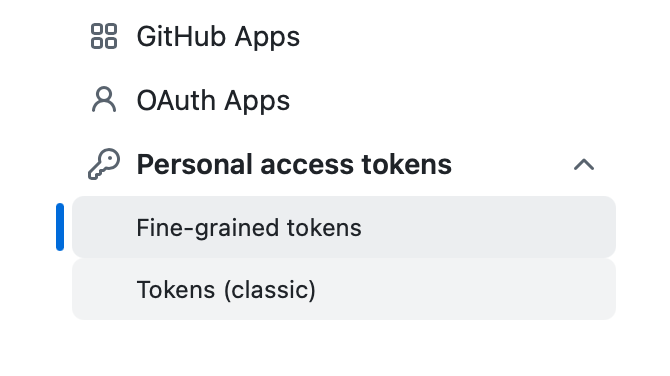
- Then select “Personal access tokens” to allow you to select “Fine-grained tokens” or “Tokens (classic)”
Fine-grained Tokens
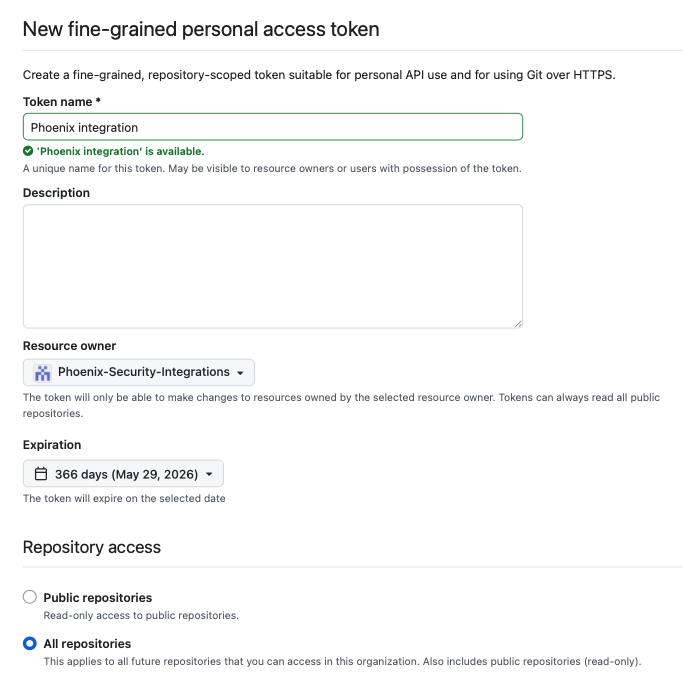
- Click on “Generate new token” and enter a name for the token.
- Ideally, select an organisation as the owner, rather then the user. Select a suitable expiration date and set repository access to All repositories.
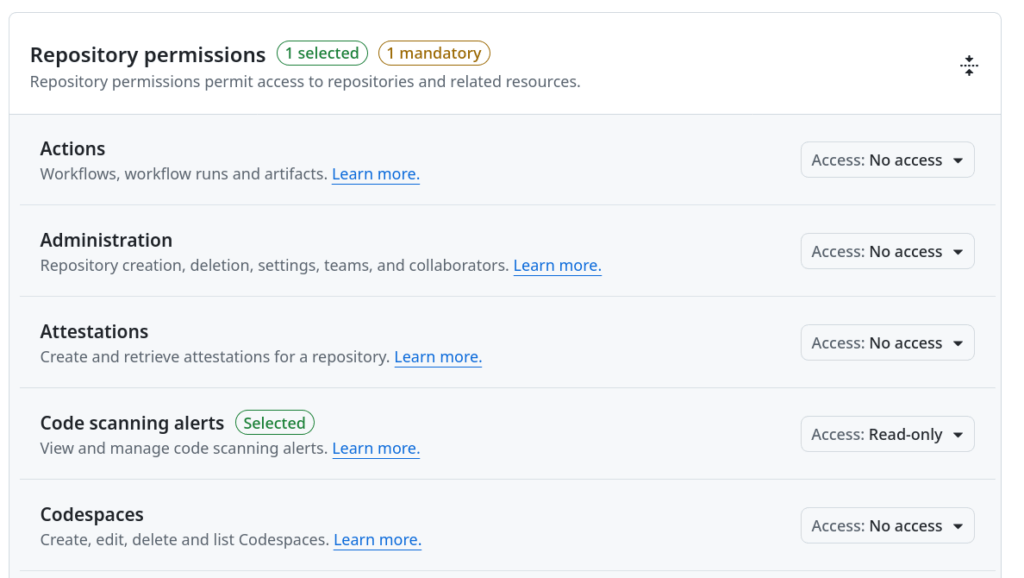
- Expand “Permissions” > “Repository permissions” and select these exact permissions.
Click on “Generate” and make sure that you copy the token in the last step since this is the last time that it will be visible.
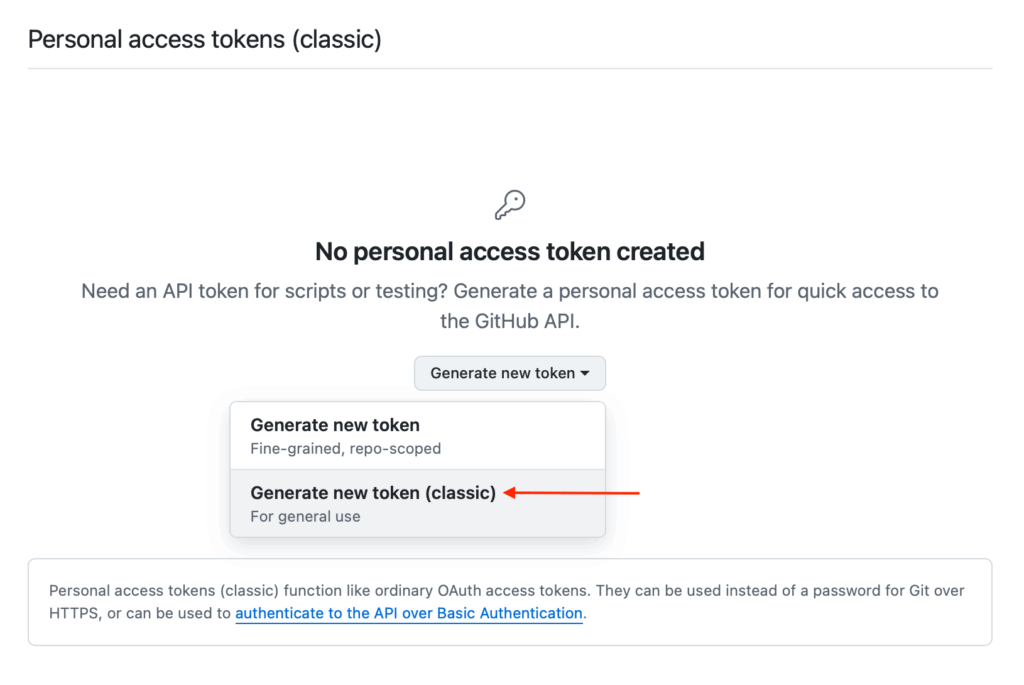
Classic Tokens
- You would normally want to create a new token for this integration. Click on “Generate new token(Classic)” at the top and fill in the details in the token configuration form. The two key points to keep in mind are:
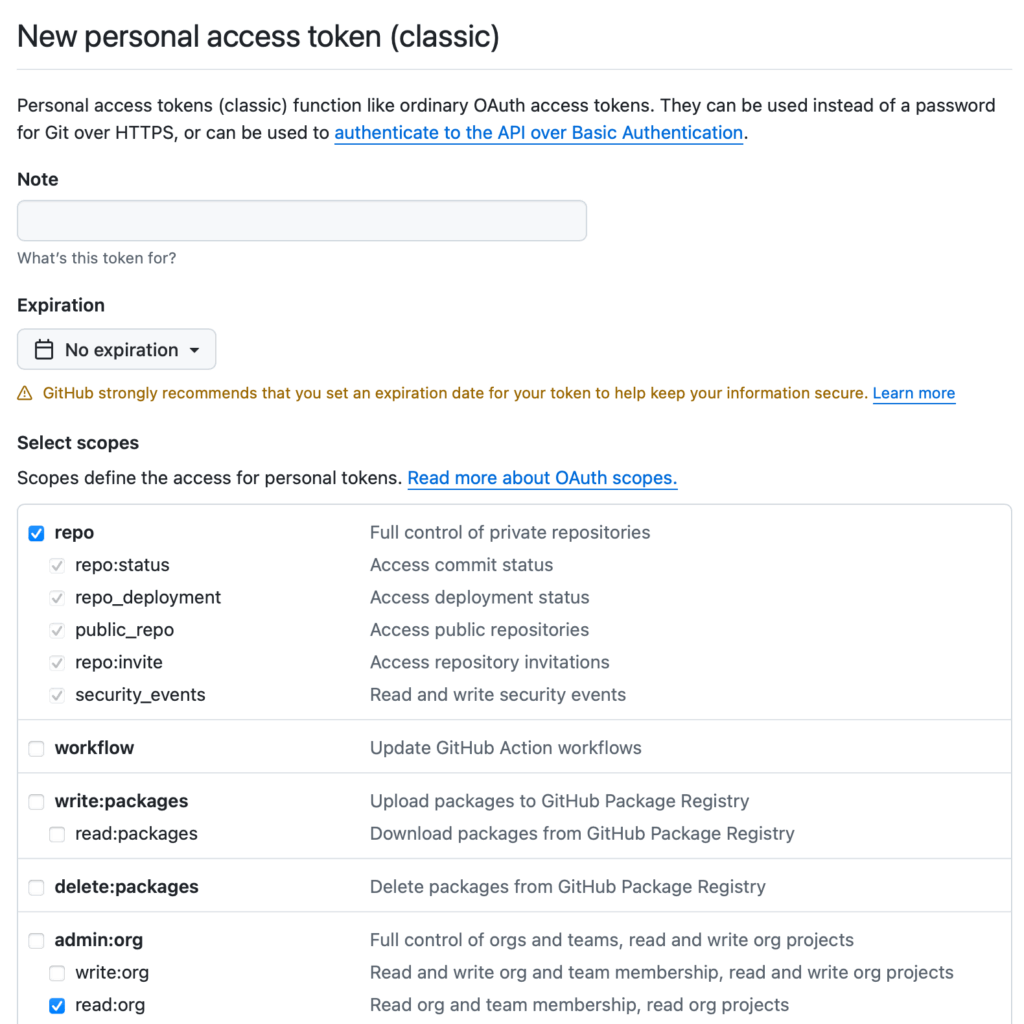
- Make sure that you enter a fairly long, custom defined Expiration date. You can select “No expiration” to ensure that the token never expires.
- In the Scopes section select “repo” and “read:org” within “admin:org”.
Make sure that you copy the token in the last step since this is the last time that it will be visible.
Create a CodeQL Integration
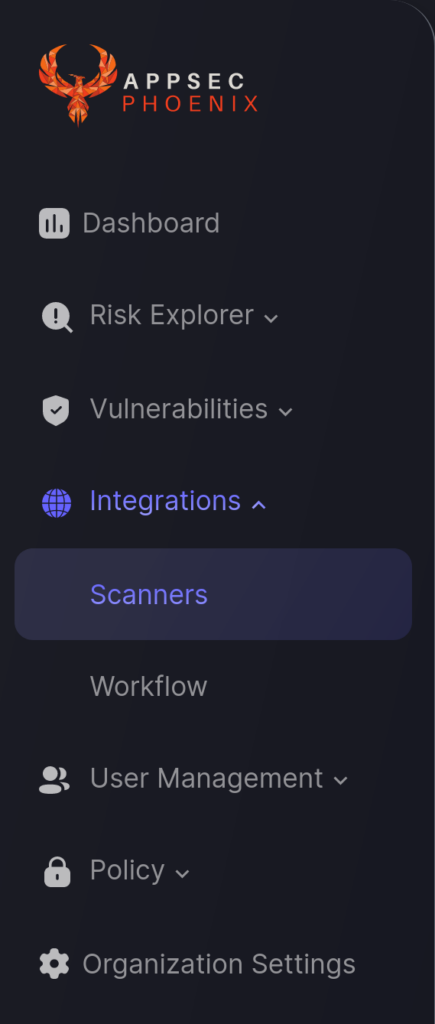
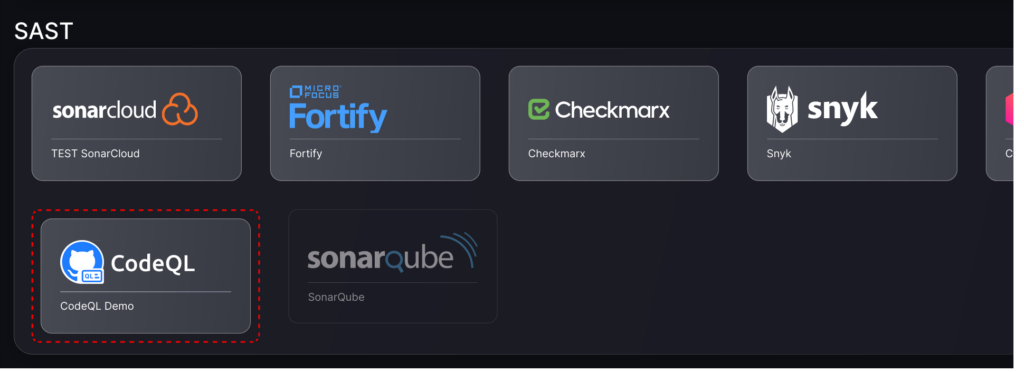
- On the sidebar menu, navigate to the Scanners tab in the Integrations section.
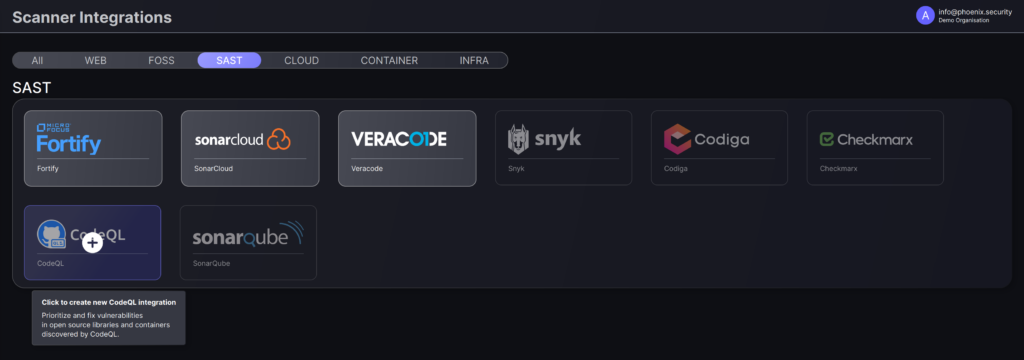
- In the SAST section, click on the plus icon (+) that appears in “CodeQL” banner. If you already have a CodeQL integration, click on the context menu in the banner […] and select “Create new integration”.
- In the first step, enter a name for this scanner integration and populate the following details to complete the configuration:
- Server URL: Enter the URL for GitHub’s REST API; typically “https://api.github.com”.
- Access Token: Enter the Personal Access Token obtained using the instructions at the start of this article.
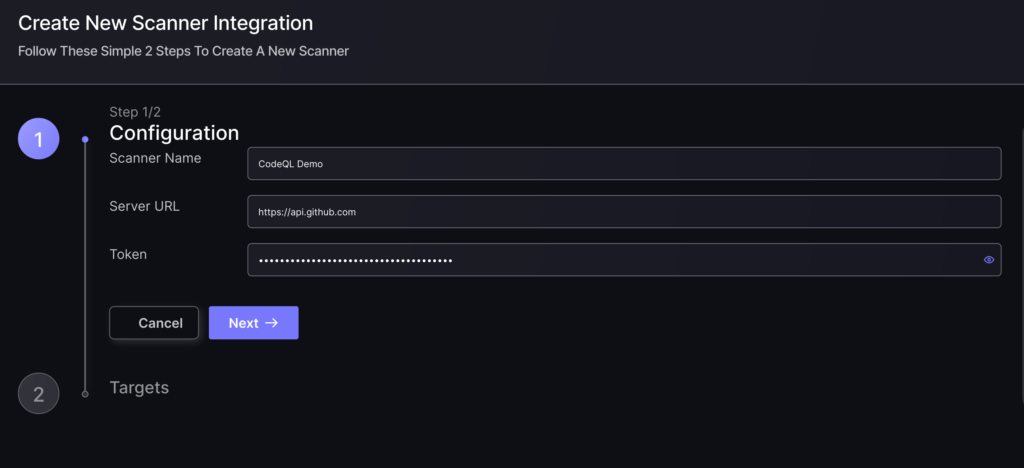
- Click on the ‘Next’ button
- Select whether to fetch vulnerabilities from all repositories accessible to the Access Token, or to choose which ones to include or exclude.
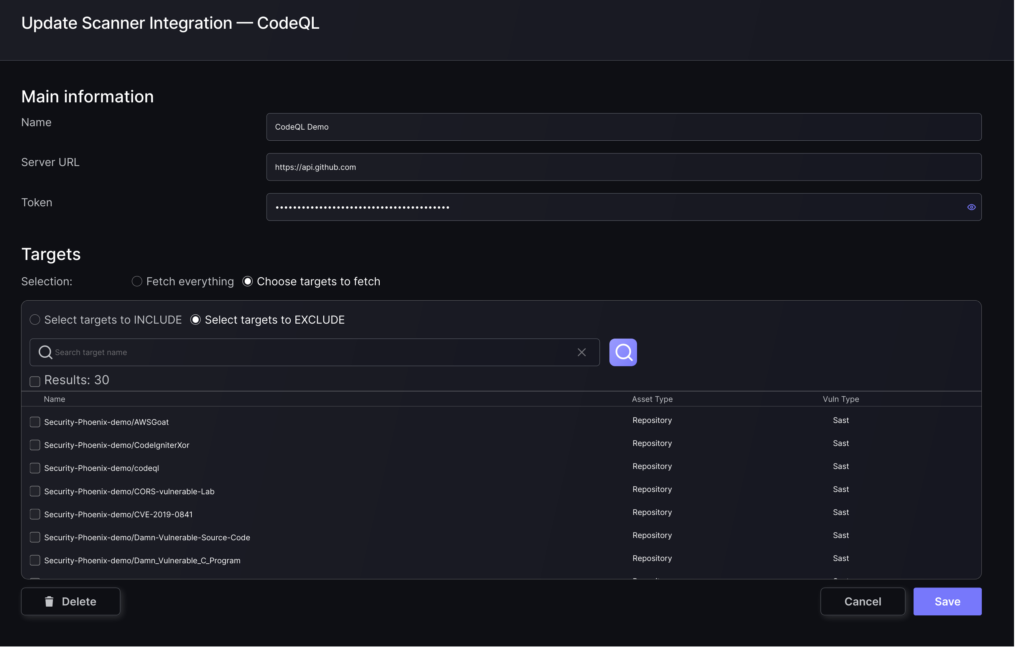
- Then click on “Save” to complete the process.
Unless there are issues with the credentials, the new scanner will appear in your list of integrations (under Integrations > Scanners) and the platform will start to collect asset and vulnerability details from the selected repositories (available through the integration credentials).
All the scanner’s assets and vulnerabilities will be automatically added to your account’s Default Application, and will be available to start assigning them to user-created Applications as required.