Tenable.io VM API Credentials
To integrate with Tenable.io VM API you need a valid set of API Keys. In order to do so, please follow the instructions below, or the ones here.
- Do one of the following:
- In Tenable.io, in the left navigation plane, click Settings. The Settings page appears.
- Click the My Account tile. The My Account page appears, where you can view and update your account details.
- In the upper-right corner, click the user profile icon. The user account menu appears.
- Click the API Keys tab. The API Keys section appears.
- Click Generate. The Generate API Keys window appears with a warning. Caution: Any existing API keys are replaced when you click the Generate button. You must update the applications where the previous API keys were used.
- Review the warning and click Generate. Tenable.io generates new access and secret keys and displays the new keys in the Custom API Keys section of the page.
- Copy the new access and secret keys to a safe location. Caution: Be sure to copy the access and secret keys before you close the API Keys tab. After you close this tab, you cannot retrieve the keys from Tenable.io.
Create a Tenable.io VM Integration
- On the sidebar menu, navigate to the Scanners tab in the Integrations section.
- Click on the “Add Scanner Integration” button on the right side of the page.
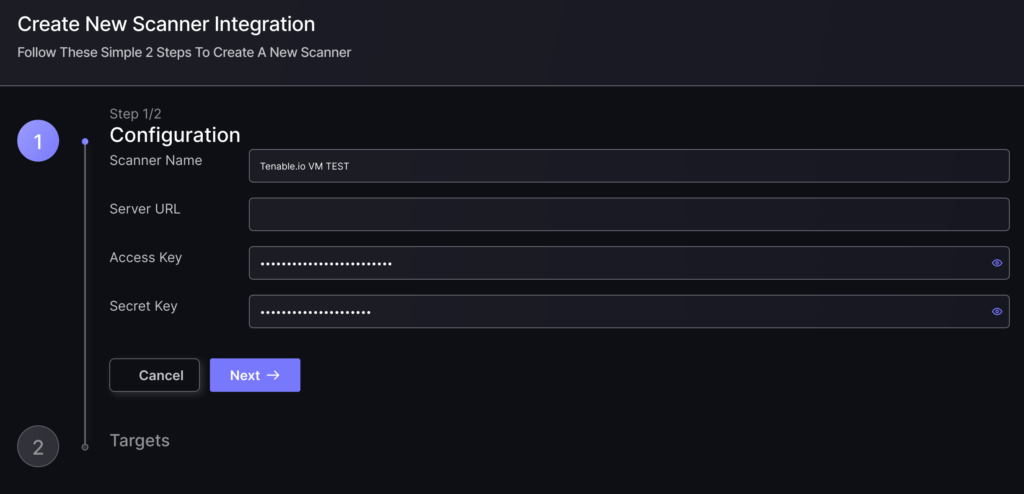
- In the first step, enter a name for this scanner integration and select Tenable.io VM from the list of available integrations; then click “Next“.
- On the second step you need to provide the required details for the scanner integration. In the case of Tenable.io VM you need to provide:
- Server URL: This is optional; it will default to “https://cloud.tenable.com”.
- Access Key: Enter the API access key obtained in the initial section above.
- Secret Key: Enter the API secret key obtained in the initial section above.
- In the next step you will be able to select whether the platform fetches all the assets and vulnerabilities available form the scanner, or you include/exclude individual “targets” (applications, project, etc), if supported by the scanner.
- To finish the configuration click on “Create Scanner“.
Unless there are issues with the credentials, the new scanner will appear in your list of integrations (under Integrations > Scanners) and the platform will start to collect asset and vulnerability details from all Subscriptions available through the integration credentials.
All the scanner’s assets and vulnerabilities will be automatically added to your account’s Default Infra Environment, and will be available to start assigning them to user-created Environments as required.