Navigation
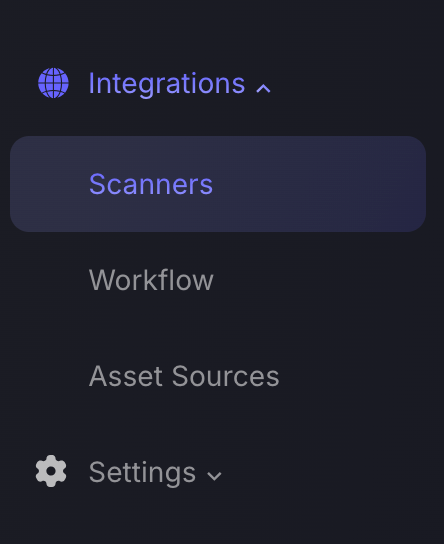
Navigate to the sidebar menu and select Scanners under the Integrations tab.
At the top of the page you will find a menu bar that will allow you to filter the scanners by vulnerability type.

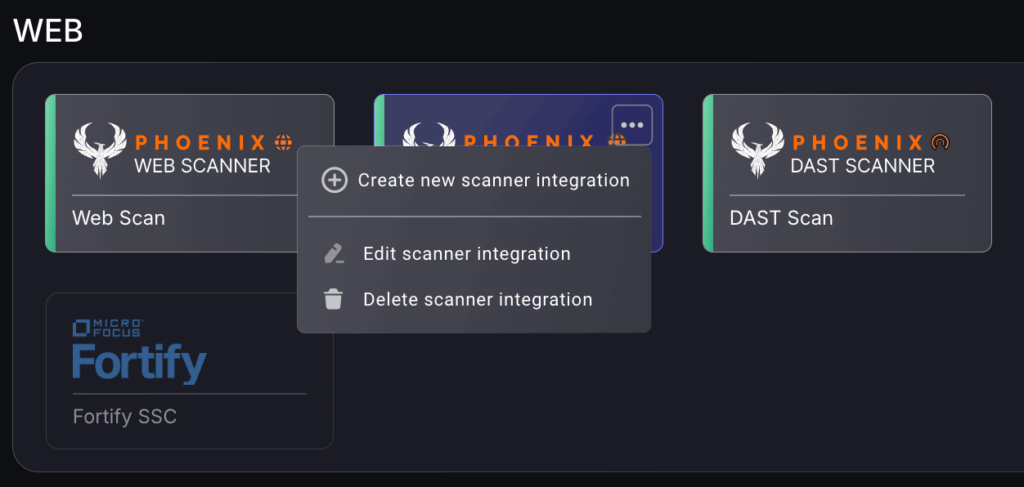
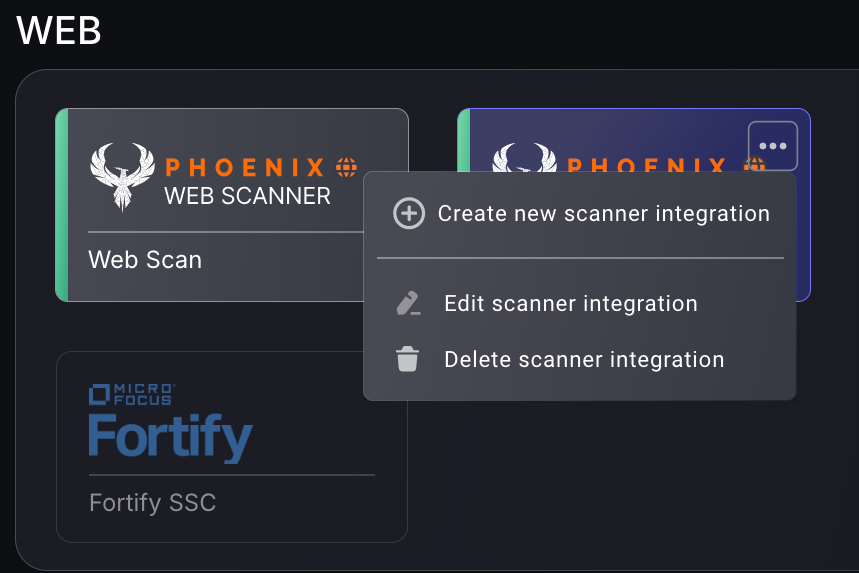
By selecting the three dots in the top right corner of an already existing scanner type it will reveal the following menu which will allow you to: create a new scanner integration of the same scanner type, edit an already existing scanner integration, or delete a scanner integration.
Creating a New Scanner Integration
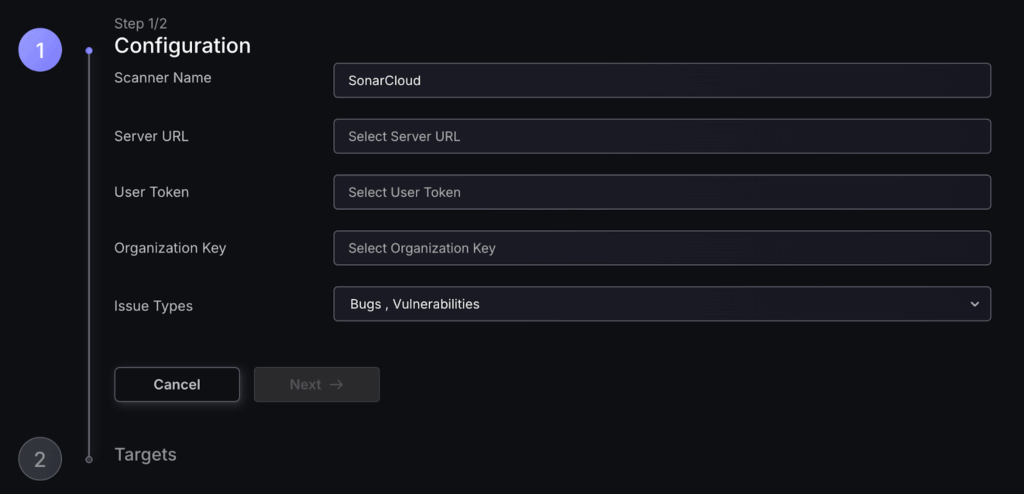
1. On the side bar menu, navigate to the Scanners tab in the Integrations section.

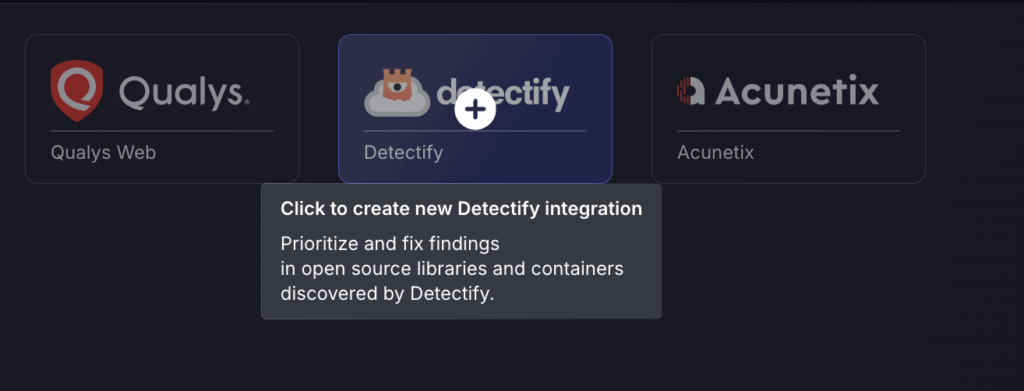
2. When creating a new scanner, locate the scanner type and click to create new scanner integration.
When creating a new scanner from an already existing scanner type: select the three dots on the top right corner and then select Create new scanner integration.
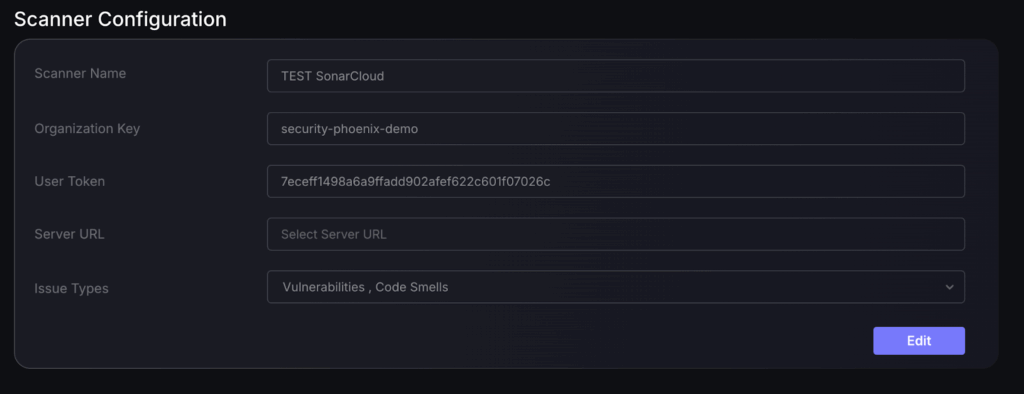
3. Enter the required details then select Next (required details will be different for each scanner type but here is an example with SonarCloud).
4. The next step is to select the targets you would like to fetch.
A target is a subdivision of the surface or scope covered by the scanner. Depending on the type of scanner, a target could be a cloud account, website, code repository, individual virtual machine, or an artificial construct defined by the scanner (like an “application” or “project”) etc. Within Phoenix, targets are defined so that the list of targets covers the entire scope of the scanner; two targets won’t cover the same entities (they don’t overlap).
a. Selecting Fetch everything will fetch all data from all targets from the scanner, including any new targets that may be found in the future. You may now select Save Scanner and be done with the process. If you change your mind you can edit target selection at a later time.
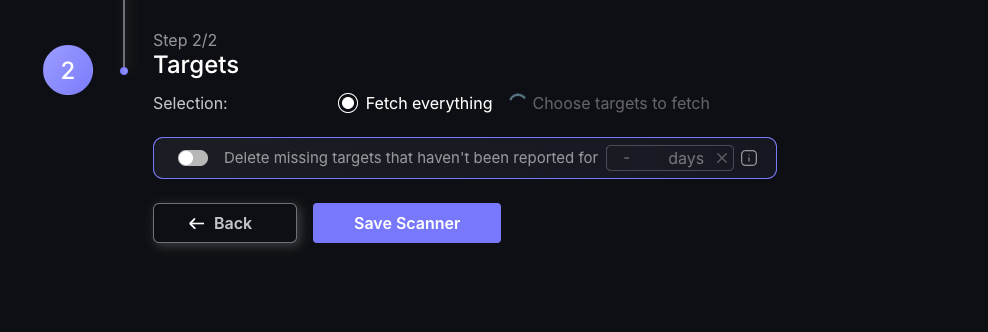
b. If you desire to choose which targets are being fetched you can wait for the spinner next to Choose targets to fetch to finish loading (as shown in the image above) or you can choose to close the creation modal window whilst the targets are loading.
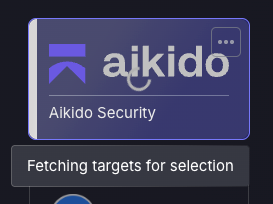
If you close the window you will see a spinner over the scanner, rolling the mouse over the scanner will reveal a tooltip that states it’s still Fetching targets for selection.

If the scanner is clicked on at this time you will be able to see the fetching targets process is still in progress.

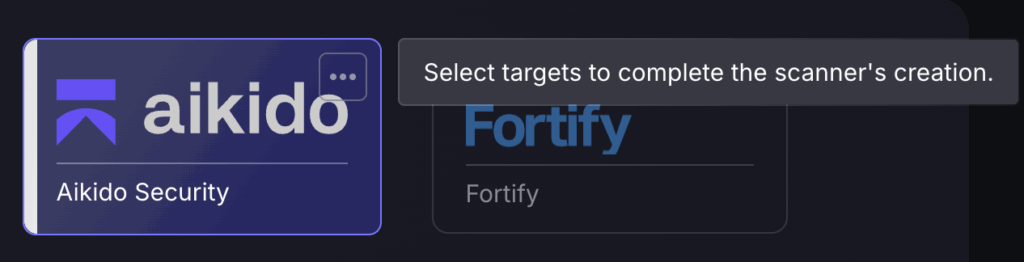
If the creation window was closed; the scanner will begin to flash to indicate that the fetching process has been completed. Rolling the mouse over the scanner will reveal the tooltip stating that you must Select targets to complete the scanners creation.

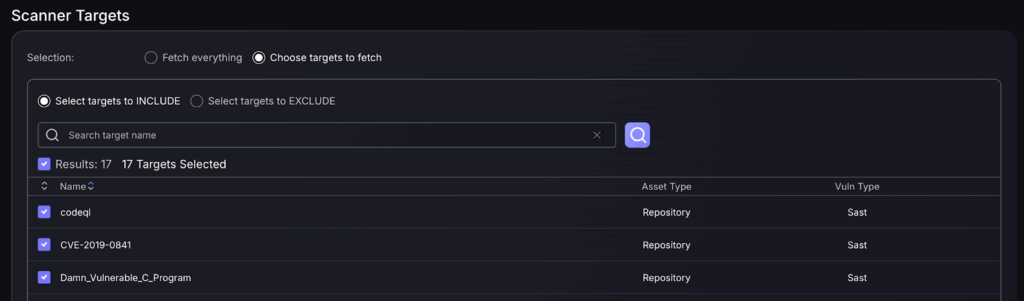
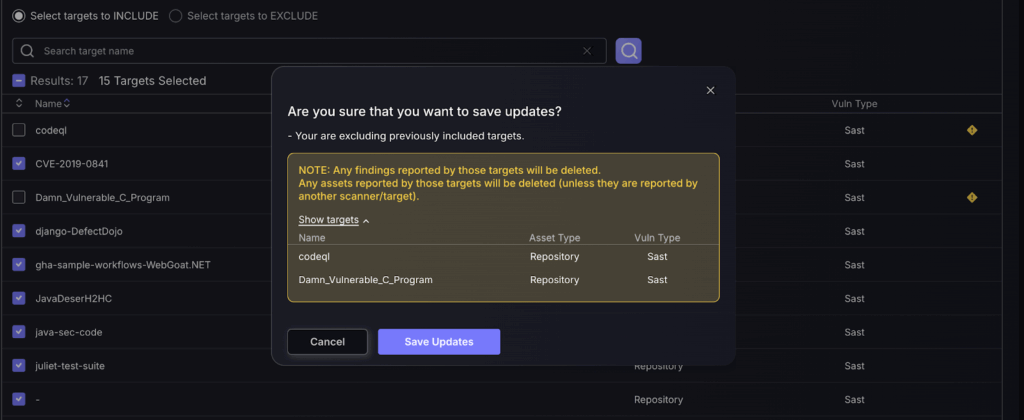
5. To complete scanner creation you must select which targets to include/exclude and then save the scanner.
- Select targets to INCLUDE : only data from selected targets will be fetched. Keep in mind that selecting all targets isn’t the same as selecting Fetch everything as it will only collect the ones that are selected and any new targets that may be found in the future will not be included in the fetch.
- Select targets to EXCLUDE : only data from selected targets will be excluded from the fetch. Any new targets that may be found in the future will be included.
Editing a Scanner Integration
To edit a scanner you can either:
- select the three dots in the top right corner of the scanner and then select Edit scanner integration.
- click directly on the desired scanner.
This will display the following page:
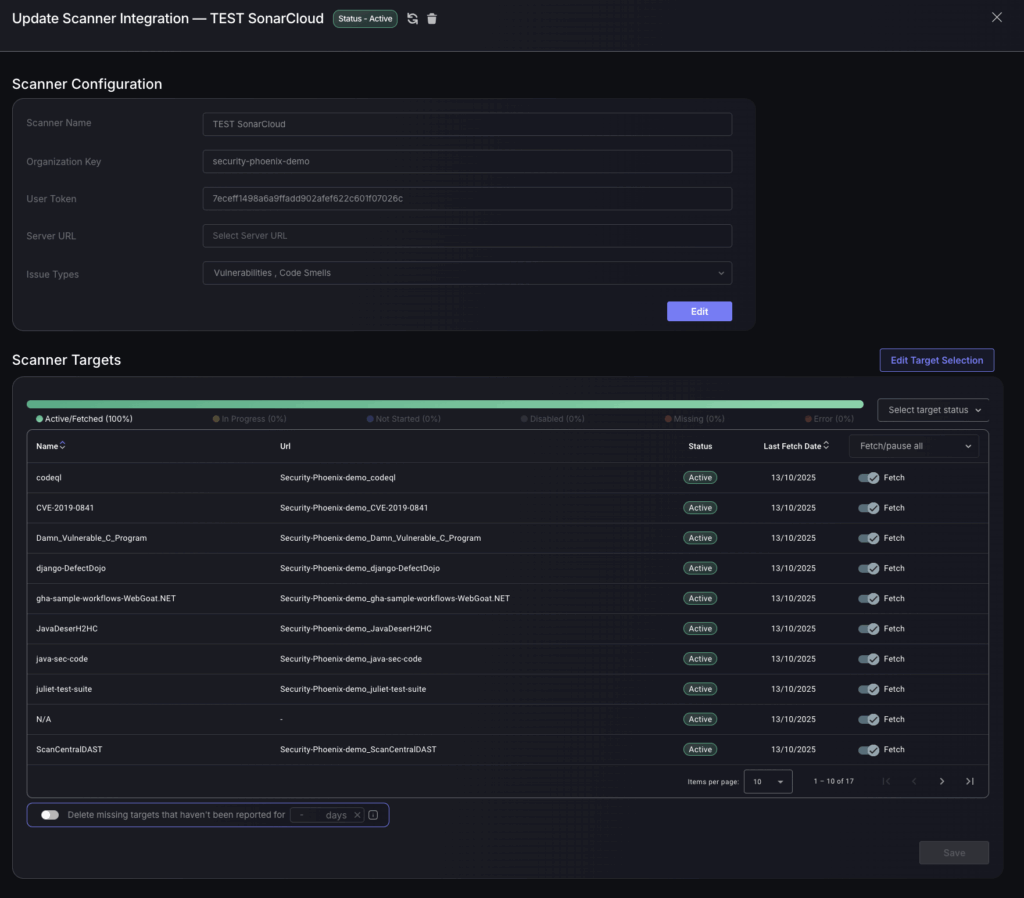
At the top of this page you will find a title bar with the name of the scanner, the status of the scanner, the option to refresh the scanner and the option to delete the scanner. Deleting a scanner will delete all previous asset and vulnerability data originating from that scanner and its targets from the system.

You can edit the scanner configuration by selecting Edit in the bottom right corner, remember to save your changes.
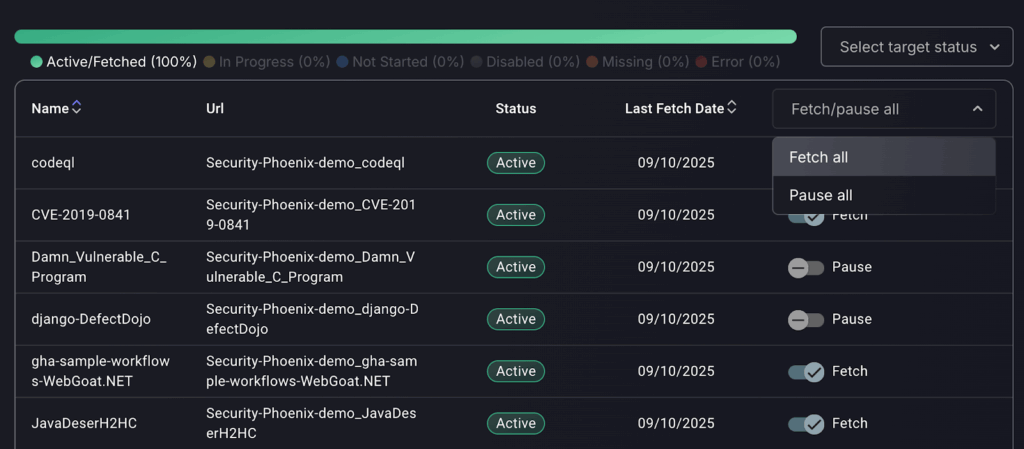
Below the scanner configuration you will find a table displaying all selected targets and their status.
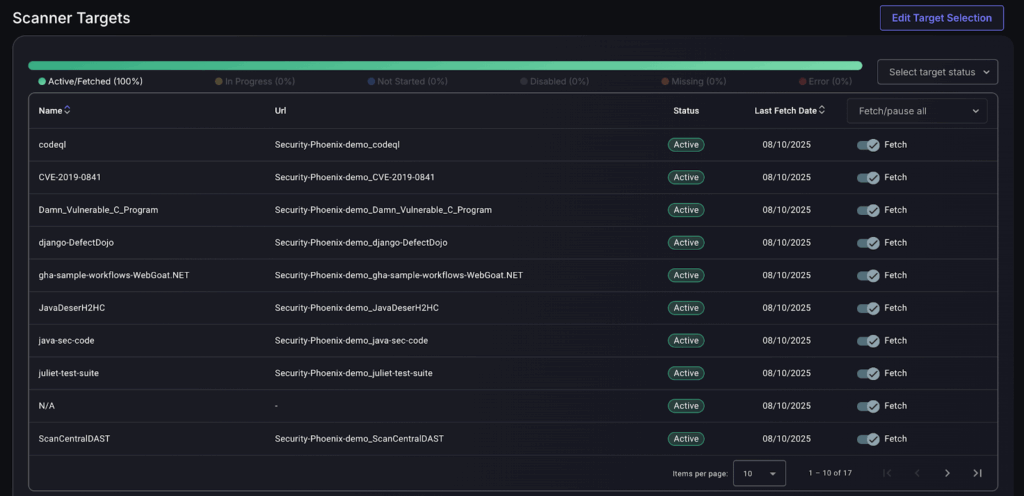
To filter which targets are displayed by status, select the drop down menu on the top right-hand side of the chart and select the status of the targets you wish to view.

In the far right column of the table you can use the drop down menu to Fetch all/Pause all or use the sliders to individually pause or fetch each target. Pausing a target will temporarily freeze a target so no more asset and vulnerability data is collected from it, till you choose to unpause it.
You can select which targets are included in the data fetch from the scanner by using the Edit target selection option. When editing the target selection you can choose to fetch all targets or manually select which targets to include/exclude.
- Fetch everything : all data from all targets will be fetched from the scanner including any new targets that may be found in the future.
- Select targets to INCLUDE : only data from selected targets will be fetched. Keep in mind that selecting all targets isn’t the same as selecting Fetch everything as it will only collect the ones that are selected and any new targets that may be found in the future will not be included in the fetch.
- Select targets to EXCLUDE : only data from selected targets will be excluded from the fetch. Any new targets that may be found in the future will be included.

If you choose to not include/exclude a certain target it will delete that target, meaning it will stop collecting assets and vulnerabilities from that target, as well as delete all previous asset and vulnerability data originating from that target from the system.
Deleting a Missing Target
A “missing target” is a target that was at some point reported by the scanner but now it is no longer found in the scanner's list of targets.
There can be different reasons for a target to become “missing”, some reasons are:
- A change in the scanner configuration
- The target becoming unreachable
- A change to the entities that are visible by the integration credentials
When a target becomes “missing”, it is marked as such in the targets list and can be deleted.
Deleting a target will mean assets and vulnerabilities will stop being collected from that target, all previous asset and vulnerability data originating from that target will also be deleted from the system.
To delete missing targets you can either select Delete ALL Missing Targets or to individually delete targets select the bin icon next to the target in the table.
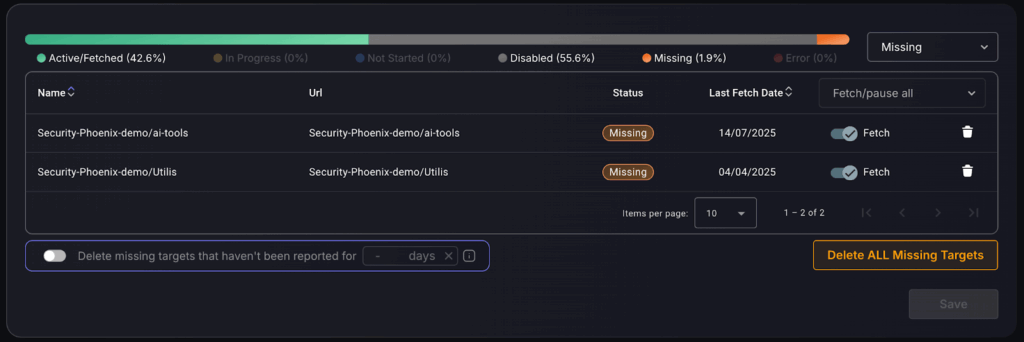
Alternatively, you can use the “missing target” lifecycle management at the bottom of the Scanner Targets table, you can configure the lifecycle management to delete missing targets that haven’t been reported by a custom number of days.

Deleting a Scanner Integration
Deleting a scanner integration will delete all previous asset and vulnerability data originating from that scanner along with its targets from the system.
To delete a scanner integration you can select the three dots in the top right corner of an already existing scanner type to reveal the following menu and then selecting Delete scanner integration. Alternatively, click on the scanner and select the bin icon in the title bar.

