To create a Prisma integration, you will need the username and password of the account you want to create a scanner integration for, as well as the Server URL and Console URL. We recommend that you review the account permissions to ensure they have a minimum of read permissions, and create a separate user account specifically for this integration, so it is not dependent on an employee remaining within your organisation. Here is how to get the URLs:
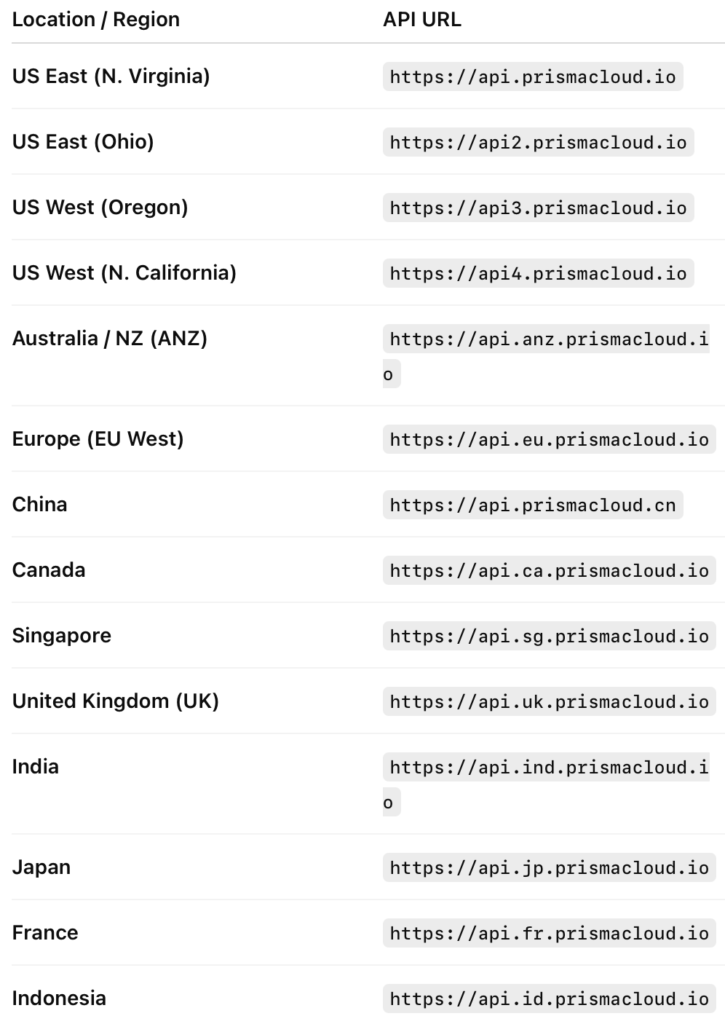
Server URL
These are the server URLs based on location. This will need to be saved for later on in the scanner setup. Refer to Prisma documentation for more details.

Console URL
This URL is optional to be entered, as it depends on whether you want to fetch container findings or not. For official documentation on how to find this, refer to the Prisma documentation.
To find your <CONSOLE> path:
- Log into Console.
- Navigate to Compute > Manage > System > Downloads.
- You can find your
<CONSOLE>path listed under Path to Console. Click Copy to quickly copy the path to your clipboard.
Create a Prisma Scanner Integration
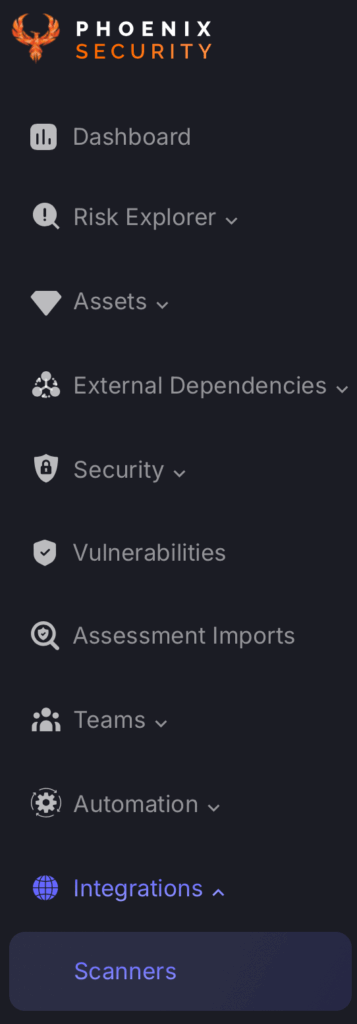
- On the sidebar menu, navigate to the Scanners tab in the Integrations section.

- Scroll down to Cloud or Container scanners and hover your mouse over the Prisma scanner template. Then click on the template to add the scanner.

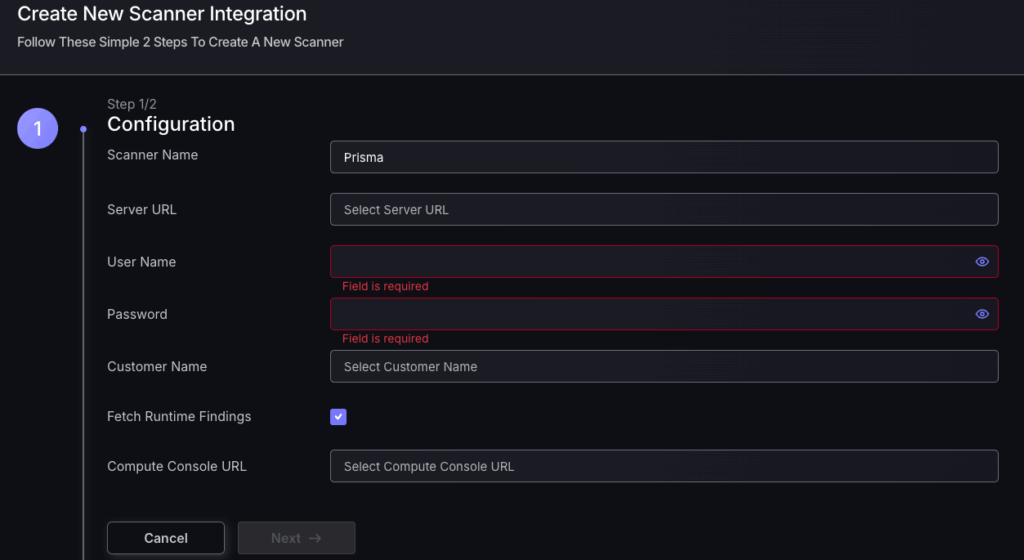
- On the next step of the process, enter the credentials created in the first part of this guide.
- Scanner Name: The name of the scanner to appear on Phoenix platform.
- Server URL: The API Root URL for your data centre. This field is required to be filled in.
- User Name: The username for your Prisma account.
- Password: The password for your Prisma account.
- Customer name: The customer name under your Prisma account.
- Fetch Runtime Findings tick box: Select this if you want to fetch container findings.
- Compute Console URL: Refer to previous documentation to find the console URL.

- Click on the ‘Next’ button
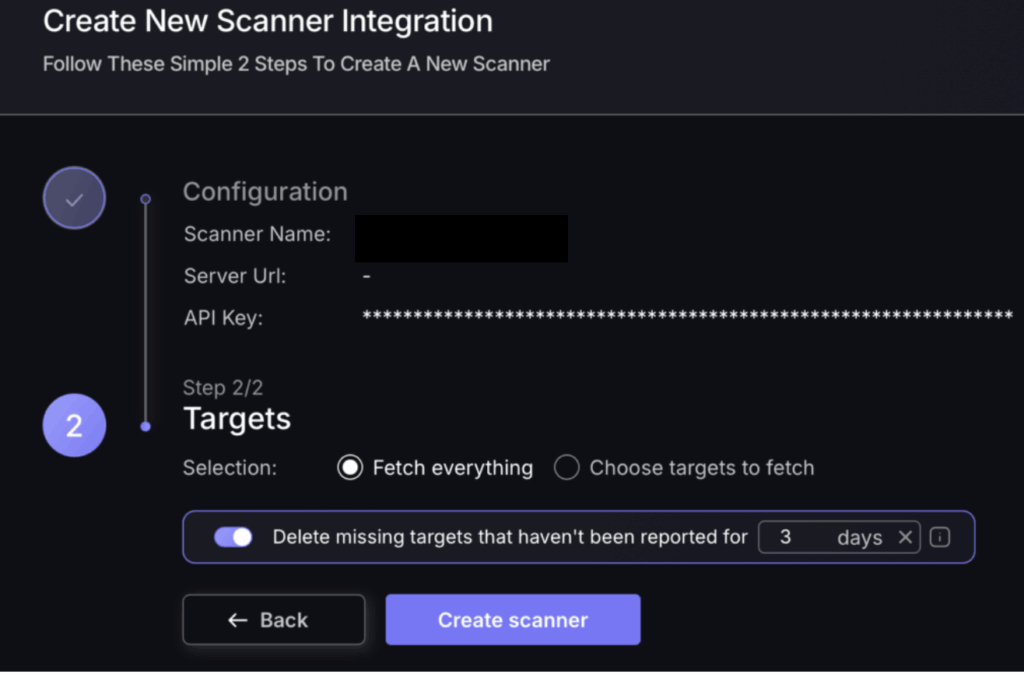
- Select whether to fetch vulnerabilities from all targets, or to choose which ones to include or exclude. Also, select if you want to delete missing targets that haven’t been reported and choose a time frame.

- Then click on “Create scanner” to complete the process.
Unless there are issues with the credentials, the new scanner will appear in your list of integrations (under Integrations > Scanners) and the platform will start to collect asset and vulnerability details from the selected repositories (available through the choose targets to fetch section).
All the scanner’s assets and vulnerabilities will be automatically added to your account’s Default Application, and will be available to start assigning them to user-created Applications as required.

