Defender API Credentials
In order to integrate Security Phoenix with your Microsoft Defender for Endpoint, you’ll need to authorise the platform to access Defender in your tenant and subscription(s). The following steps describe how to create the required API access credentials.
Create application and credentials
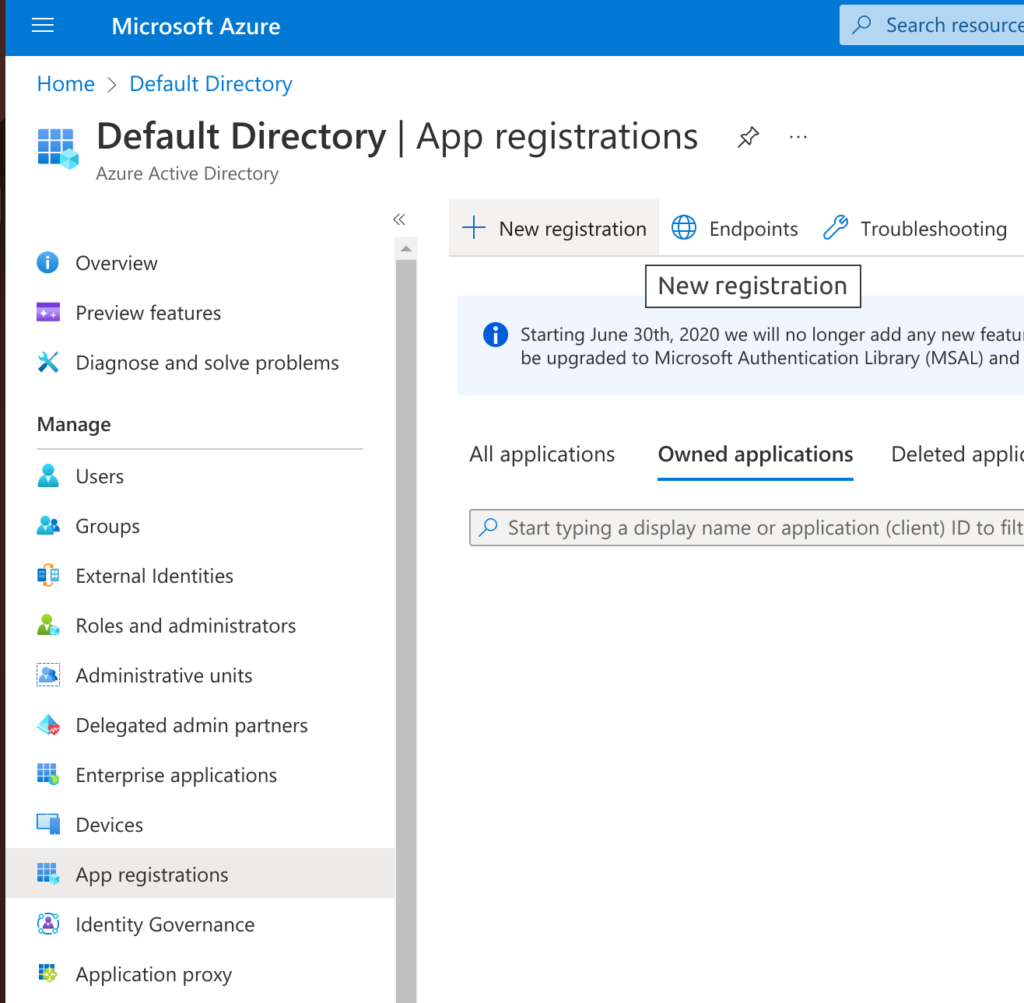
In your Azure Portal, navigate to Azure Active Directory (now Microsoft Extra ID) for the directory that you want to integrate with. Then select “App registrations” in the left menu and click on “+ New registration” at the top.
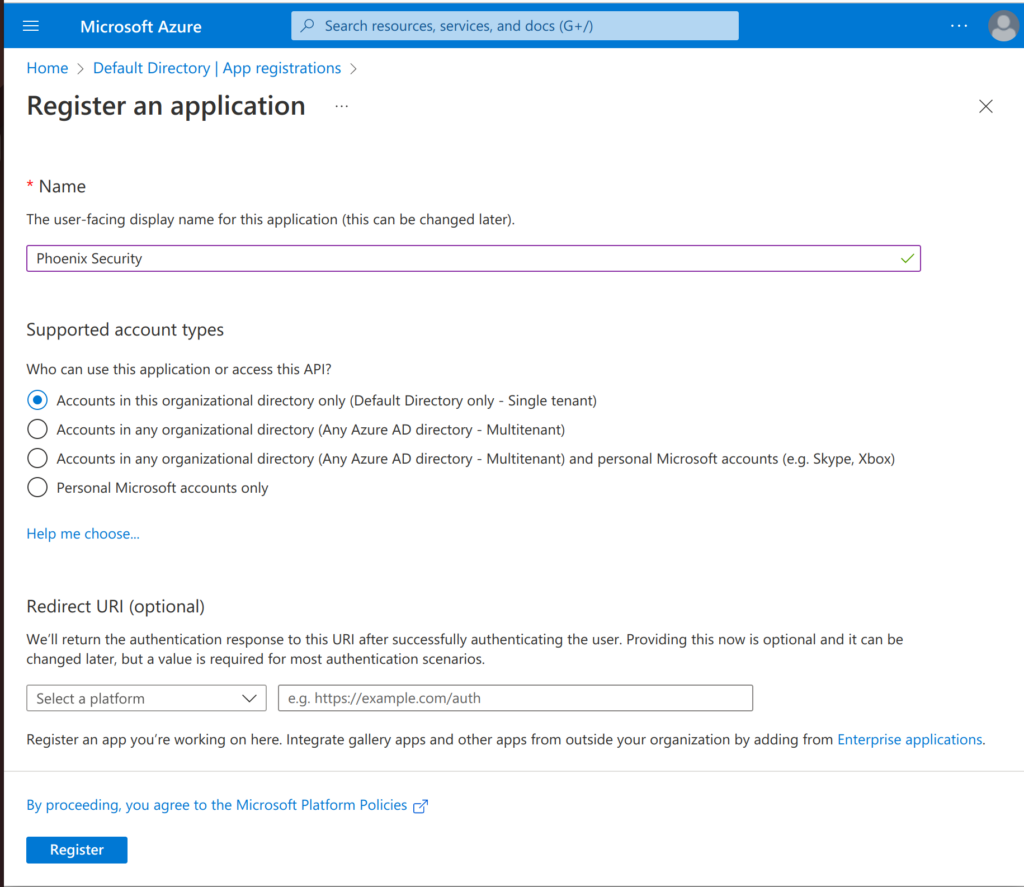
Enter a name for the application that will access Defender for Endpoint findings (e.g. “Phoenix Security”) and select the first option (“Accounts in this organizational directory only (Default Directory only – Single tenant)“) for “Supported account types”. Then click on “Register“.
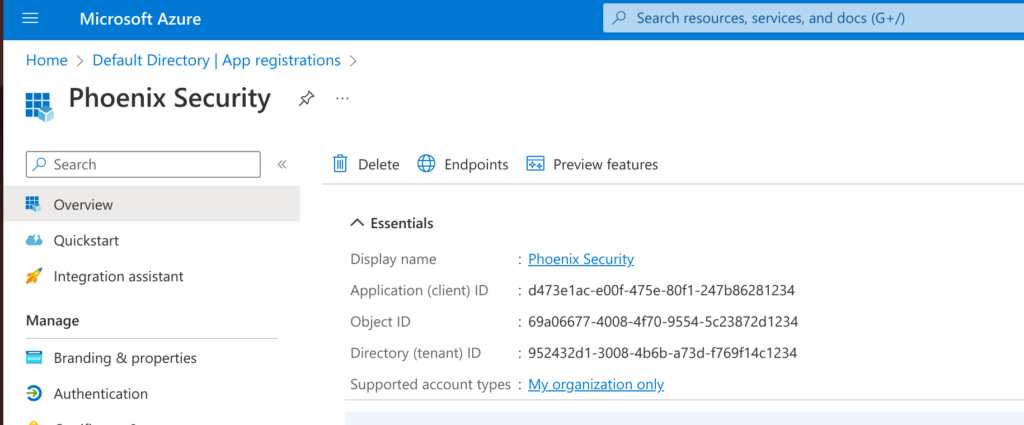
In the overview page (below) you will see the key details for this application (API access). You will need some of these details to configure access with Phoenix Security.
Now that you have your application, you just have to create a Secret so that it can authenticate with the API. Still within your registered application, click on “Certificates & secrets” and then within “Client secrets” select “+ New client secret“.
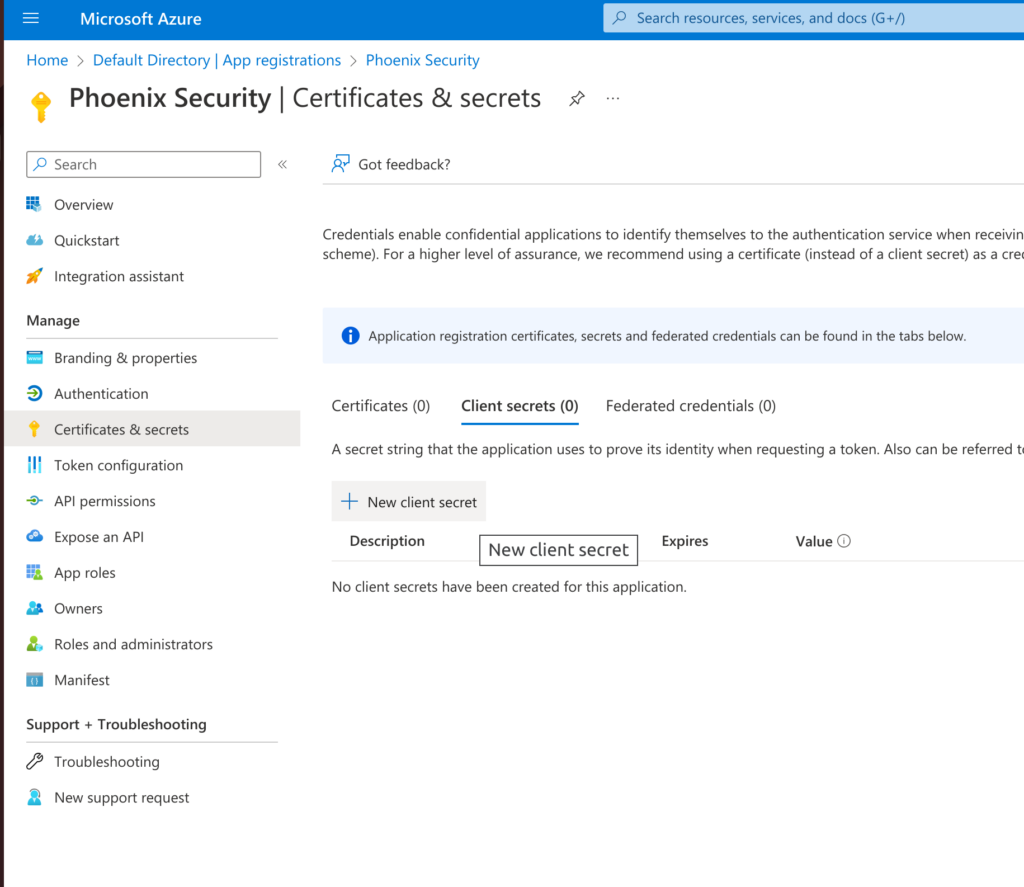
Give the secret a memorable name (e.g. “Phoenix Security API access”) and select a duration. Then clink on “Add“.
IMPORTANT: When you complete the creation you’ll be able to copy the secret’s Value; this is the last opportunity you’ll have to copy this value and keep it secure. You will need the secret as part of the Phoenix Security integration configuration.
Give Permissions to the Application
Now that you’ve created your application’s credentials, it’s time to define the level of access that those credentials would have.
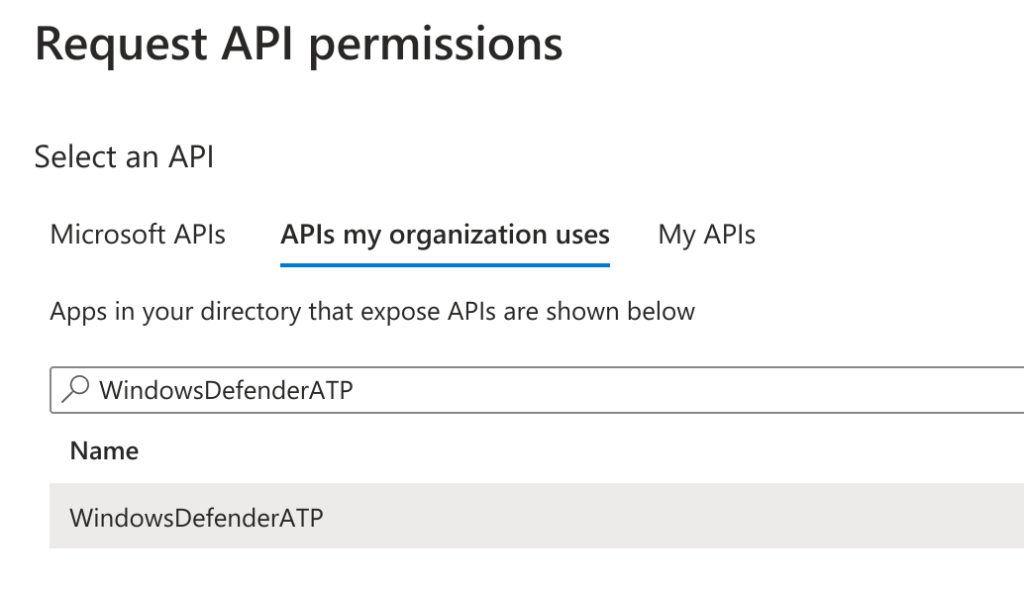
Still within the application’s page, select “API permissions” on the left menu and then click on “+ Add Permission“. In the pop-up select “APIs my organization uses” and start typing “WindowsDefenderATP” in the search box. As soon as the entry with the same name is in view, click on it.
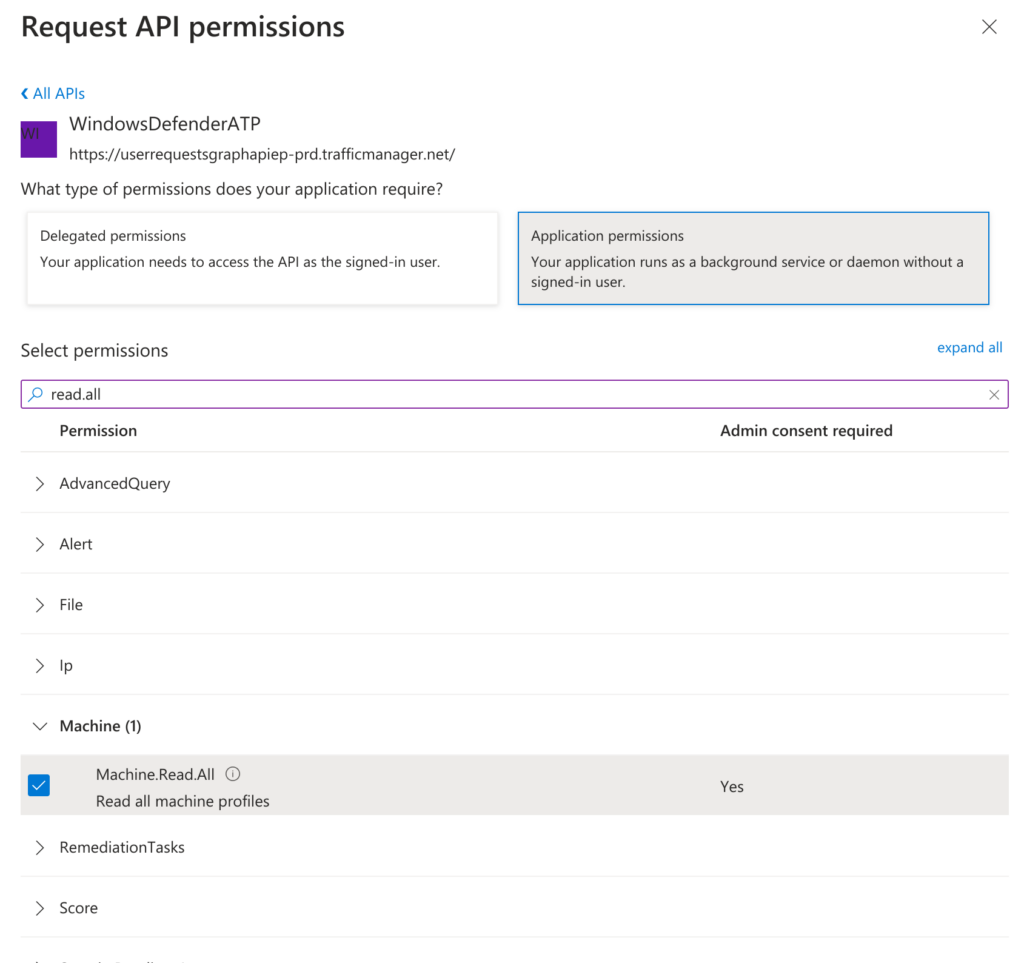
In the new pop-up select “Application permissions” permission and search for and select “Machine.Read.All” and “Vulnerability.Read.All” in the list below. Then click on “Add permissions” and confirm the changes.
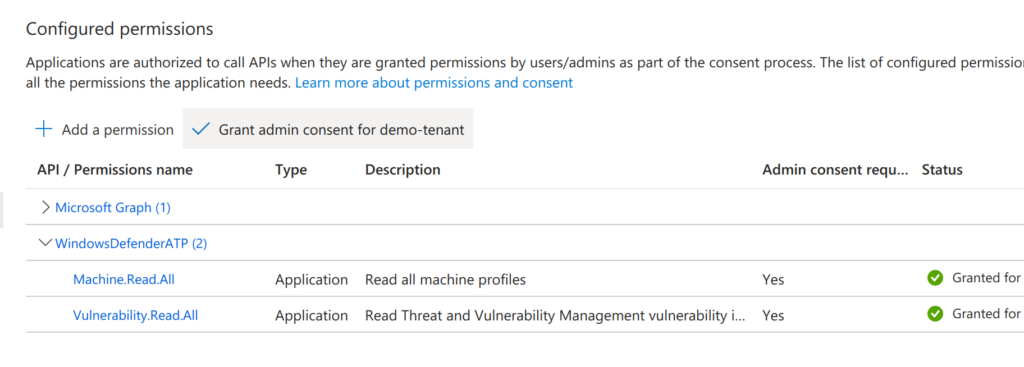
Once the permissions pop-up is closed, ensure that you click on “Grant admin consent for ……” under Configured permissions. This is required for the permissions to take effect.
Create a Defender for Endpoint Integration
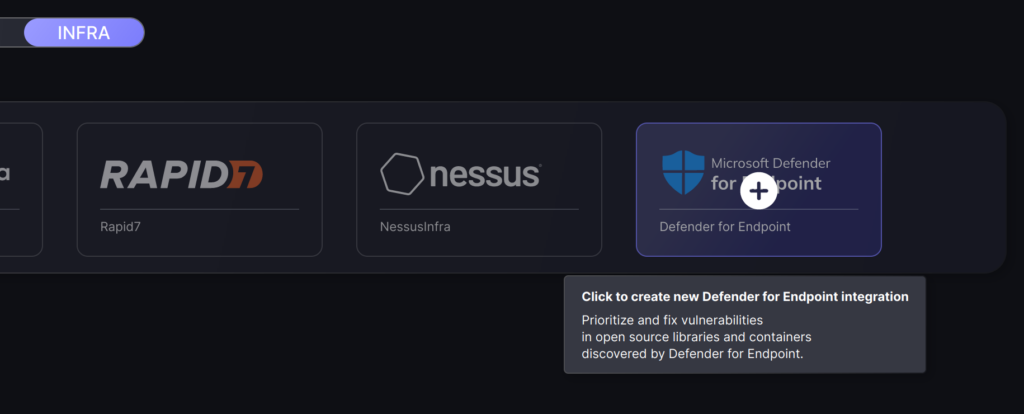
Within your Phoenix Security account, select Integrations > Scanners from the left menu, then locate the Defender for Endpoint entry (you can filter by Infra scanners) and click on the plus sign (+) to create the integration.
On the second step of the process, enter the credentials created in the first part of this guide.
- Server URL: Not required (only used for custom configurations)
- Tenant Id: “Directory (tenant) ID”
- Client Id: “Application (client) ID”
- Client Secret: Application secret’s Value
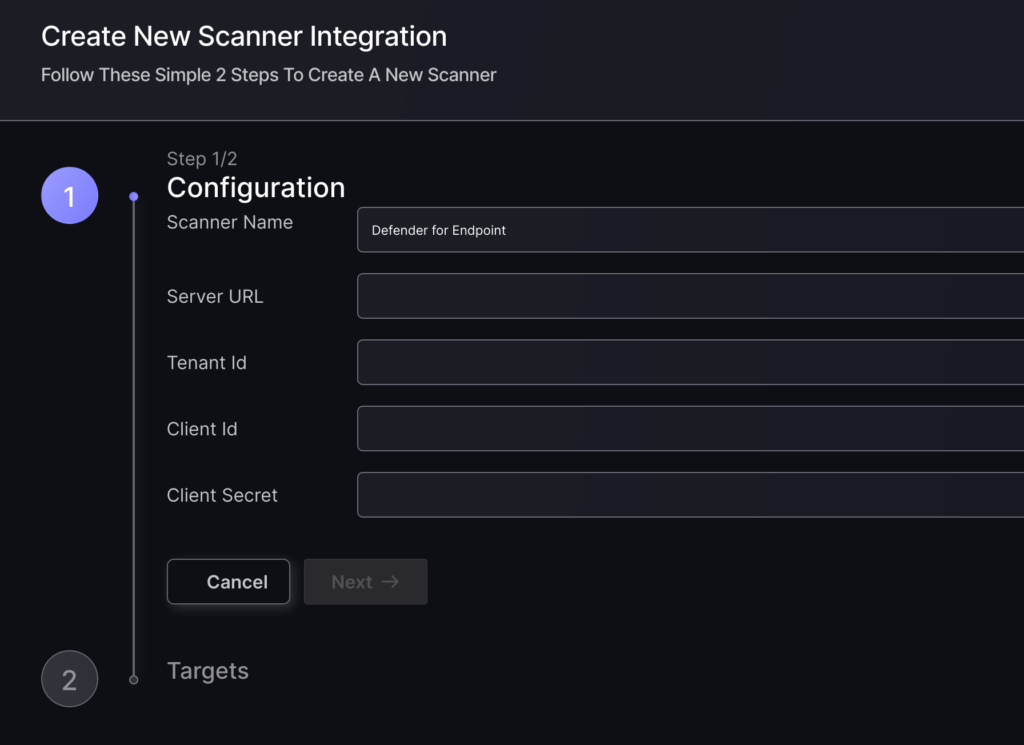
To finish the configuration click on “Create Scanner“.
Unless there are issues with the credentials, the new scanner will appear in your list of integrations (under Integrations > Scanners) and the platform will start to collect asset and vulnerability details from all Subscriptions available through the integration credentials.
All the scanner’s assets and vulnerabilities will be automatically added to your account’s Default Environments, and will be available to start assigning them to user-created Environments as required.