This guide takes you through key pages within Organization settings such as: Organization details, Configuration, Licences and API Access.
1.Introduction
The Organization Settings pages purpose is for managing essential organizational details and configurations. This includes several key sections including Details, where basic organisational information like name, address and contact details should be entered. The details page lets you manage parameters such as Threshold and Currency that should be applied globally to your whole Phoenix Security organization. If you wish to make changes that need to take effect on all of your Applications, Environments, and Components, the details section of the Organization Settings page is where it needs to be set.
Other Organization settings sections include: Configuration, which includes settings for setting risk thresholds and configuration preferences; Licences, for managing licensing details and usage; and API Access, which handles API credentials for secure integrations.
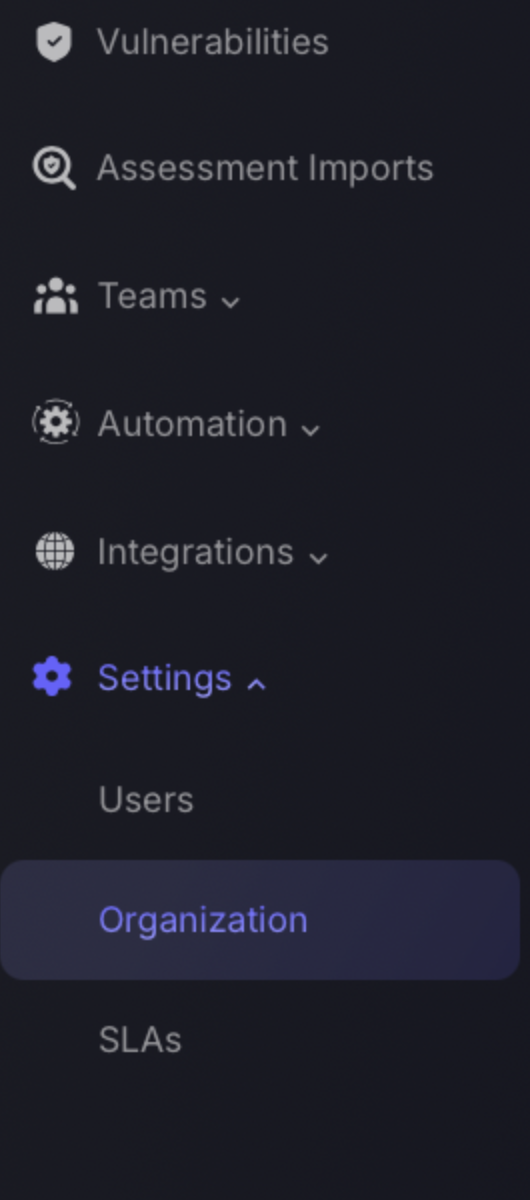
Navigation
2.Organization details
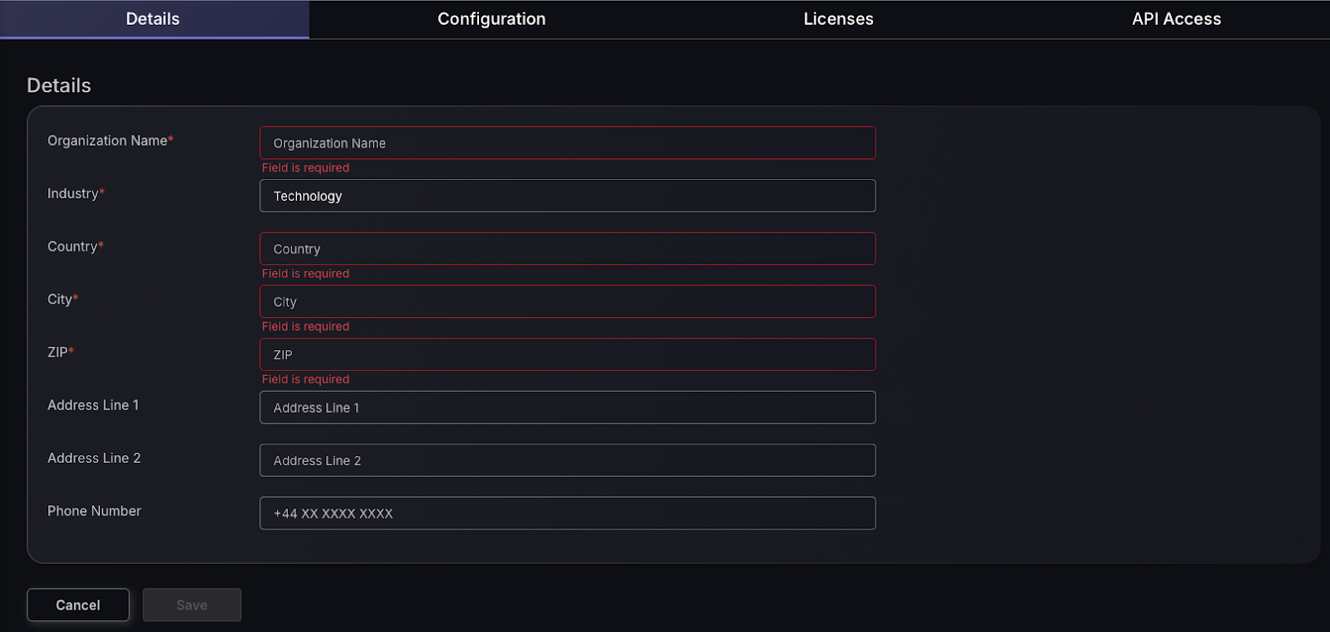
In the Details section of the Organization Settings in Phoenix Security, various input fields are provided to enter and update key organizational information:
- Organization Name: Specify the name of the organization as it should appear throughout the platform.
- Industry: Select from a dropdown the industry to which the organization belongs.
- Country: Choose the country where the organization is located.
- City: Enter the city where the organization primarily operates.
- ZIP: Provide the postal code area of the organization’s primary location.
- Address Line 1 and Address Line 2: Fill in the detailed address of the organization, used for billing and official communications.
- Phone Number: List the main contact number for the organization.
3. Configuration
General configuration
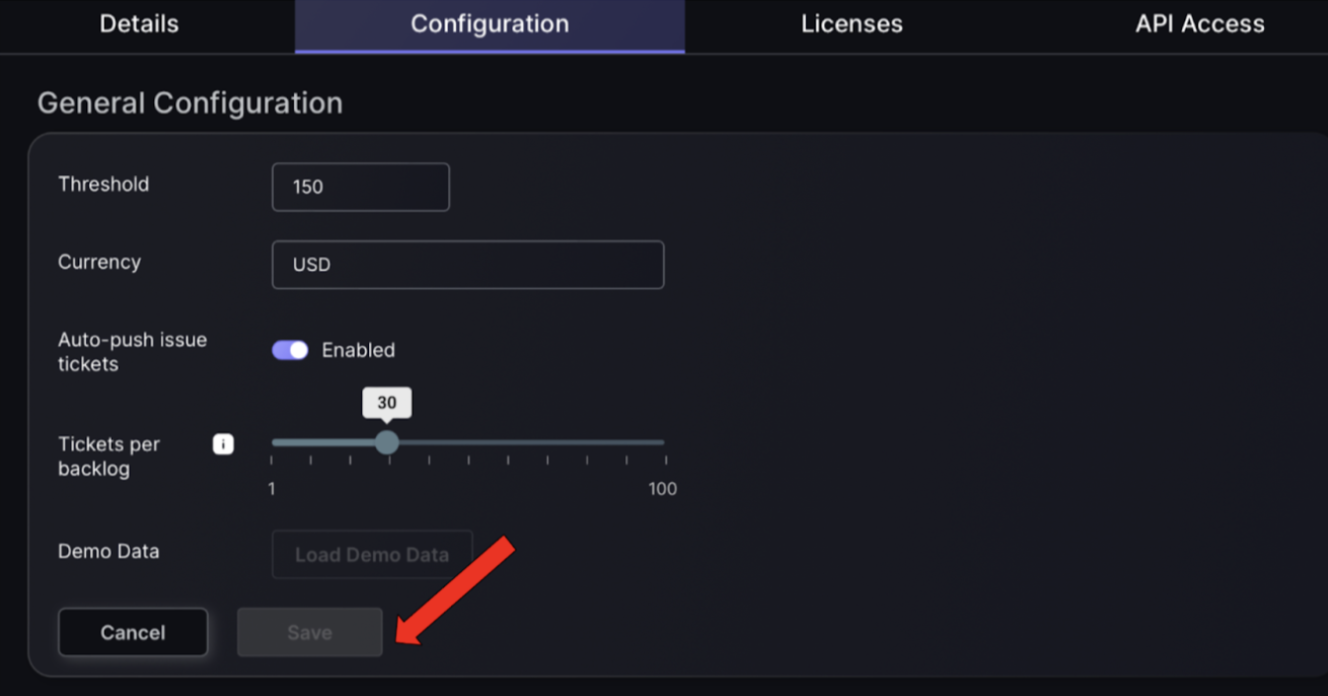
The configuration tab is where you can configure your preferences involving risk threshold settings, ticket management and more.
- Threshold: Refers to the Organizational Threshold or the minimum value the global Risk Tolerance level needs to reach in order to raise the risk level to critical. This value is critical for defining how sensitive the system is to specific metrics.
- Currency: Refers to the currency used by Phoenix Security to compute the Exposure for each risk level.
- Auto-push issue tickets: Enable or disable the automatic creation and sending of issue tickets to integrated project management tools. When a new finding is made a ticket is automatically made and pushed to the selected workflow project. This helps in managing how issues are escalated and handled.
- Tickets per backlog: Define the maximum number of tickets that can accumulate in the backlog. Configuring this helps in controlling the flow of work and avoiding ticket pile-ups.
Custom Status Configuration
This section allows you to create custom tags to aid with ticketing within the Phoenix platform. These are displayed within the Vulnerabilities and findings page to give you the option to manually add custom status’ to findings to ensure communication of triaging efforts is visual within the Phoenix platform and external ticketing platforms.
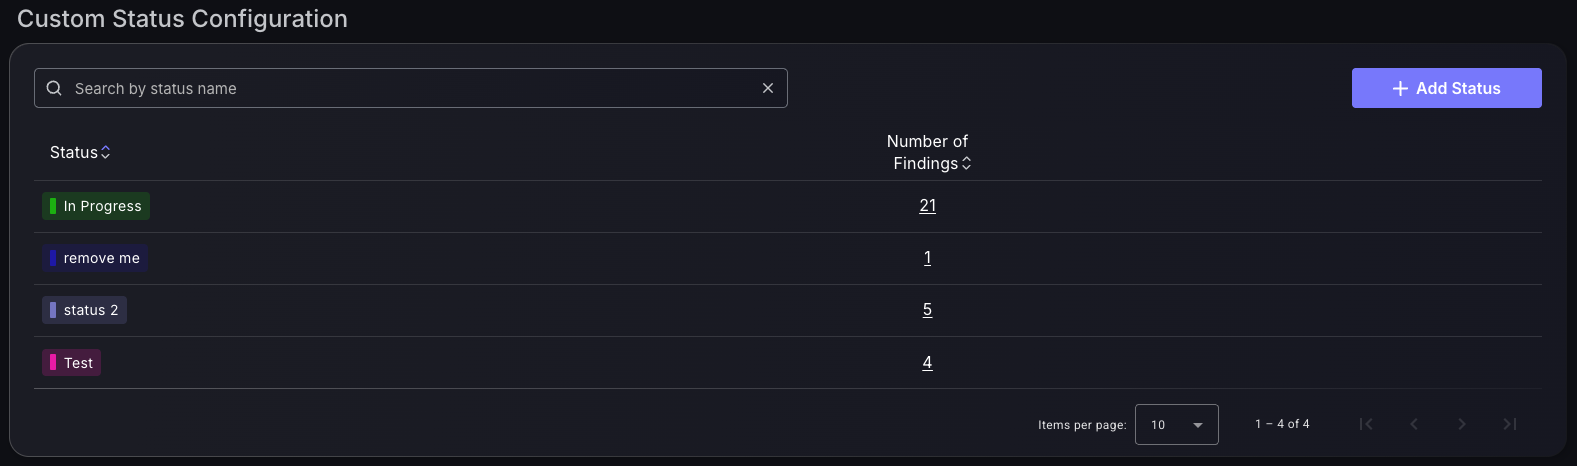
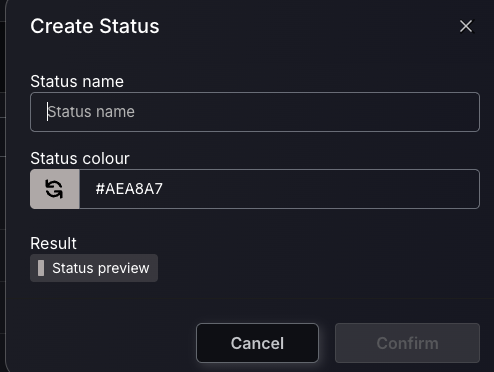
To add a new status click on the top right hand corner of the table on “Add Status”. This gives you an option to select the status name and the colour of the status from a colour wheel.
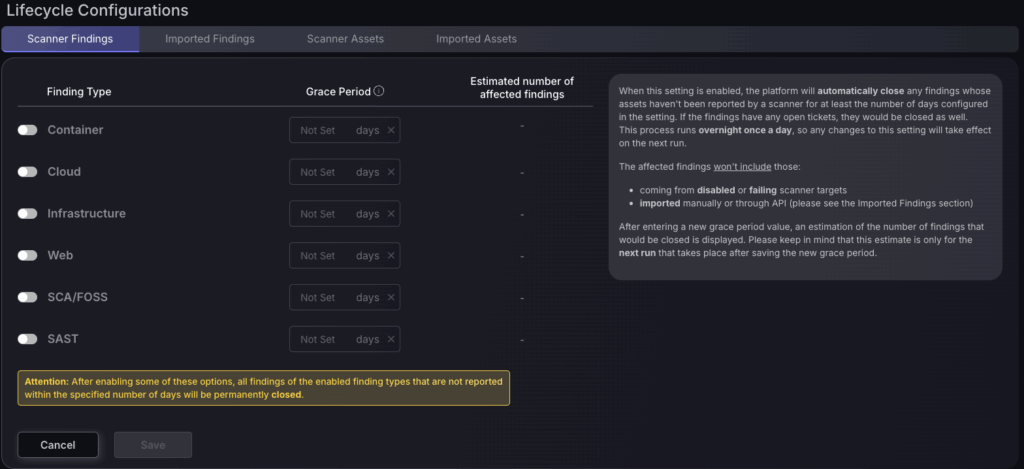
Lifecycle Configurations
In the Lifecycle Configuration of Phoenix Security, the automatic asset and finding purge feature allows for the management of asset/finding retention based on their reporting status from Scanner Findings and Assets as well as Imported Findings and Asset. When enabled, this setting directs the system to automatically remove assets/findings not reported by a scanner or manually/ through an API within a predetermined number of days. The configuration is designed to ensure the asset database remains current by removing inactive entries. Assets/findings excluded from this purge include those from disabled scanner targets and those with open issue tickets. This feature aids in maintaining a streamlined database, mitigating clutter from outdated or irrelevant asset data. Non reported “assets” (not findings) remain in the platform until garbage collection. If an asset is reported but a finding inside it is not reported, the finding is closed.
Scanner findings – When this setting is enabled, the platform will automatically close any findings whose assets haven’t been reported by a scanner for at least the number of days configured in the setting. If the findings have any open tickets, they would be closed as well.
Imported findings – When this setting is enabled, the platform will automatically close any findings that were imported, manually or through API, and whose assets haven’t been imported in at least the number of days configured in the setting. If the findings have any open tickets, they would be closed as well.
Scanner assets – When this setting is enabled, the platform will automatically purge any scanner reported assets that haven’t been reported by a scanner for at least the number of days configured in the setting.
Imported assets – When this setting is enabled, the platform will automatically purge any assets that were imported, manually or through API, and that haven’t been imported for at least the number of days configured in the setting.
To set a grace period you will need to select an asset type e.g. Container assets then select the number of days for the grace period which is the number of days between the assets ‘last seen’ and last successful fetch. This will then give you an estimate of the number of findings that will be purged.
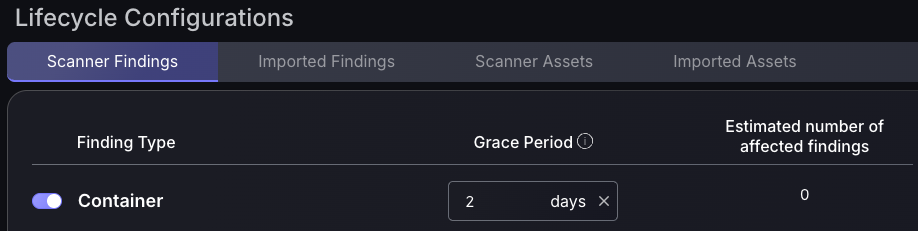
Remember to click “Save”
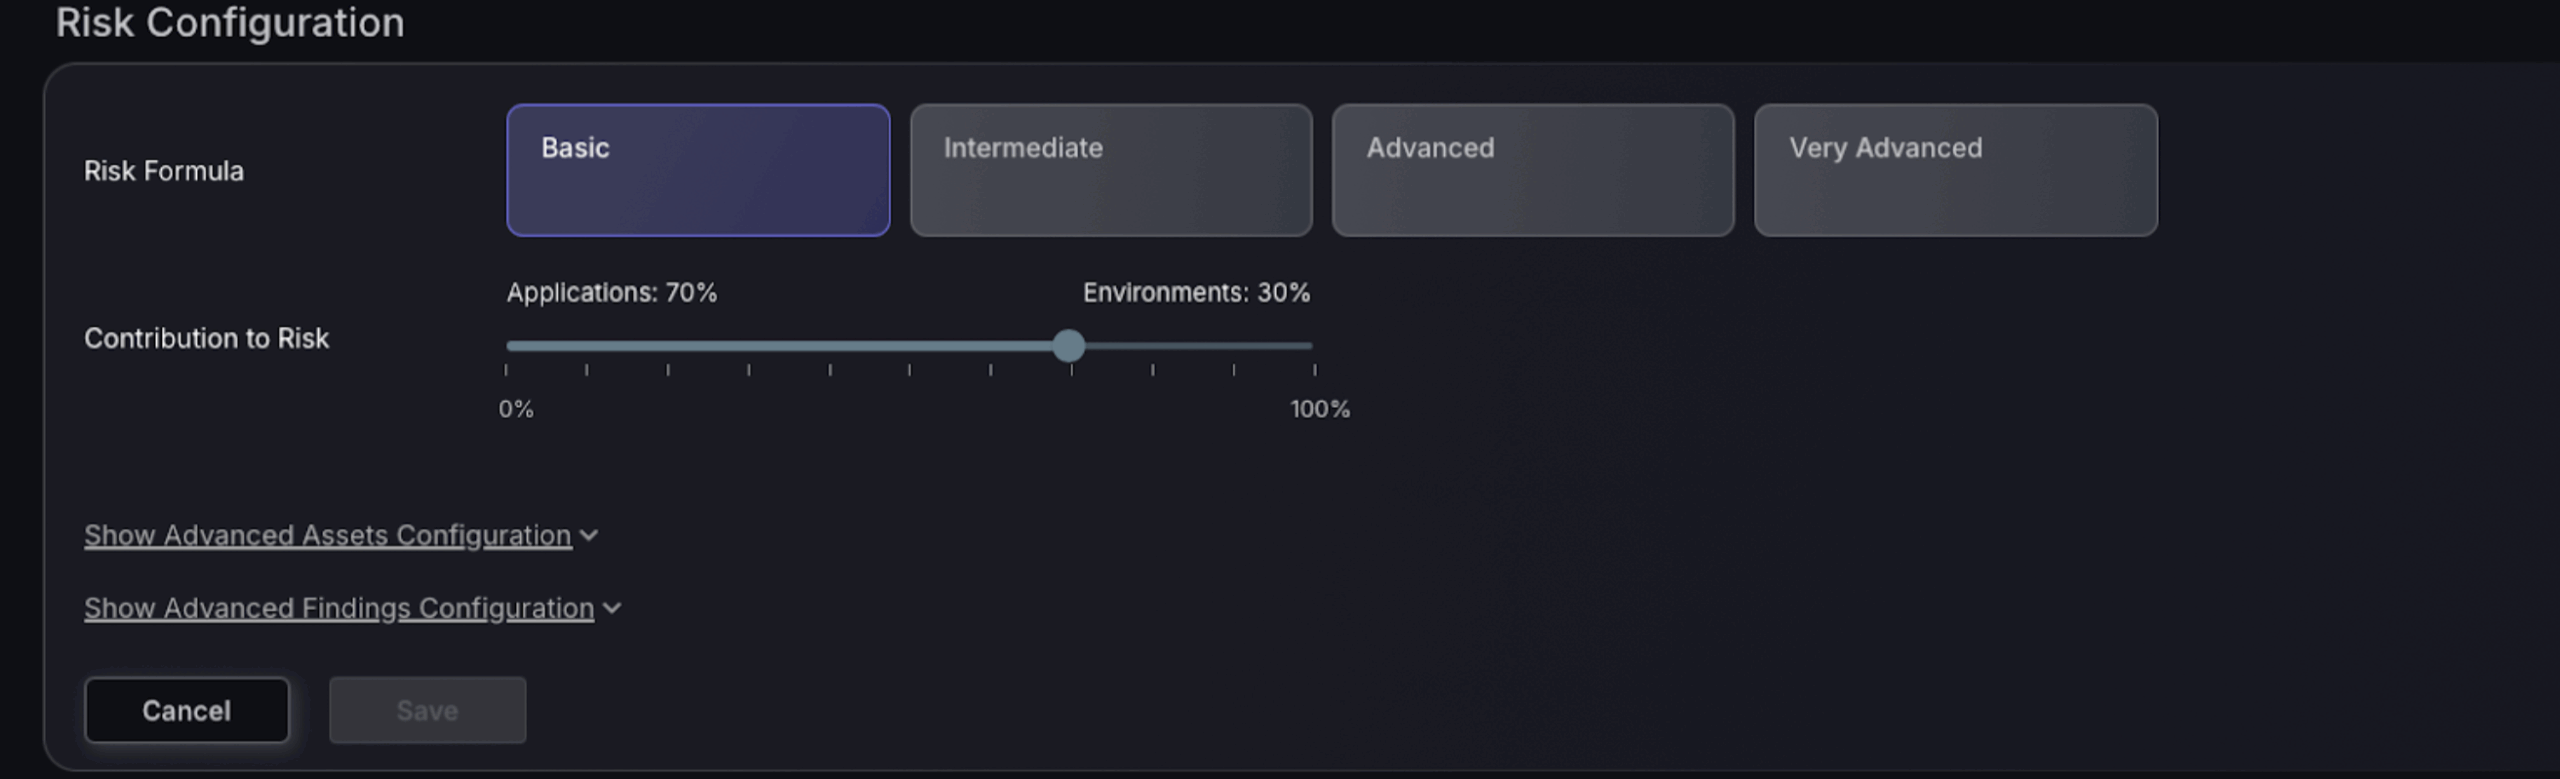
Risk configuration
In the Risk Configuration section, choose from different risk assessment formulas: Basic, Intermediate, Advanced, or Very Advanced. This setting determines the complexity of the risk calculations. Additionally, you can adjust the contribution of applications versus environments to the overall risk score, which could range from focusing solely on applications to incorporating environmental factors. This setup allows for customised risk assessment aligned with specific operational needs and priorities.
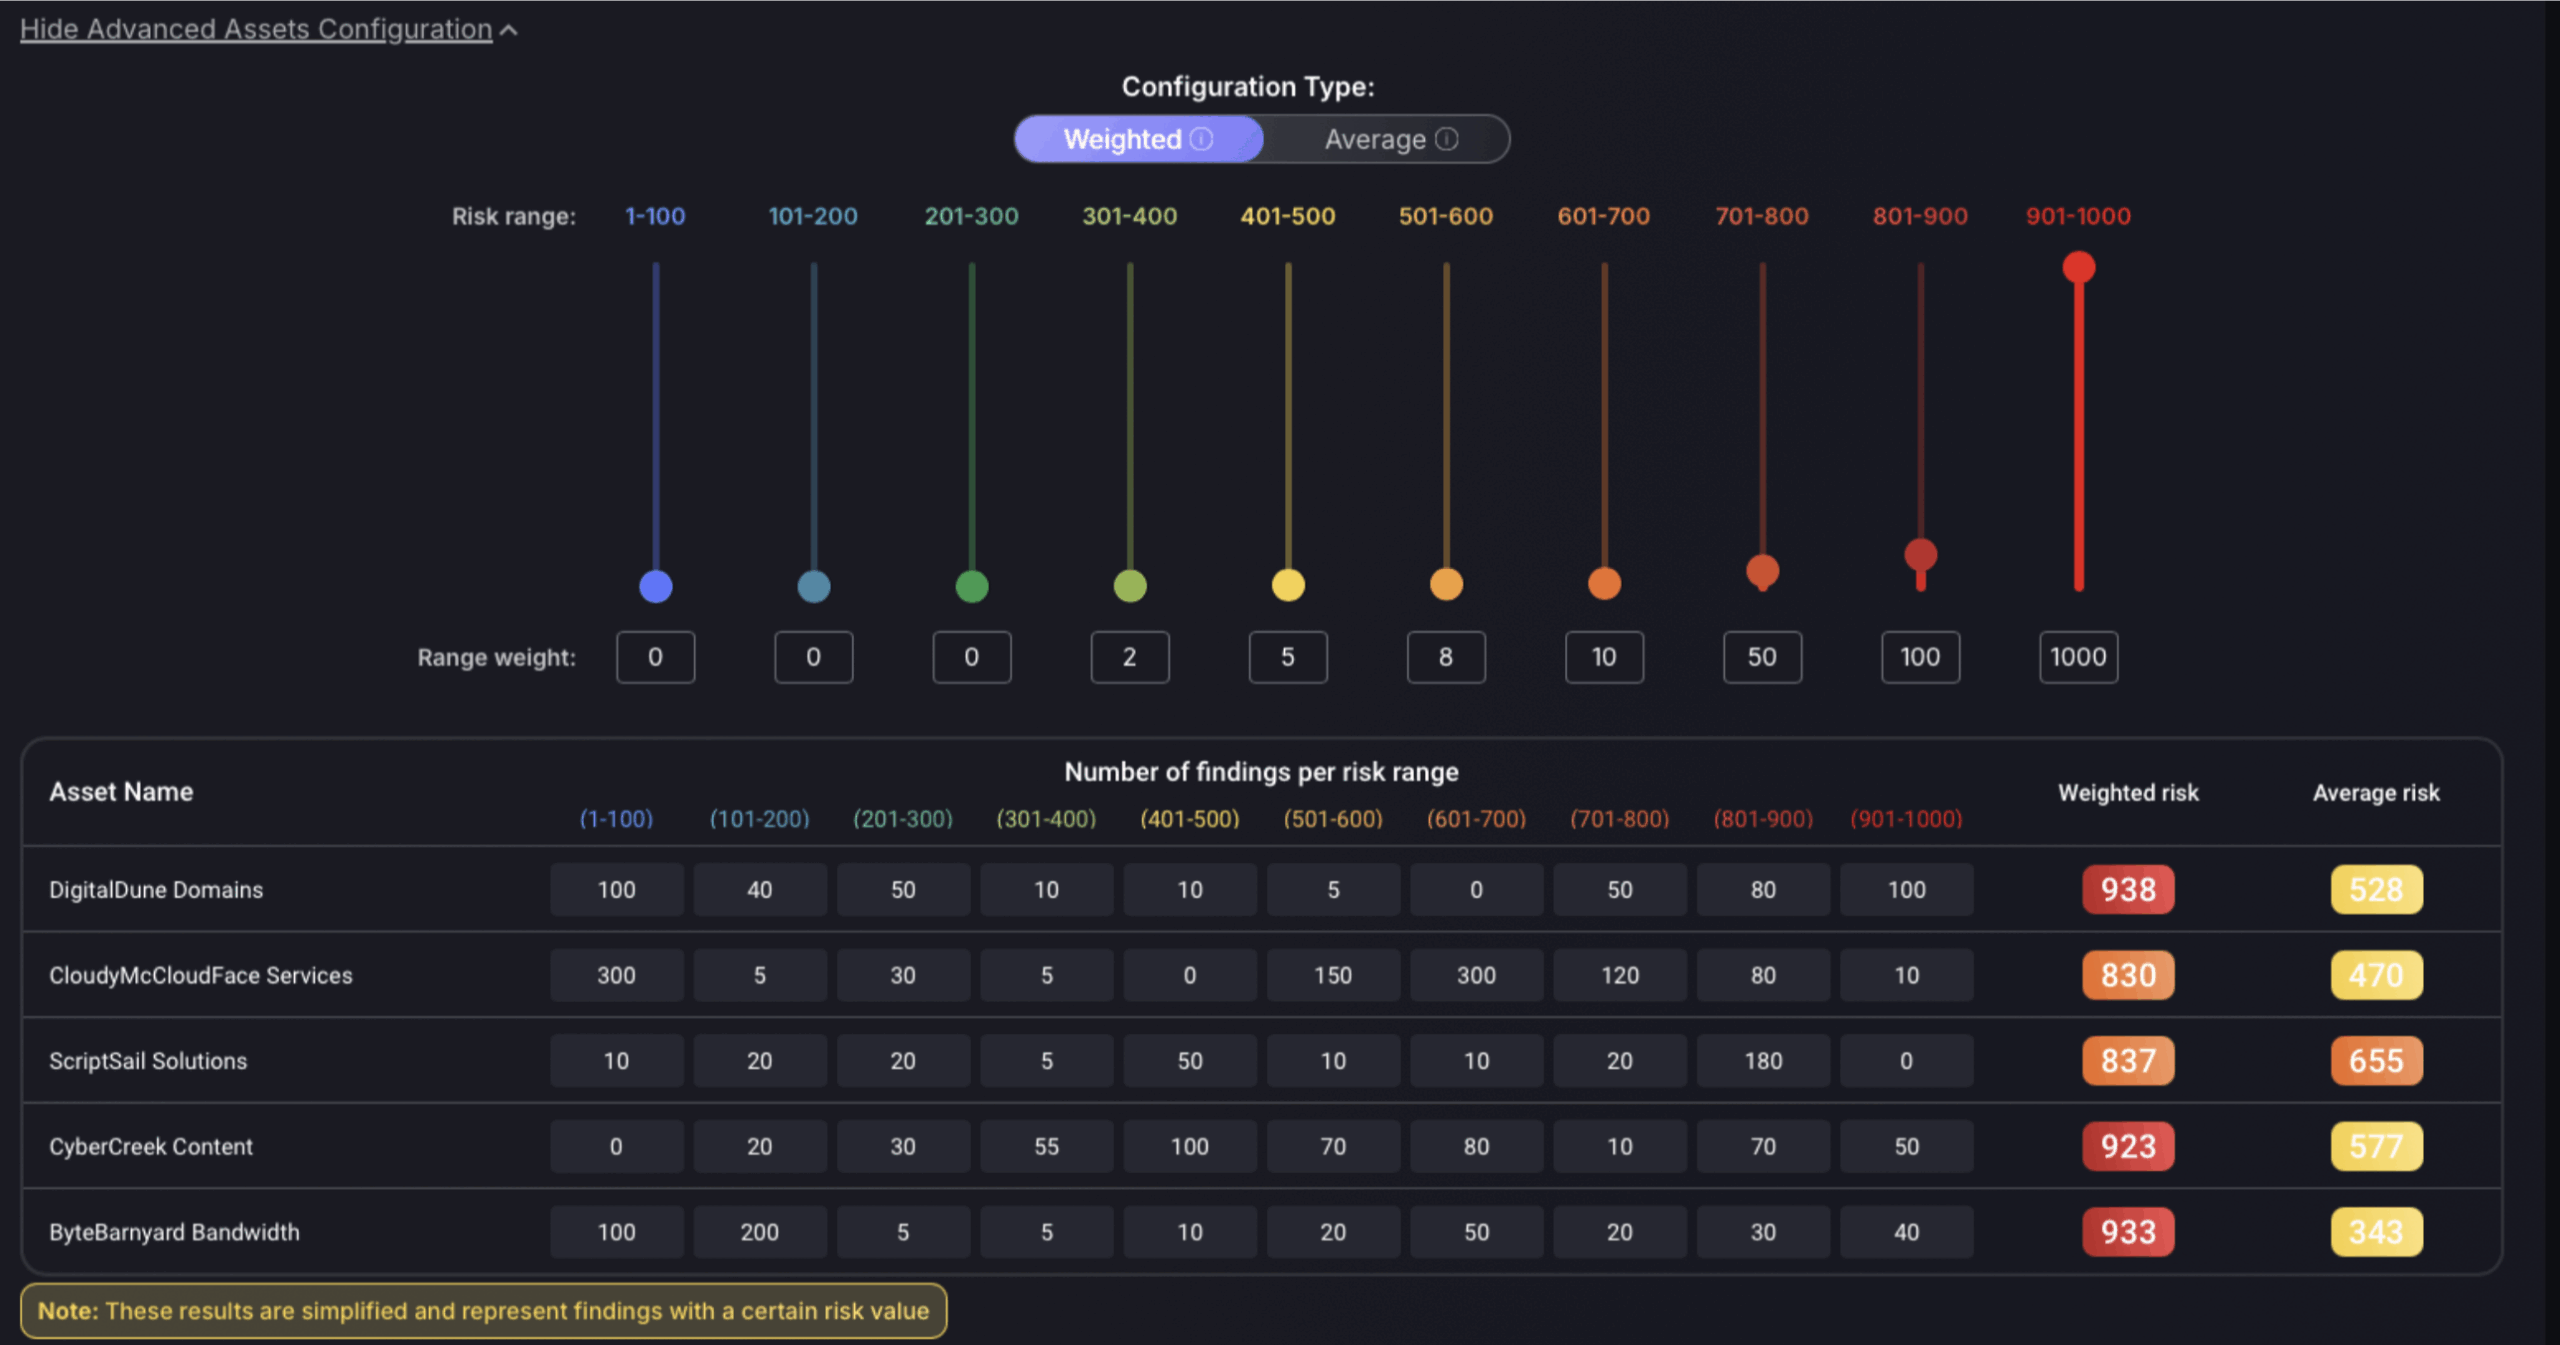
Advanced risk configuration
The Advanced Assets Configuration section allows users to configure their risk . This setting influences the importance assigned to different risk ranges. Risk ranges are categorised from 1-1000, allowing for detailed granularity in how vulnerabilities and assets are scored based on their assessed risk.
Adjustments in this section affect how risk is visualised and managed. If the risk configuration isn’t aligned correctly with a suitable security posture, it could lead to a misinterpretation of the risk levels. For instance, a misconfigured weight might exaggerate the risk of minor vulnerabilities or understate the importance of critical ones, leading to skewed risk management priorities. Proper calibration ensures that resources are allocated efficiently to address the most significant risks first.
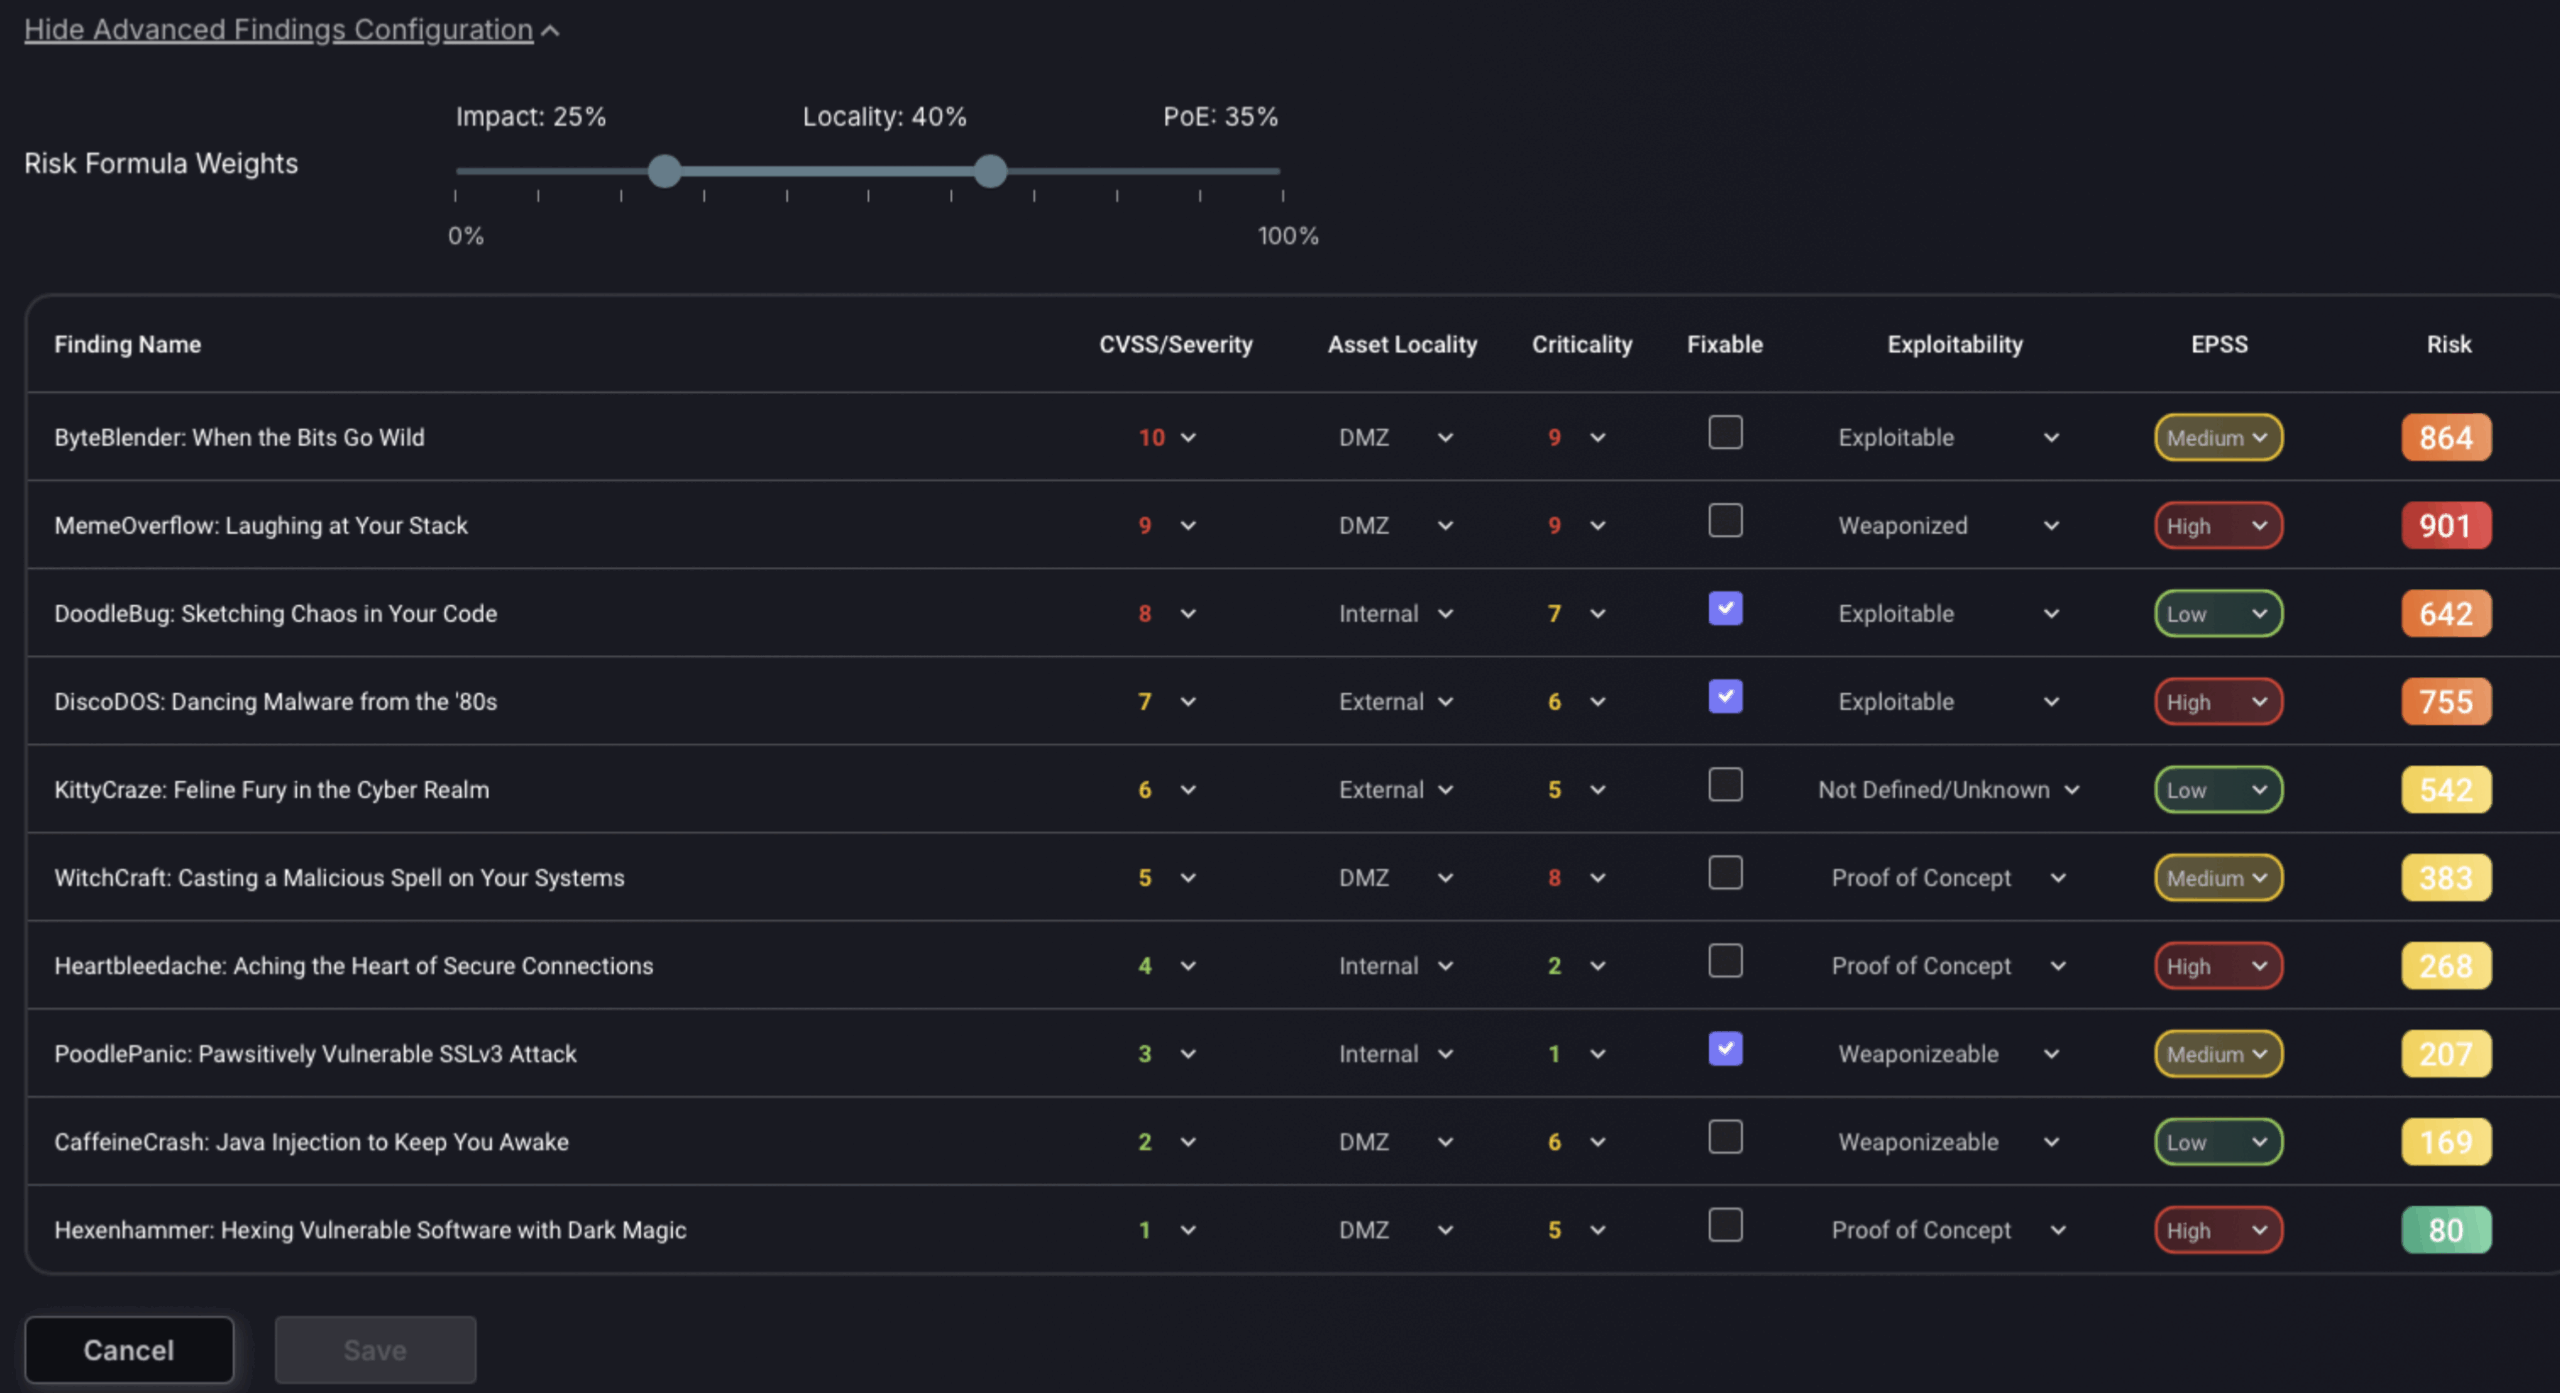
Advanced vulnerabilities configuration
The Advanced Vulnerabilities Configuration section in Phoenix Security allows operators to manage and modify specific attributes of vulnerabilities. This section includes various columns such as Vulnerability Name, CVSS/Severity, Asset Locality, Criticality, and whether a vulnerability is fixable or exploitable. Each vulnerability can have its severity or CVSS score, criticality, and asset location adjusted to reflect more accurately the specific context or threat it poses to the organisation. The platform calculates an overall risk score for each vulnerability based on these inputs. This configuration ensures that the management of vulnerabilities is adaptable to the unique security landscape of each organisation.
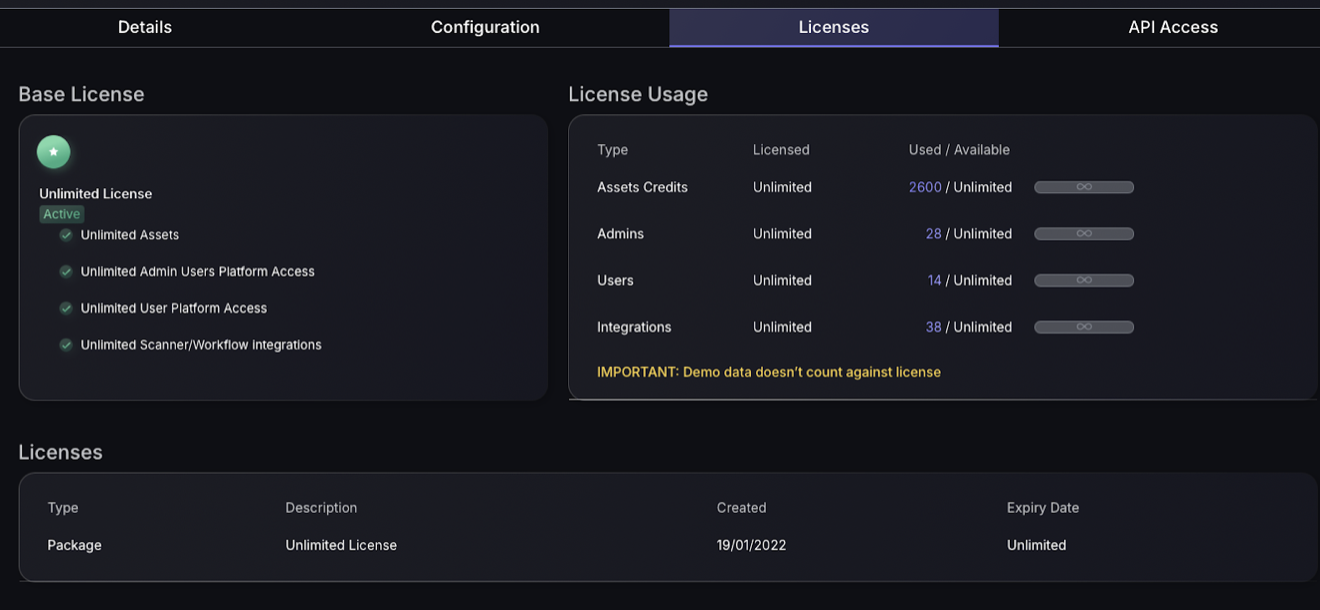
4. Licences
The licences section details the licence held by your organisation and the length of time it is to be held for. The “Base licence” section displays an overview of what the licence includes such as unlimited or limited assets, Admin Platform Access and more. Next to this, the “Licence usage” section displays a breakdown of what resources are currently being used and how many are left e.g. how many asset credits have been used and how many are left – these allow you to create new assets. You should refer to this section to track deployment of the organisation, planning licence upgrades/changes depending on how many resources are used. The licences section displays when the licence was created and how long there is left.
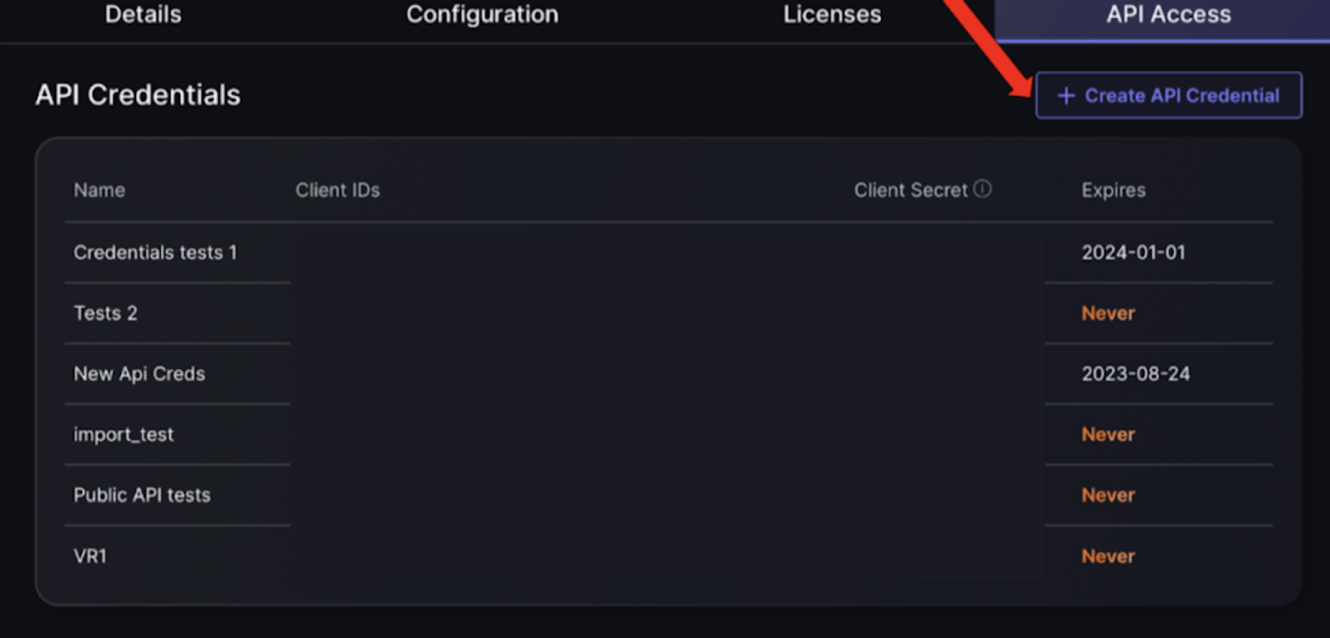
5. API access
In the API access section users can manage the API credentials to ensure the integrity of integrations remains secure. This section lists each API credential by name, showing the associated Client IDs and the obscured Client Secrets for security. Each entry also includes an expiration date, indicating how long the credential remains valid before requiring renewal or replacement. This setup ensures that interactions with the platform through APIs are secured and easily manageable, maintaining the integrity of the system’s data exchanges.
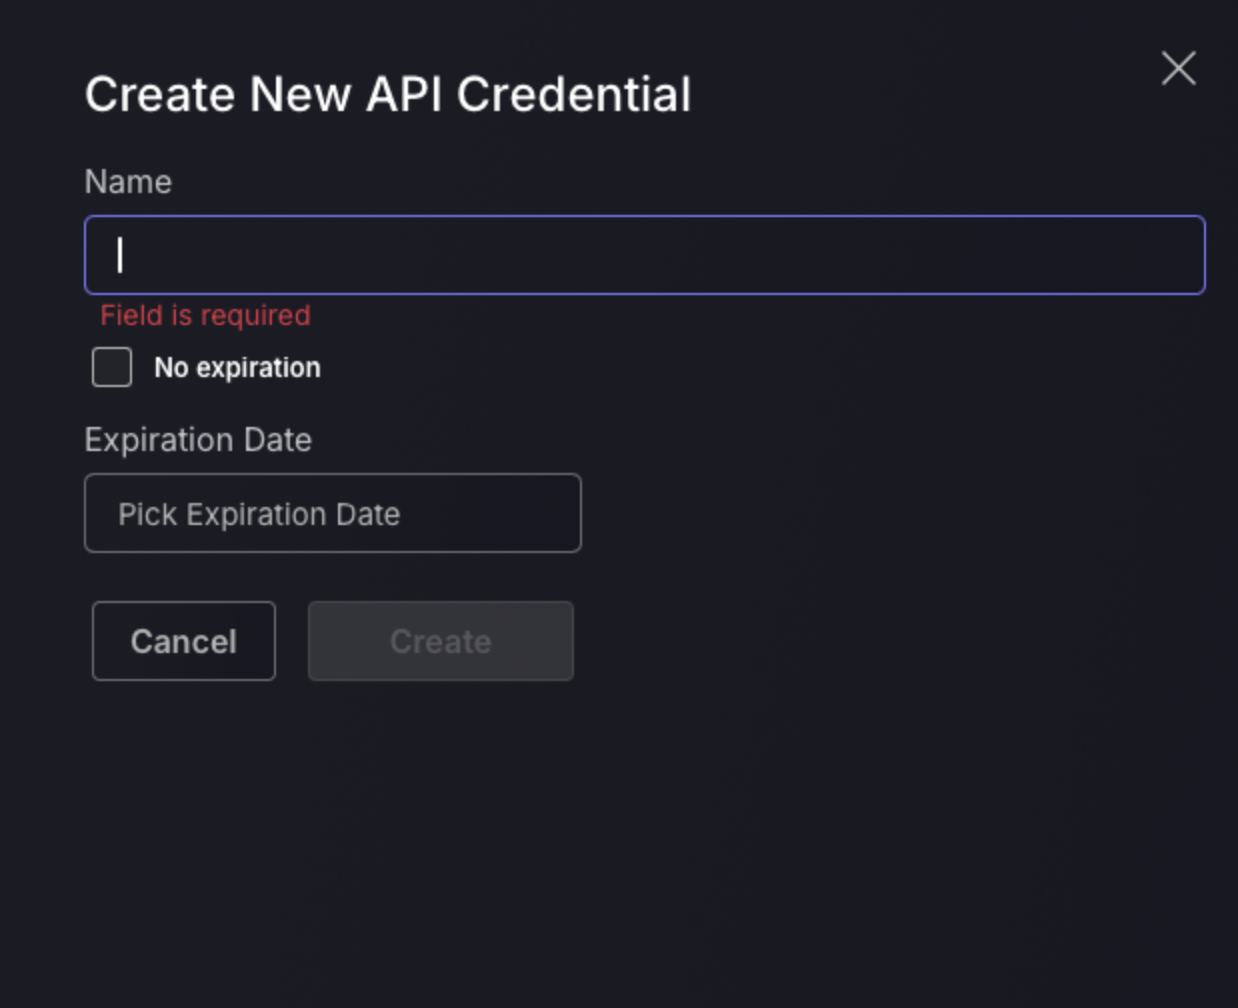
There is an option to create a new API in the top right hand corner which will open a pop up where details are to be entered.
Once “Create API Credentials” button is pressed here are the steps to create a new API:
- Enter the name of the new API which will be used to identify the API within the platform.
- If you would like there to be no expiry date click on the grey box to the left of “No expiration”. Else enter the date and press the “Create” button.
- The client ID and Client secret will now be generated and displayed as seen in the screenshot below. Be sure to copy the client secret and save it in a secure location as there will not be another chance to access it.