A risk exception is a modification of the risk score or status of a finding. In the Phoenix platform, risk exceptions must always go through an approval process; once a request is made, a member of the security team is required to review, then accept or reject the risk exception request.
There are four tyes of risk exceptions: false positives, risk mitigation, risk recasting and risk acceptance.
False Positive
Setting a finding as a false positive will mark it as no longer a threat, meaning it will no longer contribute to the global risk score/risk score of the application/environment it is within. False positive findings are not displayed in the Open section of the findings page.
Risk Mitigation
A risk mitigation can be used when you’d like to lower the risk score of a finding by a certain percentage. Some of the reasons for doing this are as follows:
- There are mitigating controls in place that reduce the exploitability or severity of the vulnerability.
- There is an upcoming upgrade that will remove the vulnerability altogether and it is considered that it shouldn’t be the focus of attention in the short term.
- The security and engineering teams agree that the risk level of the finding as provided by the scanner or other sources is too high.
Whilst a risk mitigation is active on a particular finding, the final risk score for the finding would be reduced by the percentage defined in the exception. This reduction is applied dynamically to the latest risk score of the finding. Findings with a risk mitigation of 100% are not displayed in the Open section of the findings page.
Risk Recasting
A risk recast is a reassessment of a vulnerability’s severity—typically used when the default risk score does not accurately reflect the real-world impact within your specific environment. In contrast with risk mitigation, risk recasting can be used to set the actual intended value of the risk. While defining a risk recasting the user can select the risk value that will be set for the finding, which could be higher or lower than its current risk score. However, the recasting is stored as the percentage change required to reach that value. If the calculated risk of the finding changes in the future the same percentage change will be applied and hence the recasted value will be different.
Risk Acceptance
A risk acceptance exception doesn’t actually change the risk of the finding; it is primarily a flag to indicate that a finding’s risk has been accepted by the team. A risk acceptance should be created when a user encounters a failing deployment gate due to a specific finding, and needs that finding to be excluded in order to proceed with the deployment to production. For example, the API gate may require that there be no more than 3 critical findings, and it is failing because there are 4. This API gate would be blocking deployment to production due to policy enforcement, so one of these findings could be marked as a “Risk Acceptance” to ensure the API gate passes. This is not recommended for critical findings, but more so for lower risk levels, where ignoring a finding will not put you at risk.
Creating a risk exception request
In the Exception Engine you are able to create an automated risk exception by defining a set of rules. However, if you’d like to create a risk exception request for specific findings follow the steps outlined below:
- Navigate to Findings under the Vulnerabilities tab.

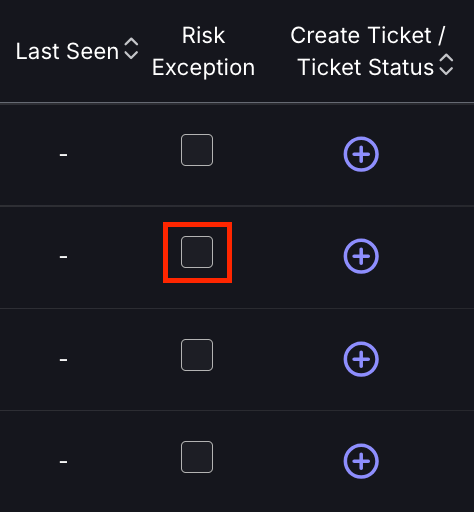
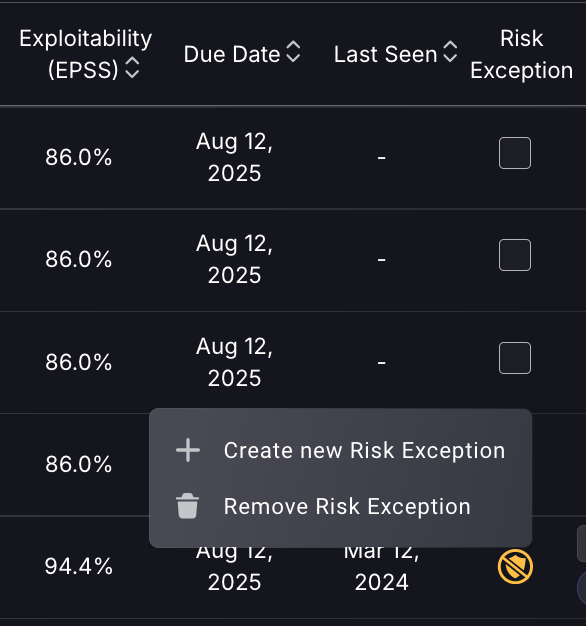
- Navigate to the finding you wish to propose a risk exception to and select the empty grey box in the Risk Exception column of the table. If a finding already has a history of risk exceptions, select the exception icon in the Risk Exception column and then select Create new Risk Exception.
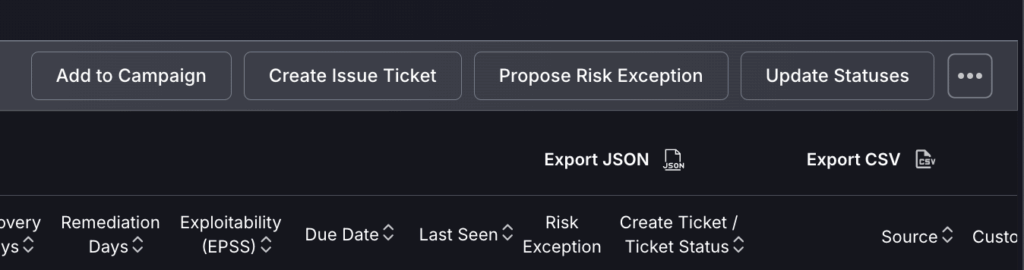
Alternatively, if you wish to apply a risk exception to multiple findings, you can do so by ticking the grey box to the left of the findings and selecting Propose Risk Exception at the top.

- For each risk exception request you must complete the following:
- Enter a name for the risk exception
- Assign the risk exception to a security team
- Use the switch to indicate whether you wish to Reset Findings SLA, if you wish to do so specify the number of target days
- Give a reason for the proposed risk exception to be approved
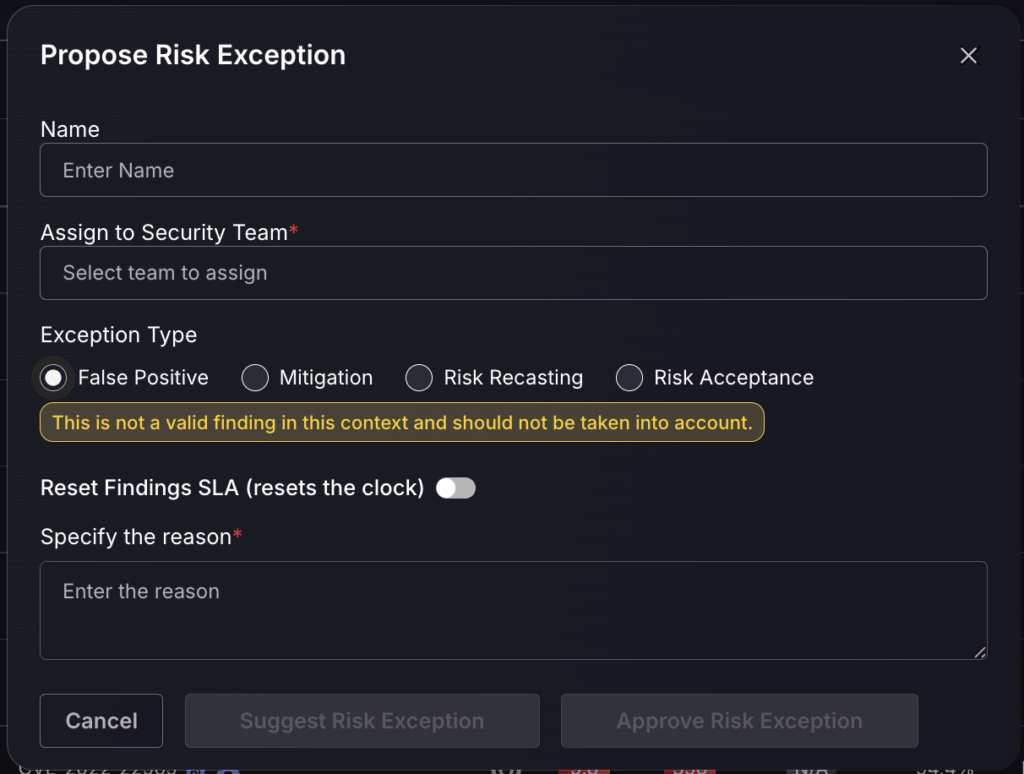
If you have selected Risk Mitigation:
- Enter the assignee’s email or name.
- Select a date you wish for the risk mitigation to stop being applied to the finding, or select No expiration if you wish for the risk mitigation to be applied indefinitely.
- Select the risk mitigation percentage from low, medium, high or use the slider to select a custom percentage. Underneath is a preview which shows you how the selected mitigation percentage will affect the risk score.

If you have selected Risk Recasting:
- Enter the assignee’s email or name.
- Select a date you wish for the risk recasting to stop being applied to the finding, or select No expiration if you wish for the risk recasting to be applied indefinitely.
- Select the desired risk score output for the finding from low, medium or high, or use the slider to select a custom value. Underneath is a preview which shows you the percentage change of the risk score, this is the percentage change that will be saved and applied for the duration of the exception request.

If you have selected Risk Acceptance:
- Enter the assignee’s email or name.
- Select a date you wish for the risk recasting to stop being applied to the finding, or select No expiration if you wish for the risk recasting to be applied indefinitely.
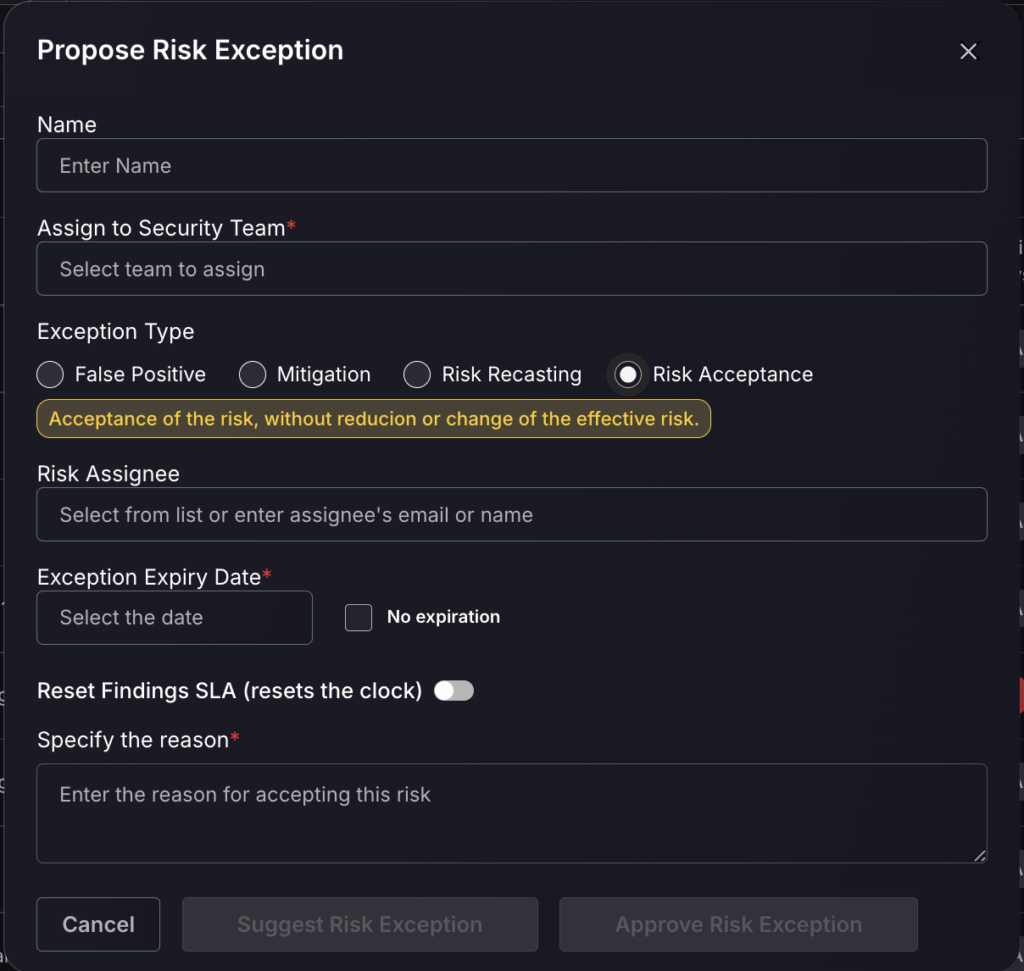
- Select Suggest Risk Exception for the proposed risk exception to be added to the queue for an Organisation Administrator or Security Administrator to approve. If you are an Organisation Administrator or a Security Administrator you will also have the option to Approve Risk Exception, this will skip the process of adding the proposed risk exception to the queue and will automatically approve and apply the risk exception.
