This section will guide you through the process off creating automations, including the Context Engine and the Exception Engine.
Context Engine
The Context Engine allows users to determine the locality of assets, including the option to change the locality based on rules which can manually be set. The locality will determine the exploitability factor which contributes to the risk level.
There are 3 different asset categories for which rules can be defined which should be selected by clicking on the category underneath the Context engine title.
Each asset can be placed in one of three locality values: internal, external, DMZ. The context engine works by defining rules to assign assets to two of those localities, while the third locality will be assigned to assets that don’t match any of the previous rules.
Follow these steps to set up automations:
- Select the default locality that don’t match any of the rules. Later we will define rules for the other two localities.
- Since assets could match rules for both of the remaining two localities, a tie breaker must be defined. Select which locality would win if an asset matches both.
- In the following two sections you must create rules for both of the remaining localities:
- For each rule you wish to set
- Select the condition category
- Select the condition value
- Click on the blue box to add an exclusion
- To add a new rule, select the “Add Rule (OR)” button
- At the bottom of the rules tab, select the locality you wish to change the asset to.
- For each rule you wish to set
- Press “Save” at the bottom of the page once a new rule has been set.

Exception Engine
The Exception Engine is used to define rules for automatic creation of risk exceptions.
Navigation
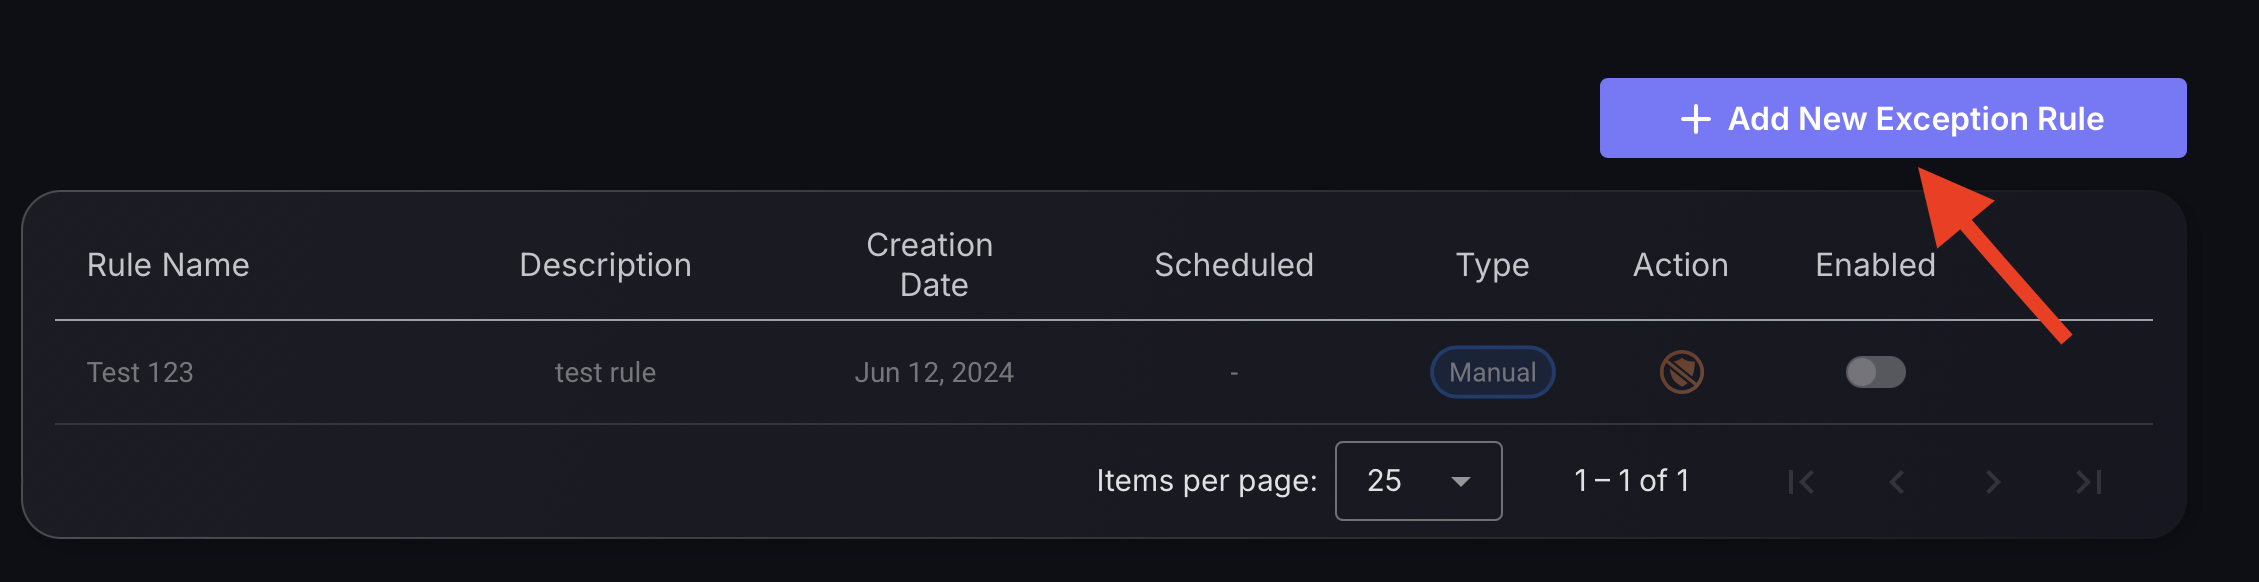
Follow these steps to add an exception rule:
- Click on the blue box, “Add New Exception Rule“.
Step 1
- Enter the rule name, which will be displayed on the Exception Engine rule table.
- Select if it is to be scheduled or manually triggered using the enabled field in the Exception engine rule table. Then select how often the exception is to be renewed which will send a notification of the new status being a risk exception or false positive.
- Enter the description of the rule, outlining the reason for the exception proposal and any other important details.

Step 2
- To set an if condition start by selecting the category of the rule definition (e.g Asset locality) and the corresponding value (e.g Internal).
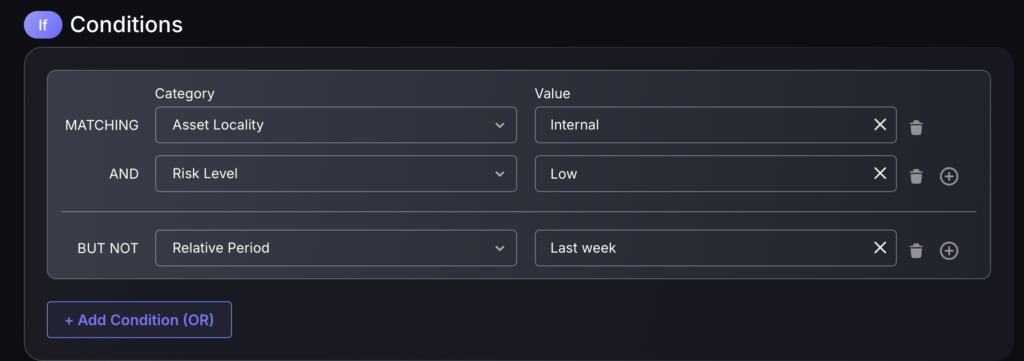
- To add a BUT NOT condition press the blue button in the bottom right corner of the rule and it will give you the same options to add another rule.
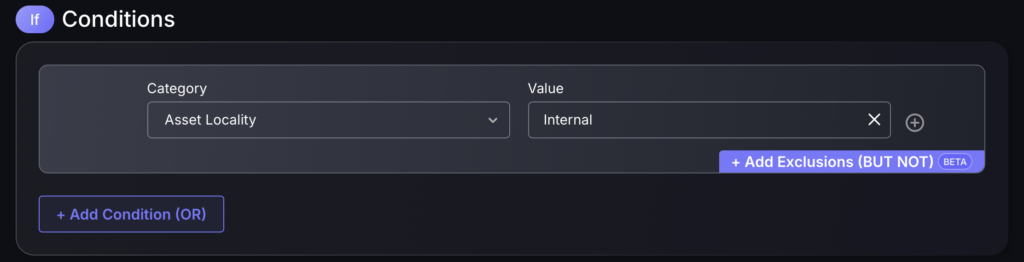
- To add an AND condition press the plus button next to the value column.
Step 3
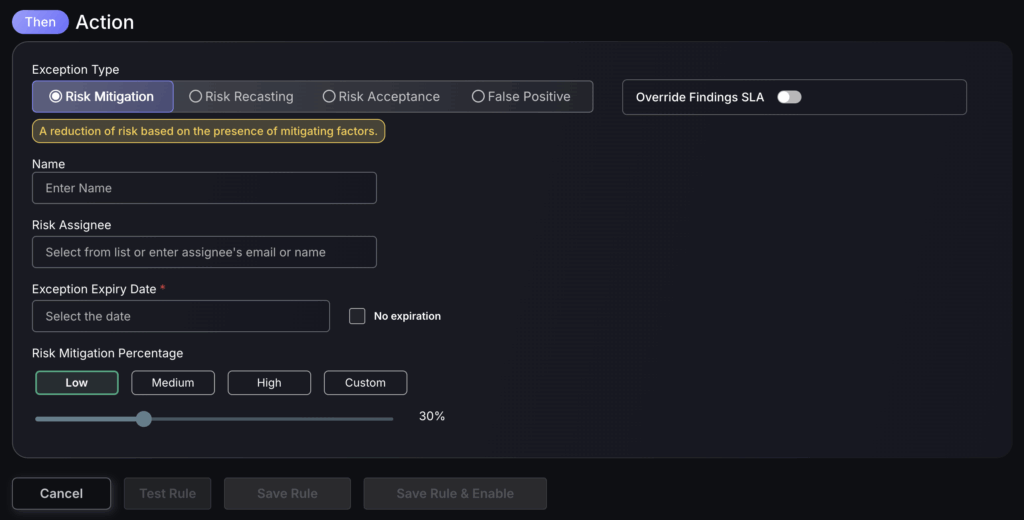
- Select the exception type

Risk Mitigation
A risk mitigation can be used when you’d like to lower the risk score of a finding by a certain percentage. For more information click here.
- Enter the name for the new risk mitigation.
- Assign the risk mitigation to a responsible user.
- Select an expiry date for when the asset is no longer flagged as risk mitigation or select no expiry date by ticking the box next to this.
- The risk mitigation percentage can be set as Low, medium, high or custom and reduces the risk score for that asset/vulnerability as a percentage e.g setting it as high will reduce the risk score by 100% to 0. While setting the risk mitigation percentage as low will reduce the risk score by 30%. This enables vulnerabilities known not to be as severe as made out to be deprioritized enabling engineering teams to focus on what matters most.
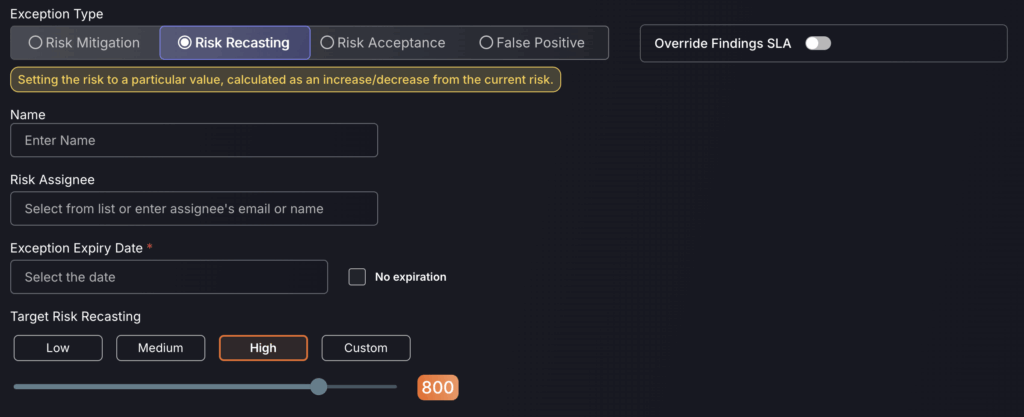
Risk Recasting
A risk recast is a reassessment of a vulnerability’s severity—typically used when the default risk score does not accurately reflect the real-world impact within your specific environment. For more information click here.
- Enter the name for the new risk recasting.
- Assign the risk recast to a responsible user.
- Select an expiry date for when the asset is no longer flagged as a risk recast or select no expiry date by ticking the box next to this.
- The risk recast percentage can be custom set and increases the risk score for that asset/vulnerability as a percentage, e.g setting it as high will increase the risk score. This enables vulnerabilities known to be more severe as made out to be upscaled, enabling engineering teams to focus on what matters most. We recommend you set the score to the recommended value, which is 800.
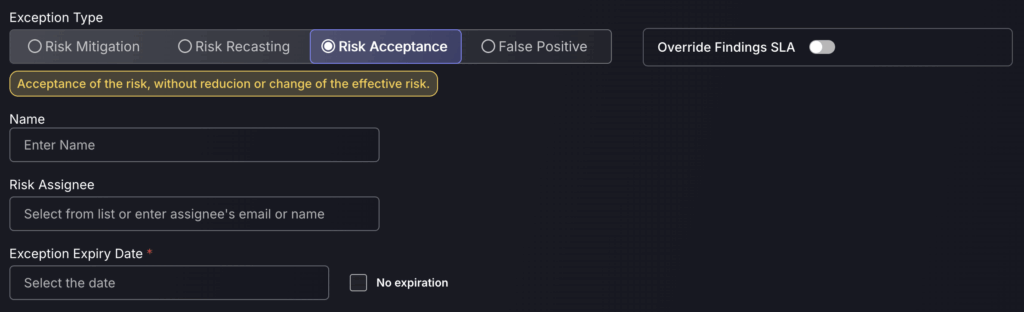
Risk Acceptance
A risk acceptance exception doesn’t actually change the risk of the finding; it is primarily a flag to indicate that a finding’s risk has been accepted by the team. For more information click here.
- Enter the name for the new Risk Acceptance.
- Assign the risk Acceptance to a responsible Team.
- Add a Risk Assignee to be responsible for the acceptance.
- Select an expiry date for when the asset is no longer flagged as a risk recast or select no expiry date by ticking the box next to this.
False Positive
Setting a finding as a false positive will mark it as no longer a threat, meaning it will no longer contribute to the global risk score/risk score of the application/environment it is within.

Final Step
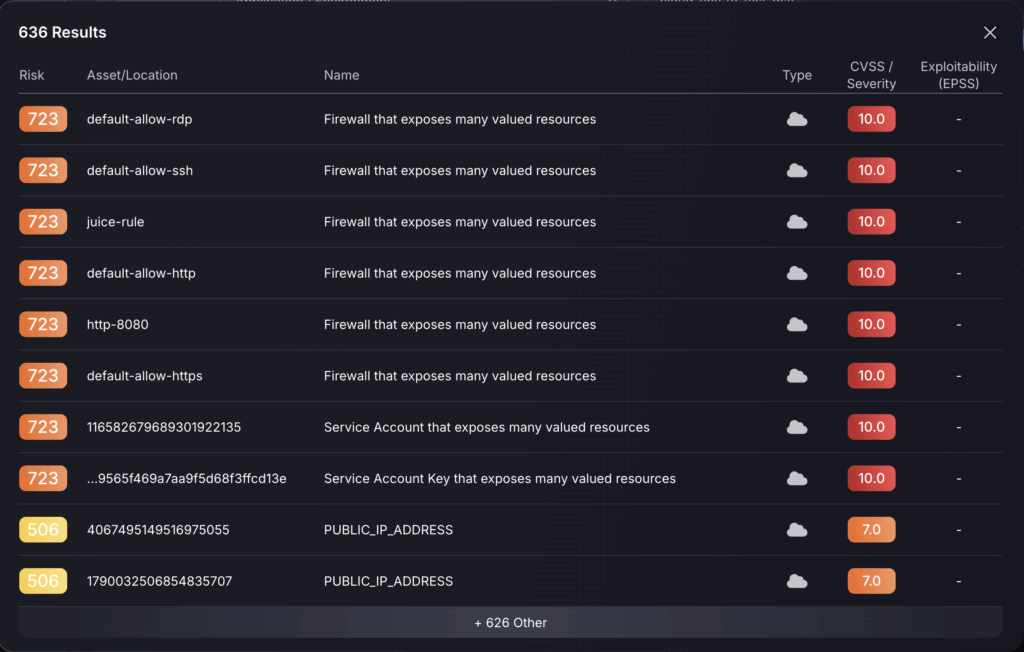
Once all the required fields have been filled in the final step is to select one of the following options:
- Test rule – this will test run the rule, a pop up will appear telling you how many findings it will affect and showing you a sample of 10. This is to be used to ensure no mistakes have been made in defining the rule.
- Save rule – this will save the rule and it will be visible on the exception engine rule table but will need to be enabled.
- Save rule and enable – this will save the rule and it will now be enabled requiring no further action.