Our guide to Campaign management will walk you through the essential processes of creating, deleting, archiving, and editing campaigns on the platform.
1. Introduction
Prerequisites :
- User must have already setup a scanner (see integrations)
- User should be logged in as a admin
Campaigns are created by administrators to provide a centralized way of tracking vulnerability management progress. Specific vulnerabilities can be assigned to a campaign, allowing teams to monitor remediation efforts, leave comments, and manage associated tickets—all from a unified campaign dashboard.
This approach fosters cross-team collaboration by consolidating efforts within a single campaign. It also enables better scheduling and coordination of vulnerability fixes, compared to managing them separately across isolated teams, which can often be harder to track and align.
2. Navigation
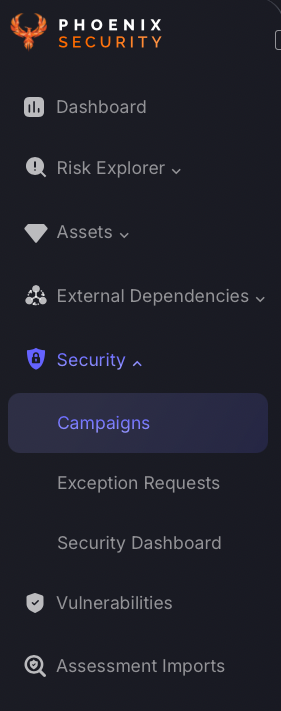
On the Navigation Menu, select Security > Campaigns.
3. Campaigns Dashboard
This dashboard is organised into three main sections: Top by Risk Magnitude, Top by Average Risk, and Campaigns Summary, each offering valuable insights into campaign performance and risk levels. Creating campaigns enables administrators to efficiently track and analyse findings by grouping them into campaigns using auto linking for findings. This enhances the customisation of the Phoenix Security platform, providing tailored groupings for more effective vulnerability tracking and management.
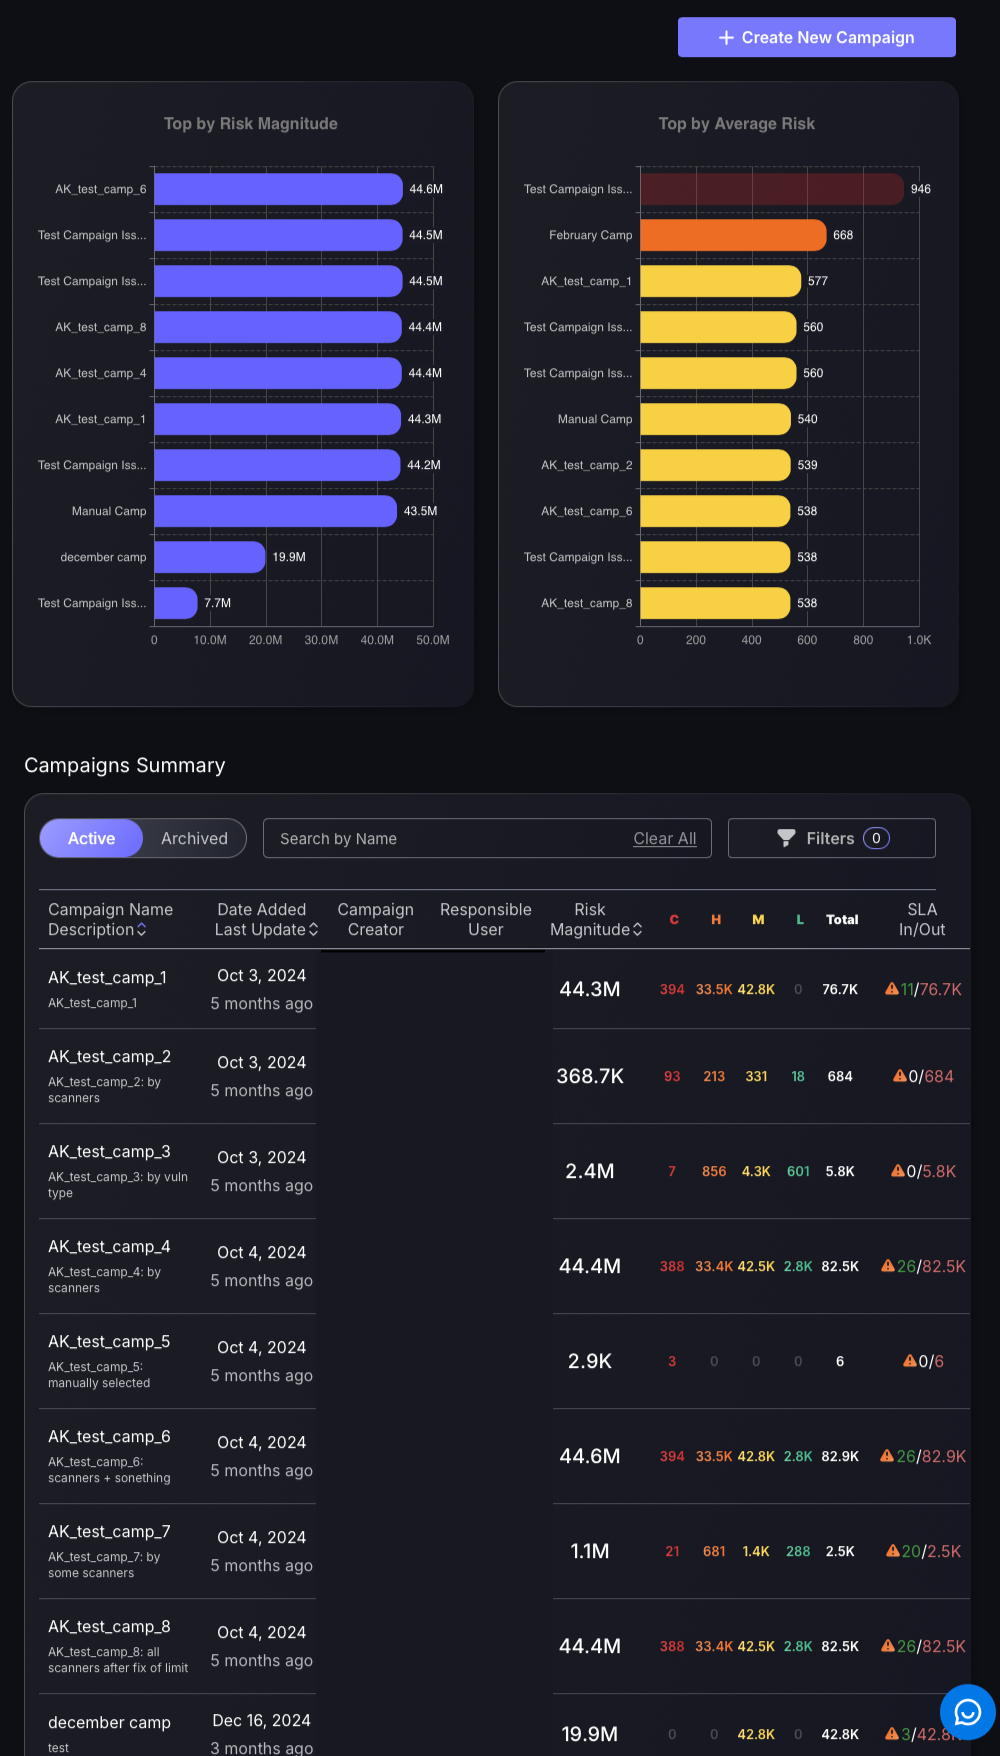
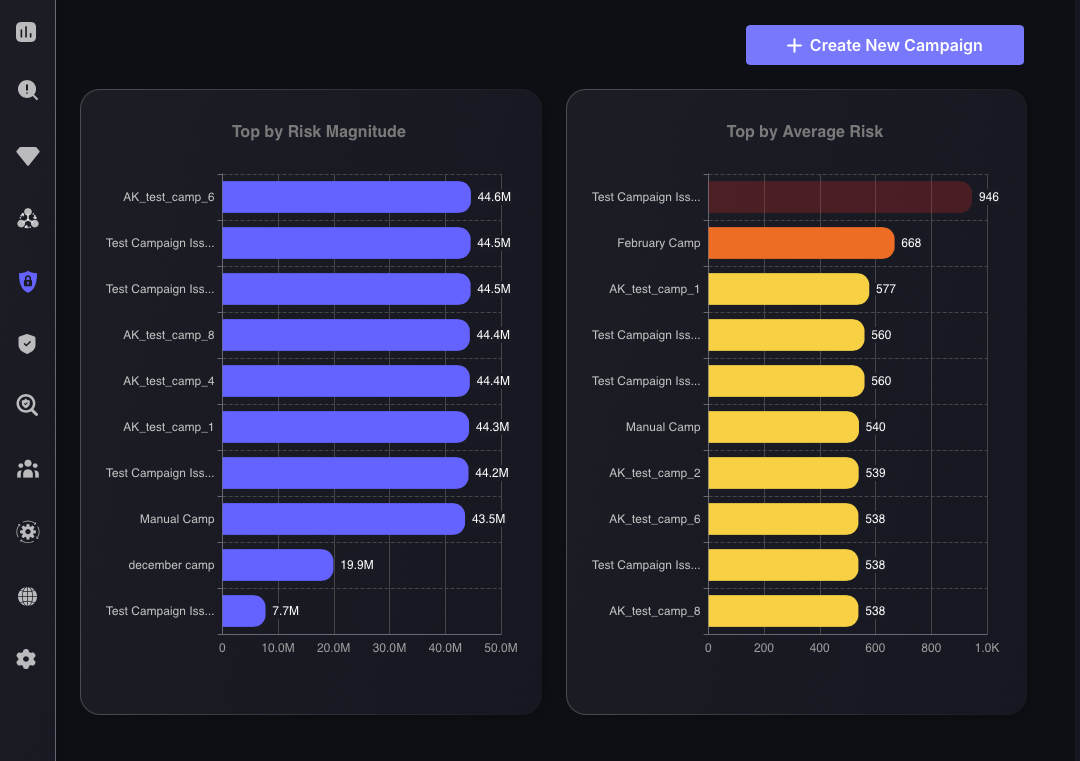
Top by Risk Magnitude: This section ranks campaigns based on their total risk exposure, highlighting those with the largest overall risk. It serves as a visual tool to identify which campaigns require immediate attention for risk mitigation, allowing teams to prioritize their efforts effectively.
Top by Average Risk: This section lists campaigns according to their average risk scores, focusing on the severity of risk per campaign. It helps pinpoint campaigns with the most intense risk profiles, guiding teams to address the most critical issues that could impact performance or outcomes.
Campaigns Summary: This table provides a detailed overview of active campaigns, including their creation dates, updates, and risk metrics. It offers a comprehensive view of each campaign’s status, enabling teams to monitor performance and make informed adjustments as needed.
Navigating the Campaigns Summary:
- Active/Archived selection will show campaigns you have enabled as active, or select Archive to see campaigns no longer active/not yet enabled.
- Search by name – This allows you to search for a campaign by its name. No need to press enter or enter case-specific letters.
- Filters – Apply custom filters depending on responsible users, Campaign creators, and the date range the campaign was created.
4. Create a Campaign
To create a new Campaign complete the following steps:
1. Click on the blue box on the top right-hand corner of the Campaigns dashboard called “Create New Campaign”.
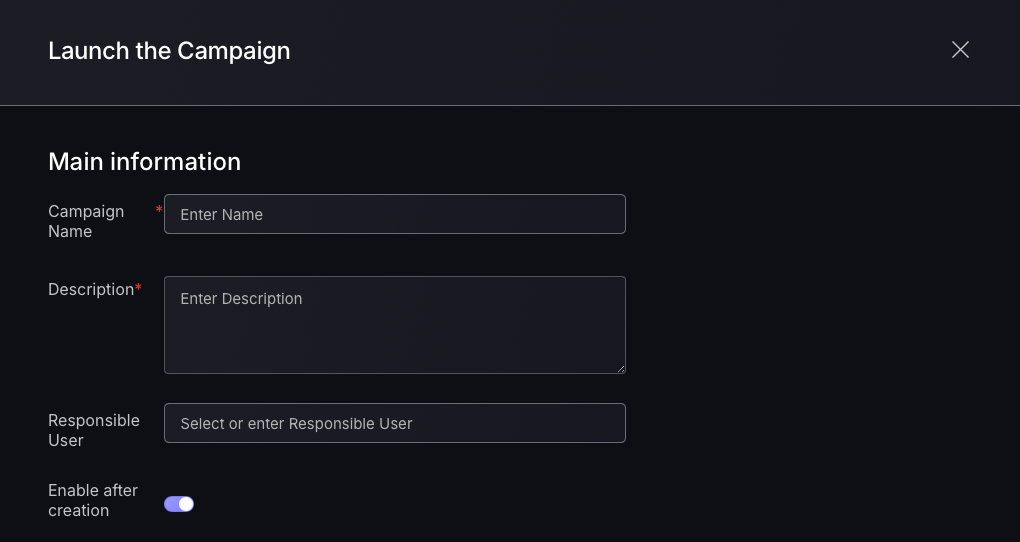
2. Enter the details as follows:
- Campaign name – advised to name this relating to the vulnerability types grouped within the campaign.
- Description – A brief description of the campaign details, i.e. purpose of the campaign.
- Responsible User – Who is responsible for monitoring performance of campaign.
- Enable after creation – will enable the campaign as soon as you create it and mark it as active.
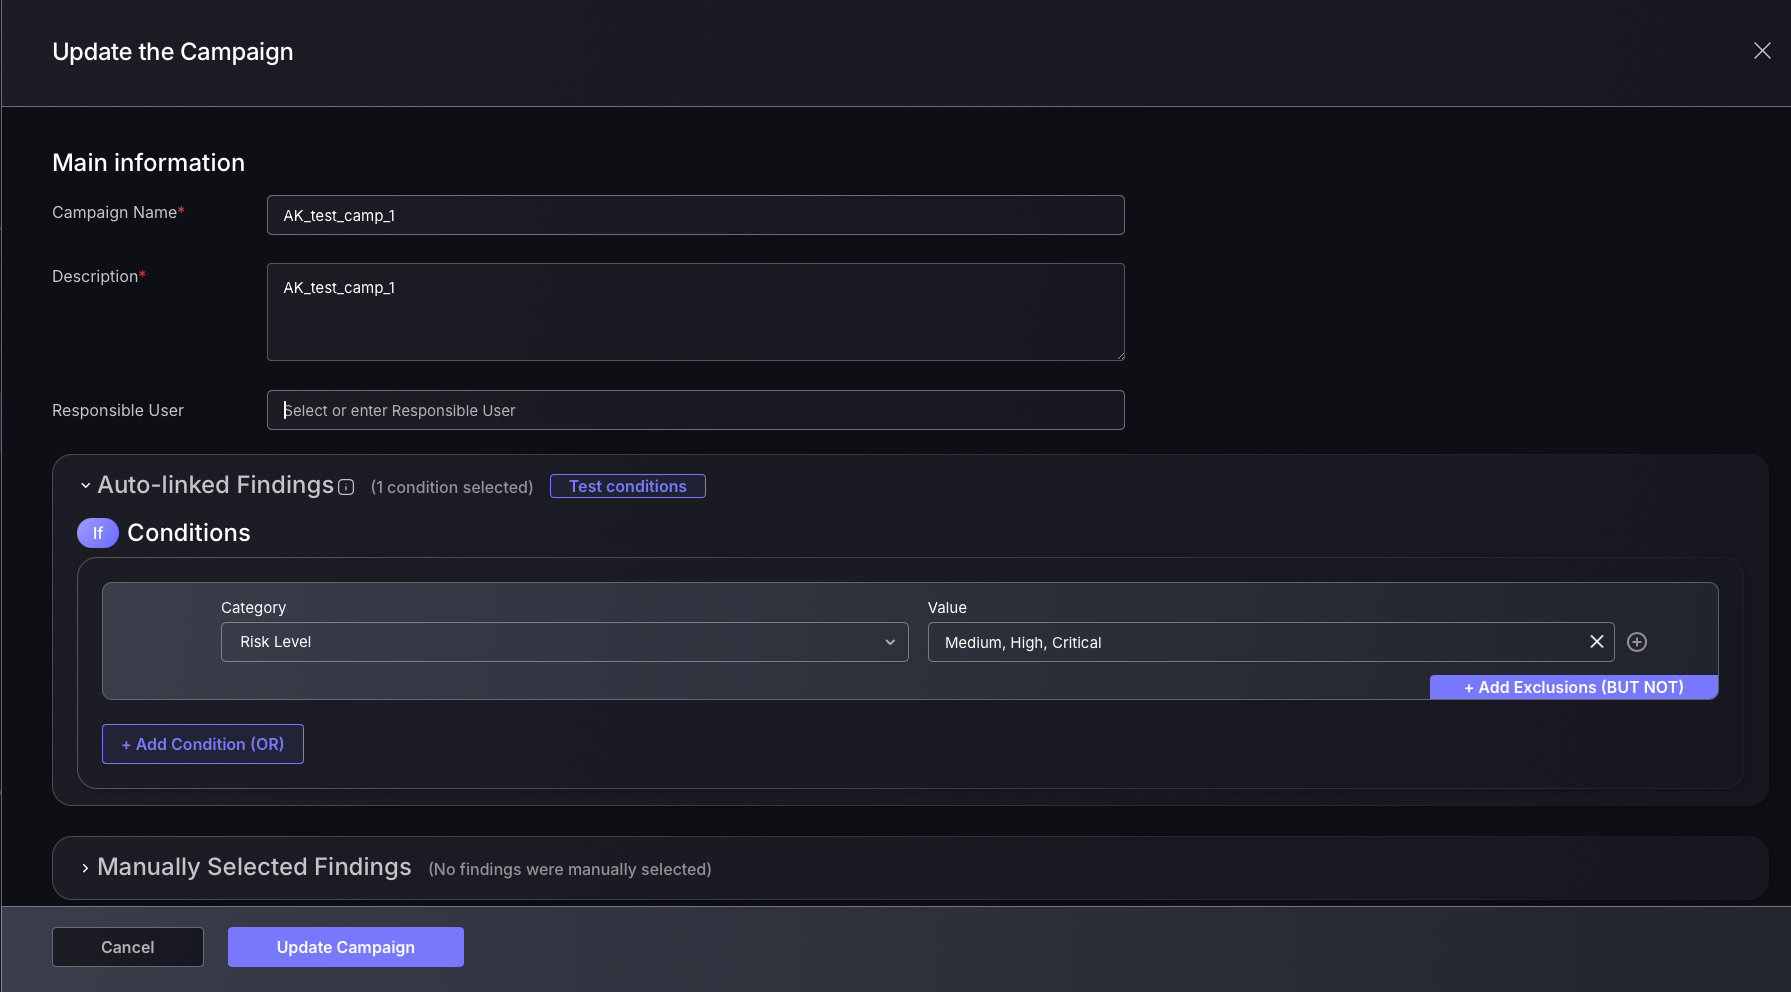
3. Using Auto-linked Findings:
It is advised to use auto-linked findings to maintain the integrity of the campaign in the case where new findings are found.
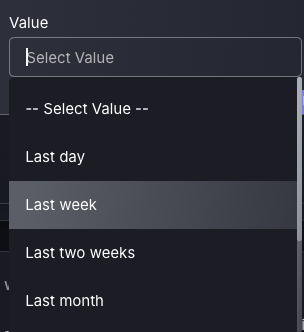
- Select a “Category” within the “If conditions” section, e.g. Relative Period.
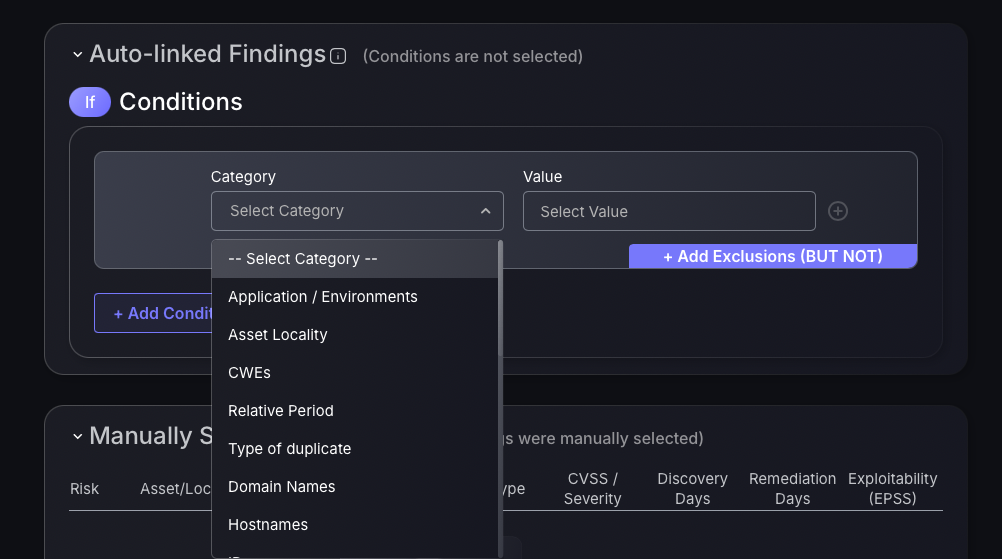
- Select a “Value” associated with the category, e.g. for a relative period category selection last week could be an appropriate selection to monitor last week’s findings.
- For an additional level of customisation, click the blue “Add Exclusions” button which acts as a logical BUT NOT function to exclude specific findings. Fill in the “Category” and “Value” the same way as before. To add an AND condition to the BUT NOT exclusion press the plus button on the right side of the exclusion.
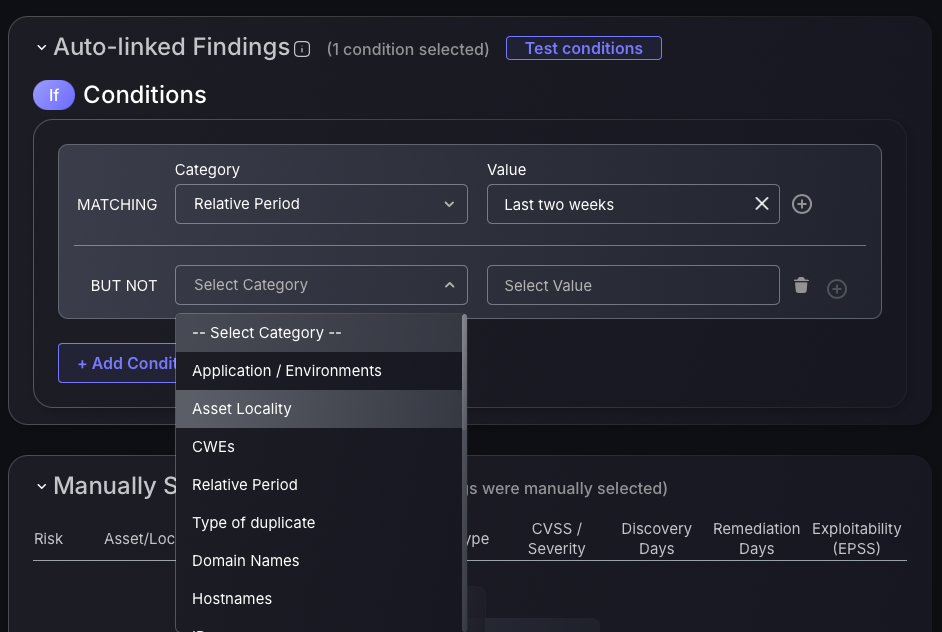
- To add an OR condition press the blue “Add Condition” button underneath the exception which you just created.

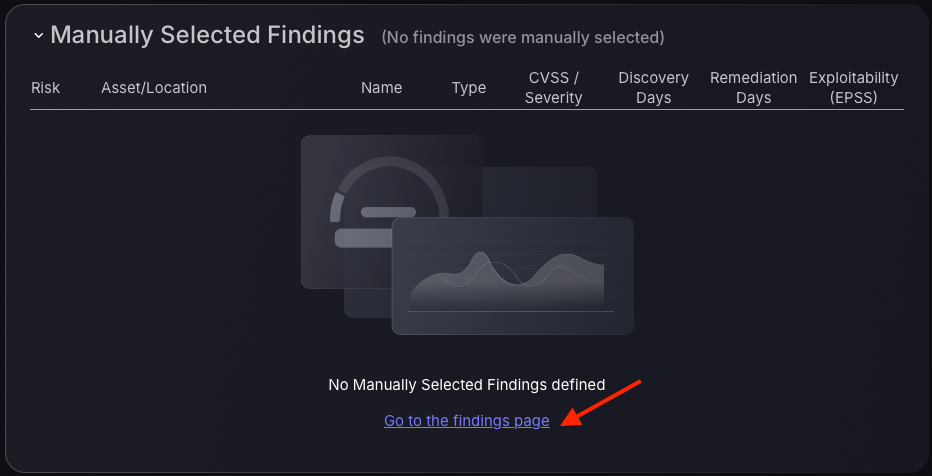
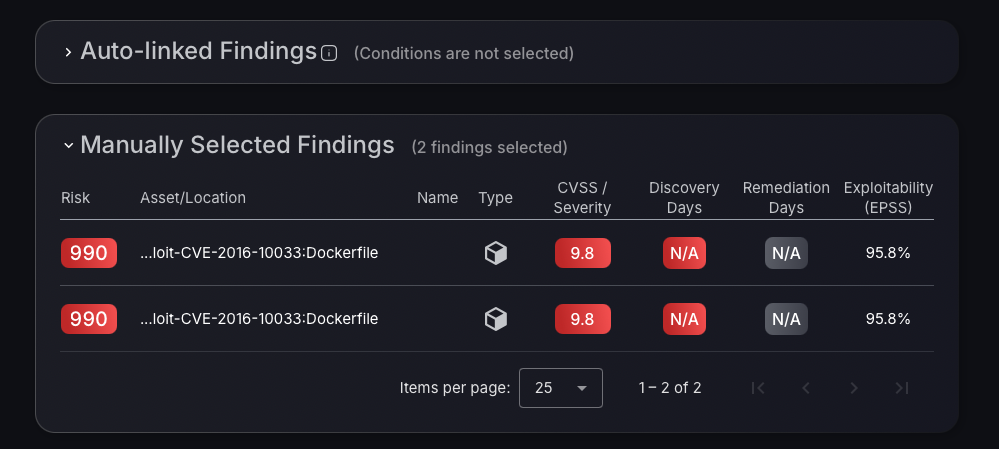
4. Using Manually Selected Findings
- Select “Go to findings page” to manually select findings and add them to the campaign on the Vulnerabilities section for the Phoenix Security platform.
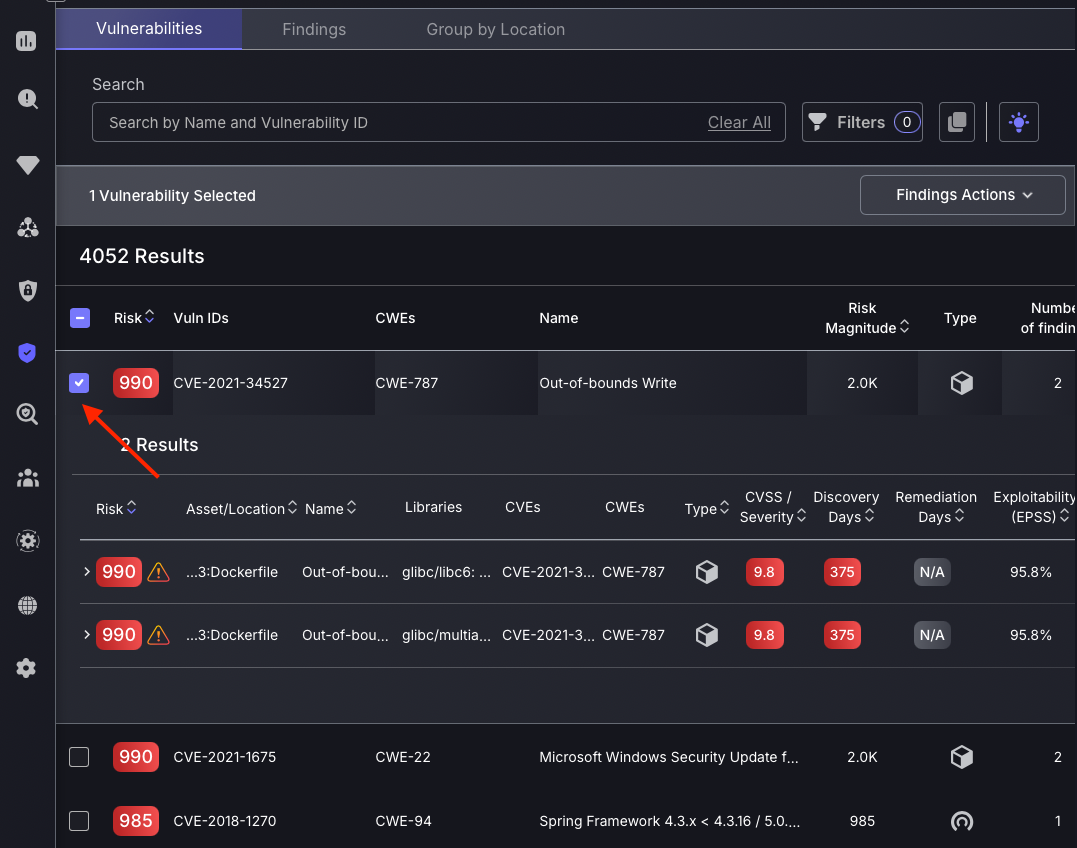
- Select a vulnerability by clicking on the box on the left-hand side of the targeted vulnerability, indicated by the red arrow in the screenshot below. If the box appears blue after selection, then you know it has been selected.
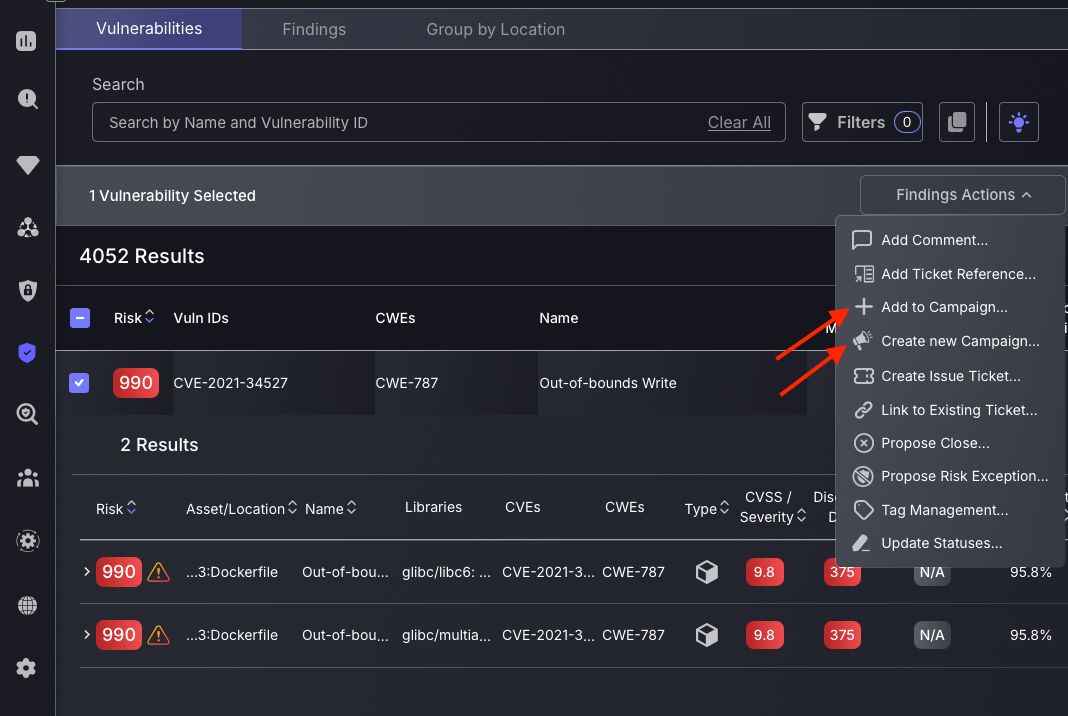
- Now that you have selected the vulnerabilities, you need to add them to the Campaign. This can be done by navigating to the “Findings Actions” panel on the top right-hand corner of the vulnerabilities page. If you are adding the vulnerability to an existing campaign then select the first option highlighted by the red arrow in the screenshot “Add to Campaign”. If you want to create a new campaign with the vulnerabilities selected then select the second highlighted option, “Create New Campaign” which will open up the Campaign Launcher panel as seen earlier.
- Press “Create Campaign” at the bottom of the Launcher panel to create the Campaign.
5. Delete a Campaign
All Campaigns created will now appear in the “Campaigns Summary” table, either within the “Active” section or the “Archived” section depending on whether you selected “Enable after creation” on the Campaign creation panel.
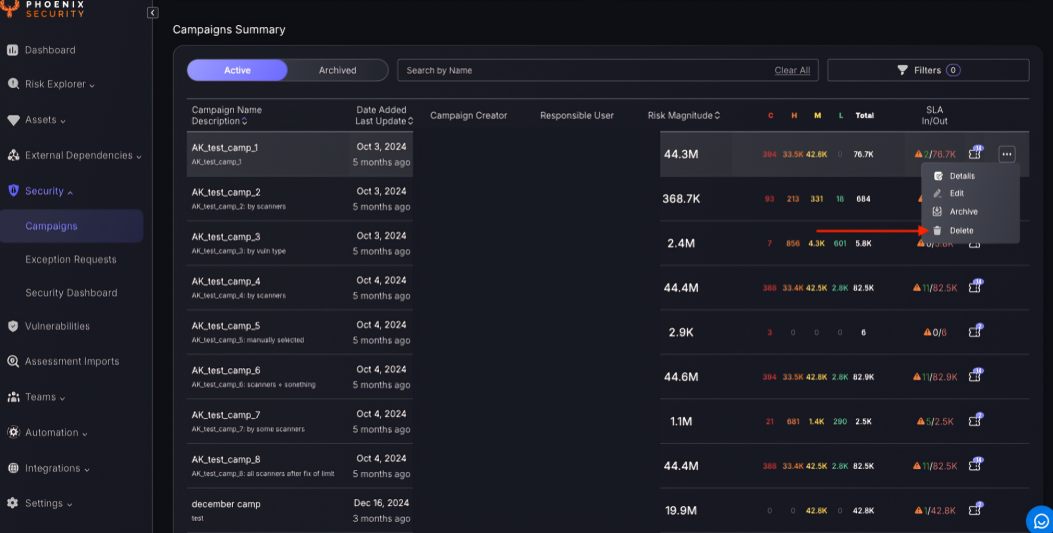
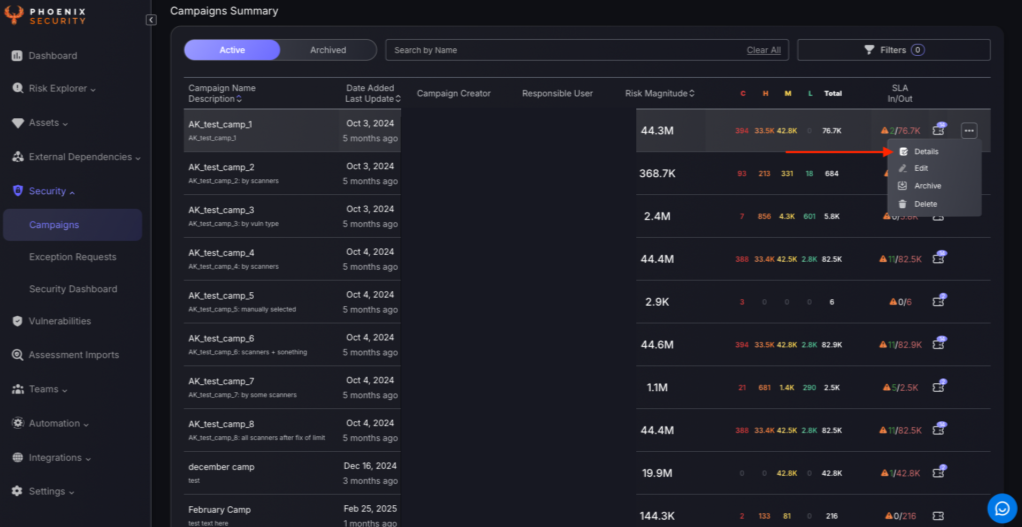
To delete a Campaign press on the three dots to the right of the corresponding campaign and select “Delete” as indicated by the red arrow in the image above.
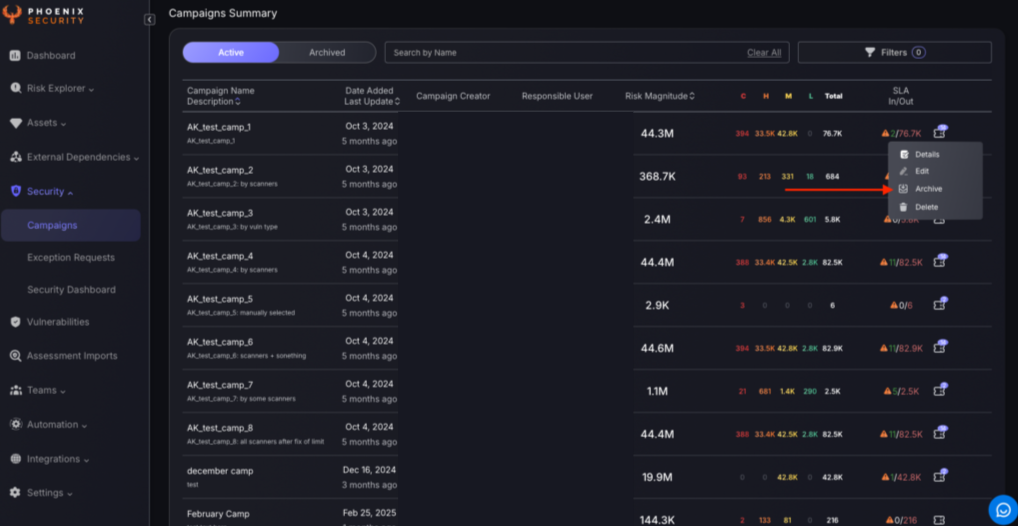
6. Archive a Campaign
To Archive a Campaign press on the three dots to the right of the corresponding campaign and select “Archive” as indicated by the red arrow in the image below.
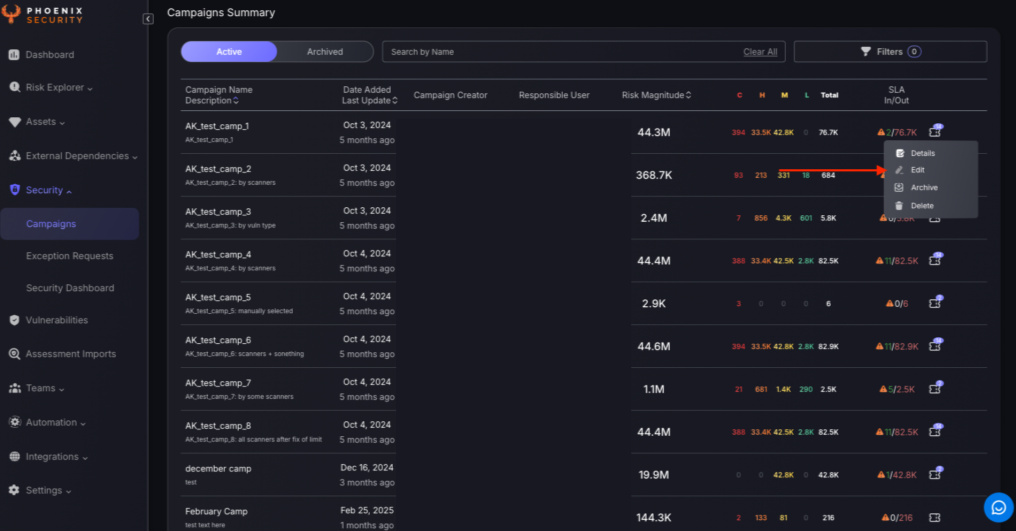
7. Edit a campaign
To Edit the Campaign press on the three dots to the right of the corresponding campaign and select “Edit” as indicated by the red arrow in the image below.
This will open up the update tab, as seen when the campaign was created.”Update the Campaign” tab:
7. View Campaign Details
To view specific details about a Campaign, such as risk overviews and ticket status’ press on the three dots to the right of the corresponding campaign and select “Details” as indicated by the red arrow in the image below.
The first part of the Campaigns dashboard will display a series of charts to give a breakdown of the risk statistics associated with the vulnerabilities assigned to the Campaign, as well as ticketing and SLA related statistics.

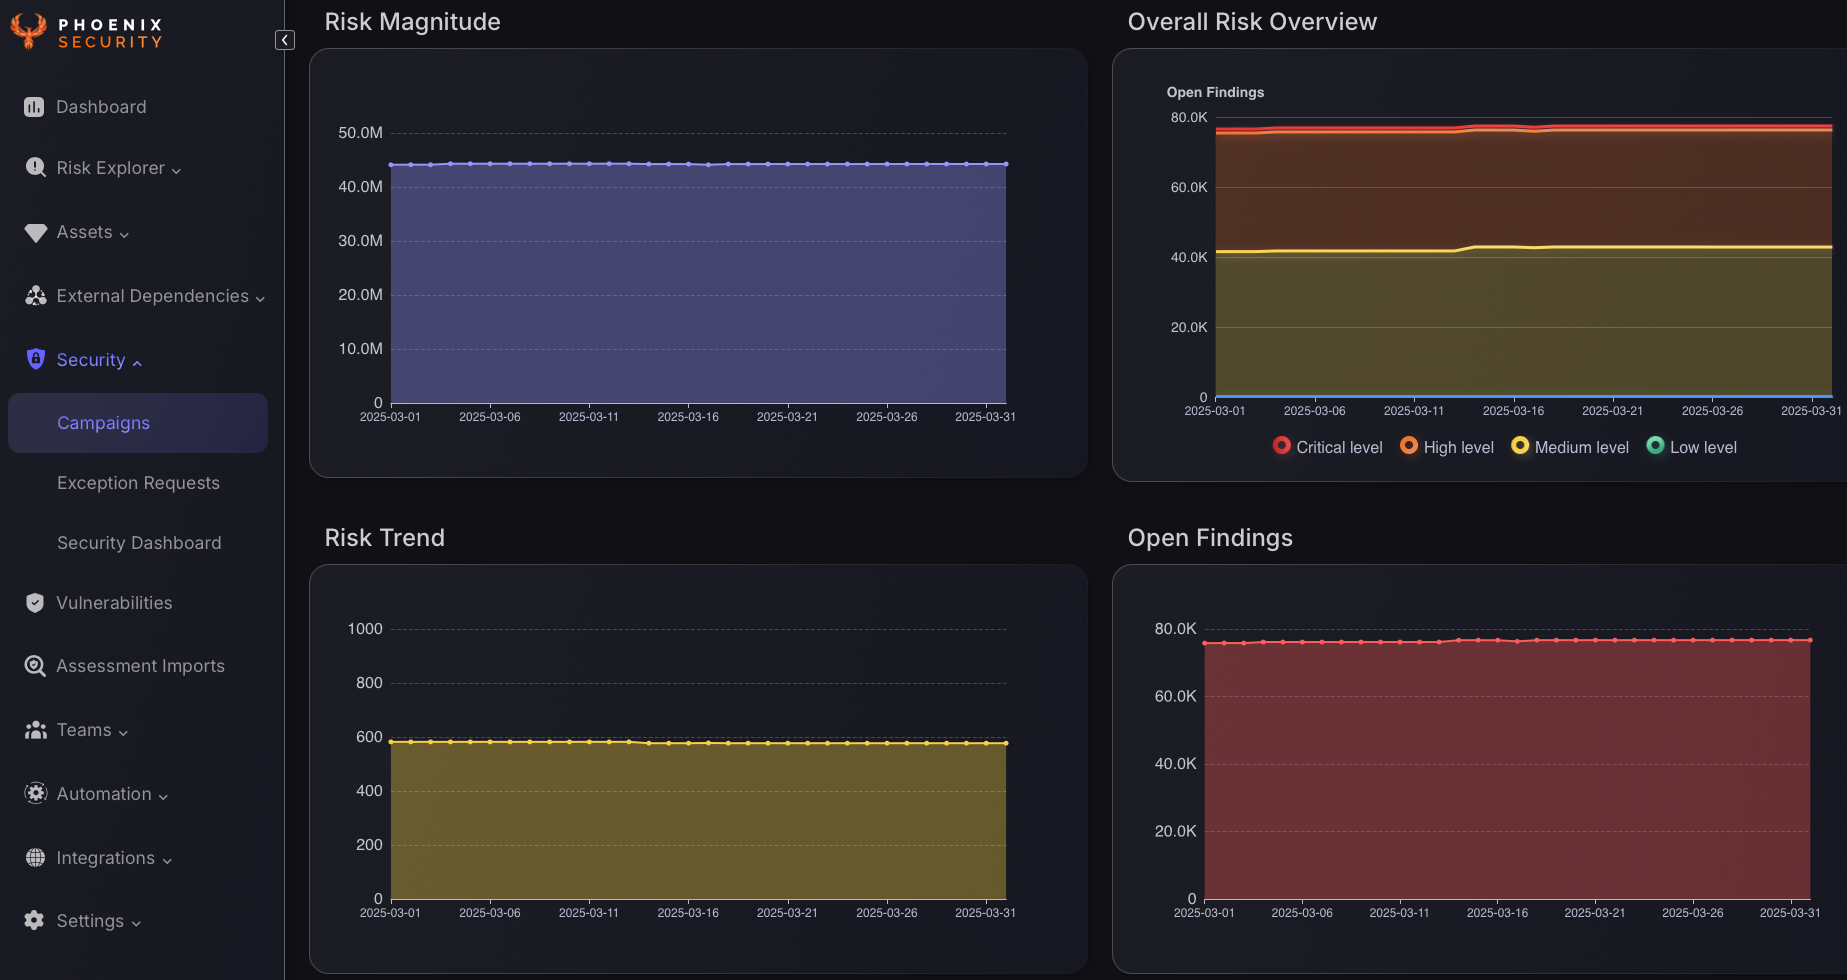
Scroll down on the Campaigns dashboard to offer a concise overview of risk and vulnerability trends aiding in the prioritisation and monitoring of specific campaigns throughout the lifecycle of the campaign. The Risk Magnitude chart shows total risk exposure, helping identify high-risk periods. The Overall Risk Overview chart breaks down open findings by severity, while the Risk Trend and Open Findings charts track average risk scores and unresolved issues.
8. Navigate the Campaigns Dashboard
At the top of the dashboard you can select different Campaign tabs to view the “Details”, “Findings”, and “Ticket Overview” sections.

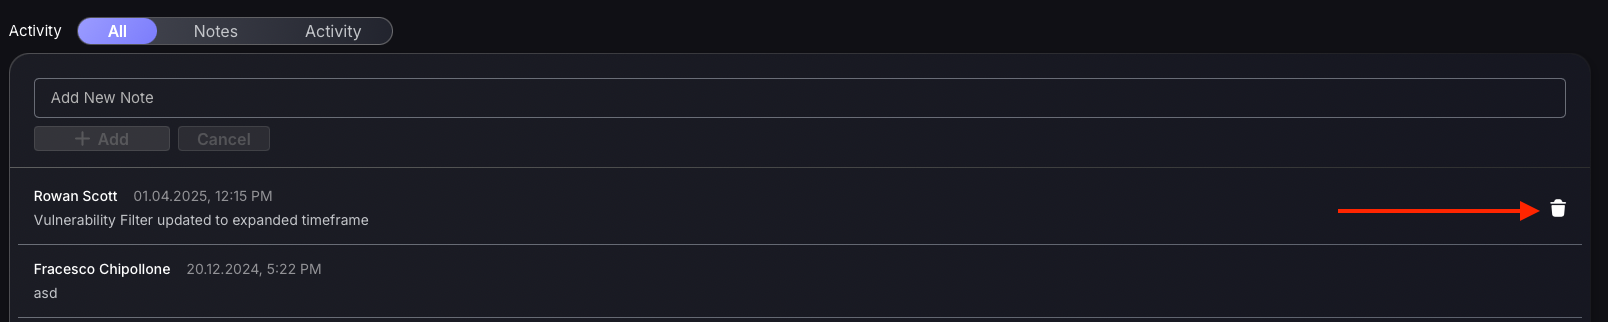
On the Campaign “Details” section you can also add notes to document Campaign progress and status updates. To do this add the note to be added where it says “Add New Note” and select “Add” below this. It will now appear on the notes list with the corresponding date added. To delete notes select the trash can icon on the right-hand side of the note to be deleted as indicated by the red arrow in the image below.
The “Findings” section allows you to view findings assigned to the campaign and filter your search as you would be able to in the “Vulnerabilities” page in the main navigation section.

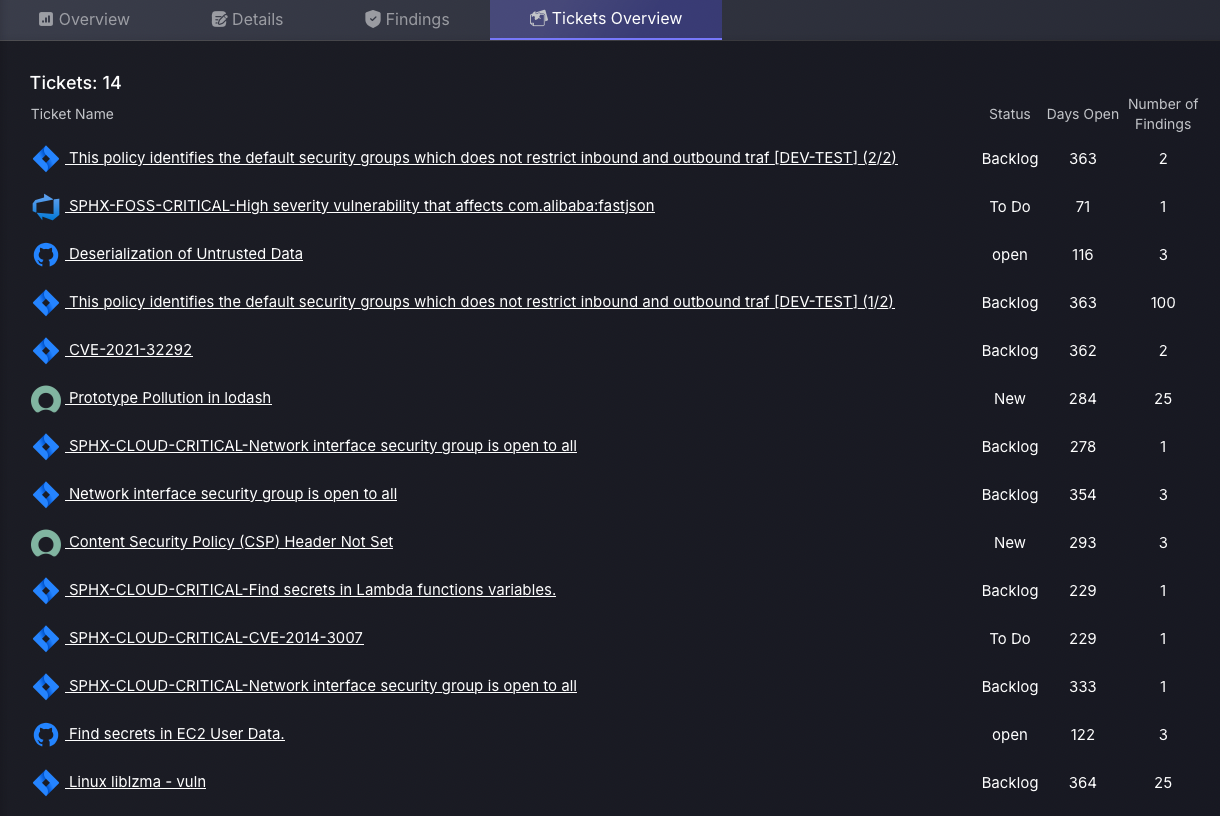
The “Tickets Overview” section offers an overview of all the tickets made for Vulnerabilities assigned to the Campaign. It includes the “Status”, “Days Open”, and “Number of Findings” columns allowing you to fully manage and monitor tickets across all platforms within the Campaign.