A. Integrating GitHub Issues
Username and Access Token
In order to authenticate with the GitHub API server you need your Username and an active Access Token. You will need these details later, when configuring the integration in Phoenix Security.
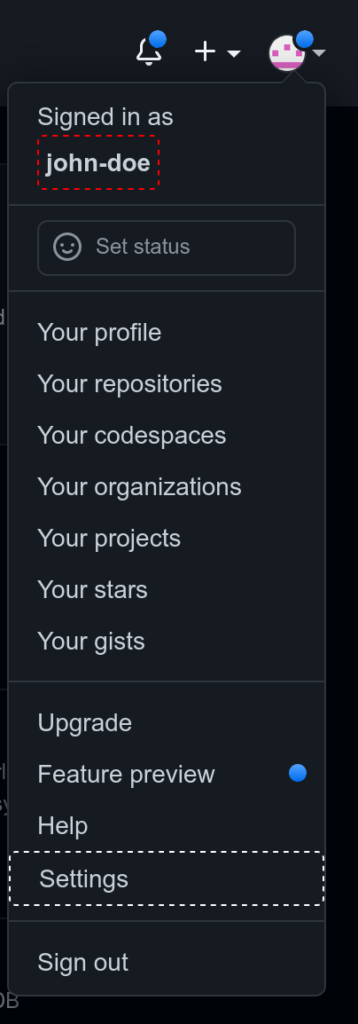
Username
This is the username that you use to log into GitHub. When you are logged in you can see your username at the top of the user name. In the example below the Username is “john-doe”, highlighted in red.
Access Token
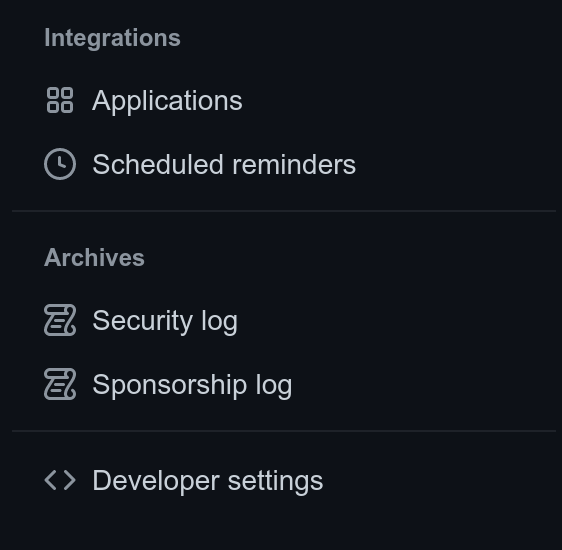
To create an Access Token you need to go to the Personal Access Tokens page. To get there, click on the user menu/icon in the top-right corner, then click on “Settings”, as highlighted in the screenshot above. In the left-hand menu select “Developer settings” in the bottom section.
Then select “Personal access tokens” on the left:
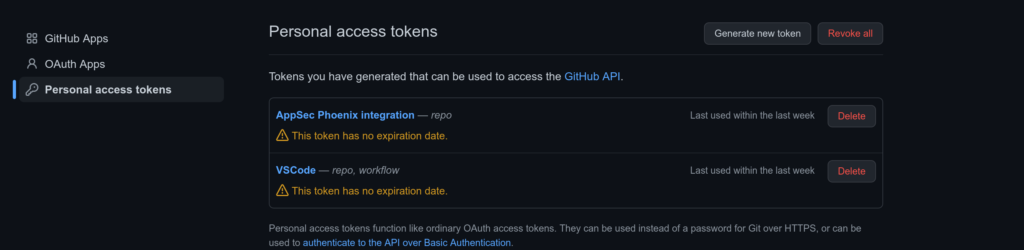
You would normally want to create a new token for this integration. Click on “Generate new token” at the top and fill in the details in the token configuration form. The two key points to keep in mind are:
- Make sure that you enter a fairly long, custom defined Expiration date. You can select “No expiration” to ensure that the token never expires.
- In the Scopes section select “repo“.

Make sure that you copy the token in the last step since this is the last time that it will be visible.
Integrating GitHub Issues within Phoenix Security
Before using GitHub integration features within your Phoenix Security instance, you have to set it up first by configuring the GitHub – Phoenix Security integration. Here are the steps to complete the integration process:
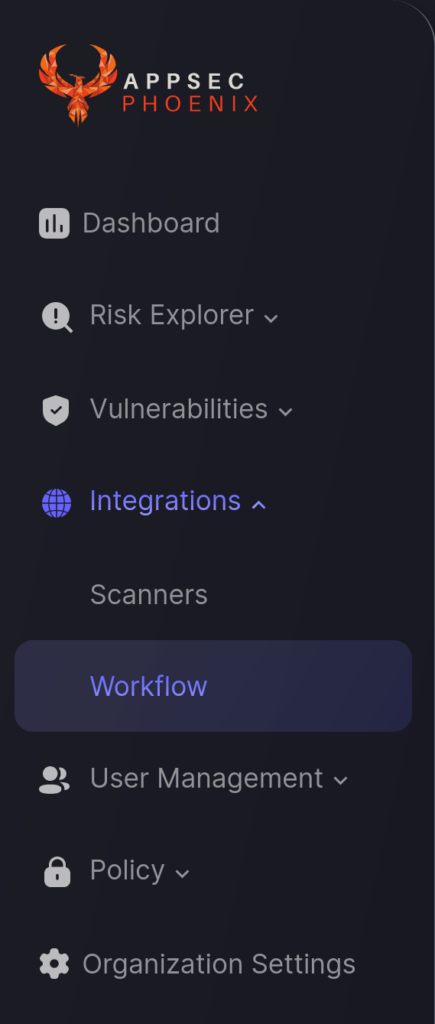
- On the Navigation Menu, go to Integrations > Workflow. Then click on the Create Workflow button.
- In the first step enter a name for the integration and select the GitHub Issues integration type. Then click Next.

- On the second step you need to provide the GitHub connection details discussed earlier in this article:
- Username
- Access Token

- Click the “Create Workflow” button.
B. Link GitHub to an Application
In order to link an existing Phoenix Security Application to GitHub, you need to edit the Application and enable the “Link to Issue Tracking Project” checkbox.
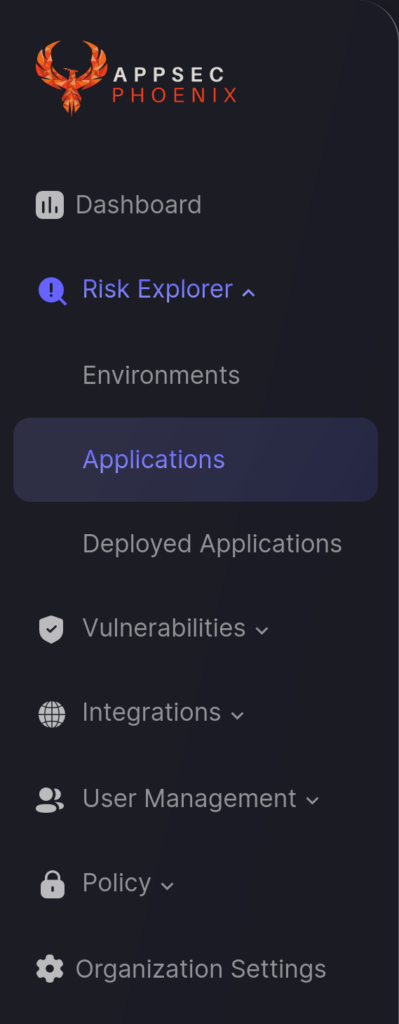
- On the Navigation Menu, select Risk Explorer > Applications.
- Select the Application List tab and scroll down to the Application that you want to update. Hover your mouse over the application entry, click on the three-dots icon than appears on the right, and select Edit (pencil icon).

- In the Update Application form, find that Integration section on the right-hand side and check the “Link to Issue Tracking Project”.
- Select the GitHub Account and GitHub Project (repository) that you want to link the Application to.
- Click the “Save Linking to Issue Tracking” button to save the changes.

By linking your application to a GitHub repository you will be able to create issues in GitHub for the application’s vulnerabilities with a single click.
Once the process is completed a blue GitHub logo will appear next to the Application in the Applications list to indicate that the Application is currently linked to a GitHub Project.

C. Link GitHub to an Environment
In order to link an existing Phoenix Security Environment to GitHub, you need to edit the Environment and enable the “Link to Issue Tracking Project” checkbox. The whole process is analogous to the one for Applications (above):
- On the Navigation Menu, select Risk Explorer > Environments.
- Select the Environment List tab and scroll down to the Environment that you want to update. Hover your mouse over the application entry, click on the three-dots icon than appears on the right, and select Edit (pencil icon)
- In the Update Environment form, find that Integration section on the right-hand side and check the “Link to Issue Tracking Project”.
- Select the GitHub Account and GitHub Project (repository) that you want to link the Environment to.
- Click the “Save Linking to Issue Tracking” button to save the changes.
Once the process is completed a blue GitHub logo will appear next to the environment in the Environment list to indicate that the environment is currently linked to a GitHub Project.
D. Create a GitHub Issue to Track a Vulnerability
Once GitHub is fully integrated with your Phoenix Security account, you can create GitHub issues to keep track and monitor a Vulnerability identified in your Application. Here are the steps for you to follow:
- On the Navigation Menu, click Vulnerabilities.
- Scroll down until you see the Vulnerabilities section. Look for the Vulnerability you wish to track with GitHub and click the blue GitHub icon corresponding to it (marked with the white line in the screenshot below).
- Once a ticket has been successfully created, the ticket reference number and status will be displayed where the blue GitHub icon was located in step 2. An example has been marked with a red line in the screenshot below.

- Click on the issue reference number to open the incident issue page in GitHub.

You can monitor the progress of the ticket on GitHub moving forward.
E. Webhooks and Issue Updates
Once a ticket has been created for a vulnerability Phoenix Security can keep track of the status changes and deletion of the ticket within GitHub Issues. For this to work you need to configure a webhook within GitHub that tells the platform how to send updates to Phoenix Security.
In order to configure you webhooks you will need the unique URL create for your GitHub integration. In the main menu select Integration > Workflows and then click on the GitHub integration that you are configuring the webhooks for. In the details you will find the “Webhook URL” field, which is not editable but can be copied from here.

Once you have your webhook URL, select a repository within GitHub and click on “Settings” at the right-hand side of the top menu. In the vertical menu that appears, select “Webhooks” in the “Code and automation” section. Here you can create the webhook to update issue status and deletion in Phoenix Security.

Click the “Add webhook” button to open the new webhook form, and configure it as shown below.

- Paste the Webhook URL that you copied from your GitHub integration details in Phoenix Security.
- Select application/json as content type (important)
- Enable SSL, as suggested
- Choose to enable individual events to synchronise. You only nee to select “Issues“.
Note: GitHub sends a test notification to new webhooks. This can fail since the content of the test notification is not correct for the real updates sent when issues change. This doesn’t mean that the webhook is not working.
Once you have completed these steps, any status changes or deletions within GitHub of issues created through Phoenix Security will be updated automatically.