
This guide explains how to connect Jira to your Phoenix Security account and use that connection to track vulnerabilities as tickets, with status and a few other details flowing back into Phoenix Security automatically.
1. Introduction
This integration links Phoenix Security Applications and Environments to Jira projects, creates a Jira ticket for a vulnerability with a single click and pulls ticket status changes back into Phoenix Security through a webhook.
1.1 Supported Jira Versions
- Jira Software: authenticate with a username and an API token.
- Jira Data Center (on premises): authenticate with a Personal Access Token and use a single hyphen as the username field.
2. Requirements
- Org Admin access to your Phoenix Security account.
- Jira product access for the account that generates the token, with Browse Projects and Create Issues in the projects you plan to link.
- If you’re also setting up the webhook in Section 6, a Jira account with the correct admin permission for your deployment, Administer Jira on Jira Software, Jira Administrators on Jira Data Center. This is a separate, stronger permission than what’s needed for the token above.
2.1 Jira Software
Anyone can generate their own API token, it carries no scope of its own, it simply inherits whatever permissions that account already has.
2.2 Jira Data Center
Anyone can generate their own Personal Access Token the same way, it matches their existing permission level.
Issue attachments must be enabled for the whole instance, under Administration (⚙) > System > Advanced > Attachments.
3. Connect Jira to Phoenix Security
3.1 Jira Software API Token
- Log in here, or from your profile icon select Account Settings > Security > API tokens.
- Select Create API token with scopes.

- Give the token a name and select an expiration date. One year from creation is the maximum, this is an Atlassian wide limit, not something Phoenix controls.

- Select the app, choose Jira, then add these scopes (these sections can be copy and pasted):
- Classic Scopes
- read:jira-user
- read:jira-work
- write:jira-work
- Granular Scopes
- read:issue:jira
- write:issue:jira
- read:issue-details:jira
- read:issue-status:jira
- read:issue-type:jira
- read:field:jira
- read:field.option:jira
- read:field.default-value:jira
- read:project:jira
- read:status:jira
- read:user:jira
- write:comment:jira
- read:comment:jira
- read:issue.transition:jira
- read:issue-meta:jira
- Classic Scopes
- Select Create, then copy the token immediately. Once you close this dialog the token can’t be viewed again. Store it in a secrets manager or password manager, never in a plain file.
3.2 Jira Data Center PAT
- Select your avatar in the top right corner, then Profile.
- Select Personal access tokens in the left hand menu.
- Select Create token and give it a name.
- Optionally set an expiration date. There’s no enforced maximum here, but setting one anyway is good practice.
- Select Create, then copy the token immediately, it’s shown only once.
3.3 Workflow Integration in Phoenix Security
3.3.1 Jira Software
- In the Phoenix Security menu, go to Integrations > Workflow, then select the Jira Software card.
- Enter the connection details directly:
- Integration Name: pre-filled, editable.
- Server URL: the base URL of your Jira Cloud site. While logged in, copy everything in your browser’s address bar up to and including .atlassian.net, for example https://your-organization.atlassian.net.
- Username: the email address of the account that generated the token in 3.1.
- Access Token: the token from 3.1.
- Issue Type: optional. If left blank, Phoenix tries Bug, then Task. If you enter a value, it must exactly match an existing issue type name in the project, case doesn’t matter. Don’t use a subtask type here, Phoenix doesn’t supply a parent issue.

- Select Create Workflow.
- Open the integration from the Workflow list afterward to copy its Webhook URL, needed for Section 6.
3.3.2 Jira Data Center
- In the Phoenix Security menu, go to Integrations > Workflow, then select the Jira Data Center card.
- Enter the connection details directly:
- Integration Name: pre-filled, editable.
- Server URL: the base URL your organization uses to reach your Jira Data Center instance, whatever address you’d type into a browser to log in, no path after the domain.
- Username: a single hyphen character, just “-“.
- Access Token: the token from 3.2.
- Issue Type: optional. If left blank, Phoenix tries Bug, then Task. If you enter a value, it must exactly match an existing issue type name in the project, case doesn’t matter. Don’t use a subtask type here, Phoenix doesn’t supply a parent issue.
- Select Create Workflow.
4. Link Applications & Environments
4.1 Link an Application
- In the Phoenix Security menu, go to Risk Explorer > Applications, then select the Application List tab.
- Find the Application, hover over it, select the three dot icon, then select Edit.

- In the Update Application form, find the Integration section, then check Link to Jira Project.
- Select the Jira Account and the Jira Project to link to.
- Select Save > Cancel.

Once linked, a blue Jira logo appears next to the Application in the Applications list.

4.2 Link an Environment
The process is identical, using Environments instead of Applications.
- In the Phoenix Security menu, go to Risk Explorer > Environments, then select the Environment List tab.
- Find the Environment, hover over it, select the three dot icon, then select Edit.
- In the Update Environment form, find the Integration section, then check Link to Jira Project.
- Select the Jira Account and the Jira Project to link to.
- Select Save Linking to Jira.
The same blue Jira logo appears next to a linked Environment in the Environment list.
5. Create & Track Tickets
This is the one click ticket creation that Section 4 makes possible, once an Application or Environment is linked to a Jira project.
5.1 Create a Ticket for a Vulnerability
- Go to Vulnerabilities in the navigation menu.
- Find the vulnerability you want to track and select it.

- Click on the Findings Action button that appears and click “Create Issue Ticket”.

- If this vulnerability is within the application/environment you linked, stay on Inherit Project. If not, select Choose Project.
- You’re then able to choose a finding which populates the content needed to open a ticket.

Once you click “Open Ticket”, the ticket will be created to track.
5.2 Follow the Ticket Status
- Open the vulnerability to view the findings which have been linked to the ticket, then select the ticket reference number to open the ticket in Jira.

- From here, progress is tracked in Jira as usual. Status updates only flow back into Phoenix Security once the webhook in Section 6 is set up, without it you’d need to check Jira directly for progress.
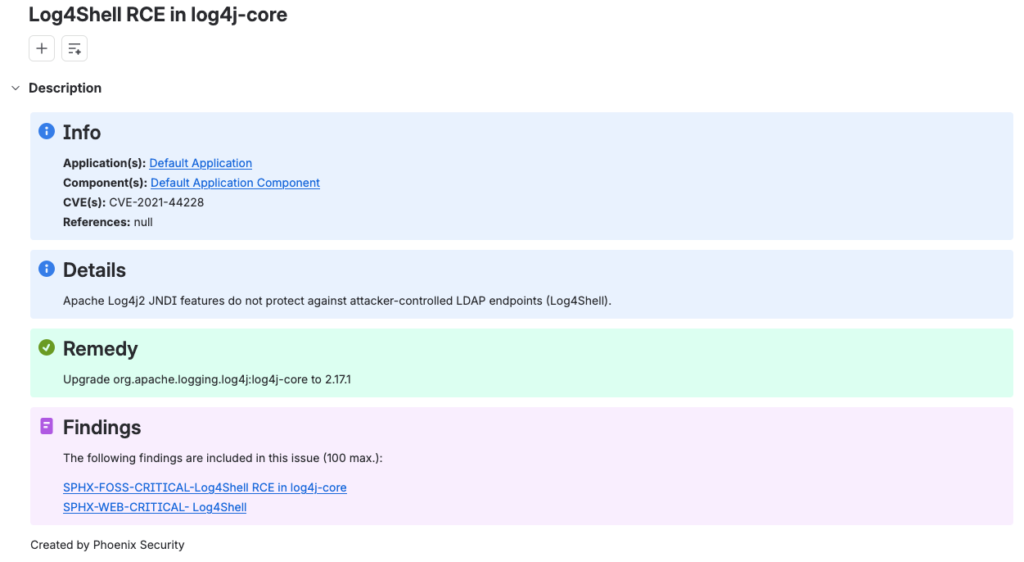
You can monitor the progress of the ticket on Jira moving forward.
6. Configure Webhooks
This needs the admin permission covered in Section 2, Administer Jira on Jira Software, Jira Administrators on Jira Data Center, a separate requirement from the token used in Section 3. Without it, the WebHooks screen in the next two steps won’t be available to you at all.
6.1 Jira Software
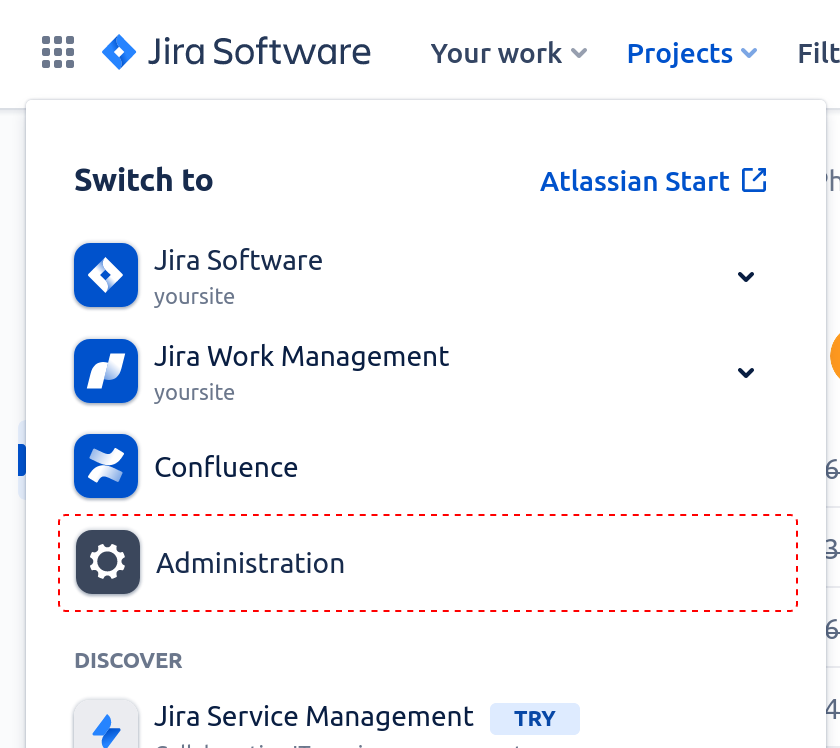
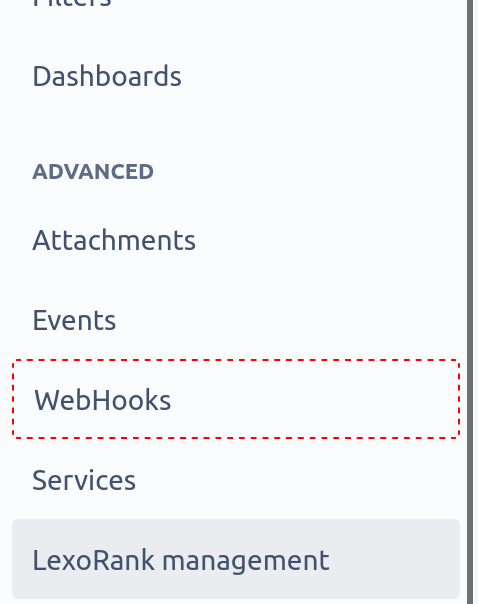
- Go to your site’s Administration area, then select Jira under Application Settings at the bottom of the left hand menu.
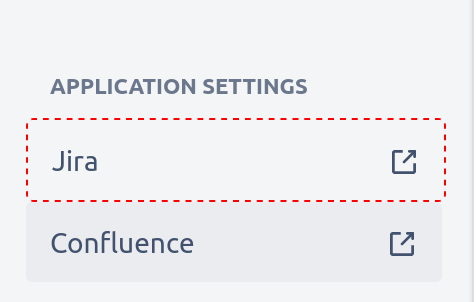
- From the new page that opens up, click on “WebHooks” in “Advanced” section.
6.2 Jira Data Center
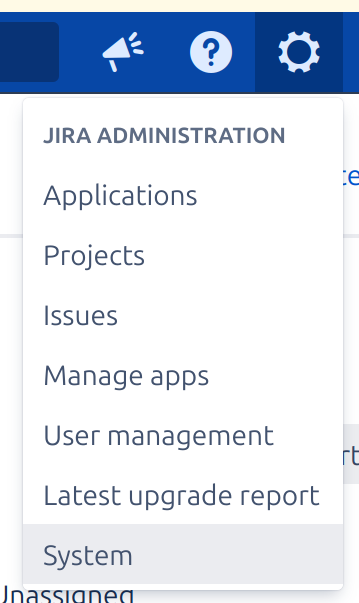
Go to Administration > System, then select WebHooks under Advanced in the left menu.
6.3 Create the Webhook
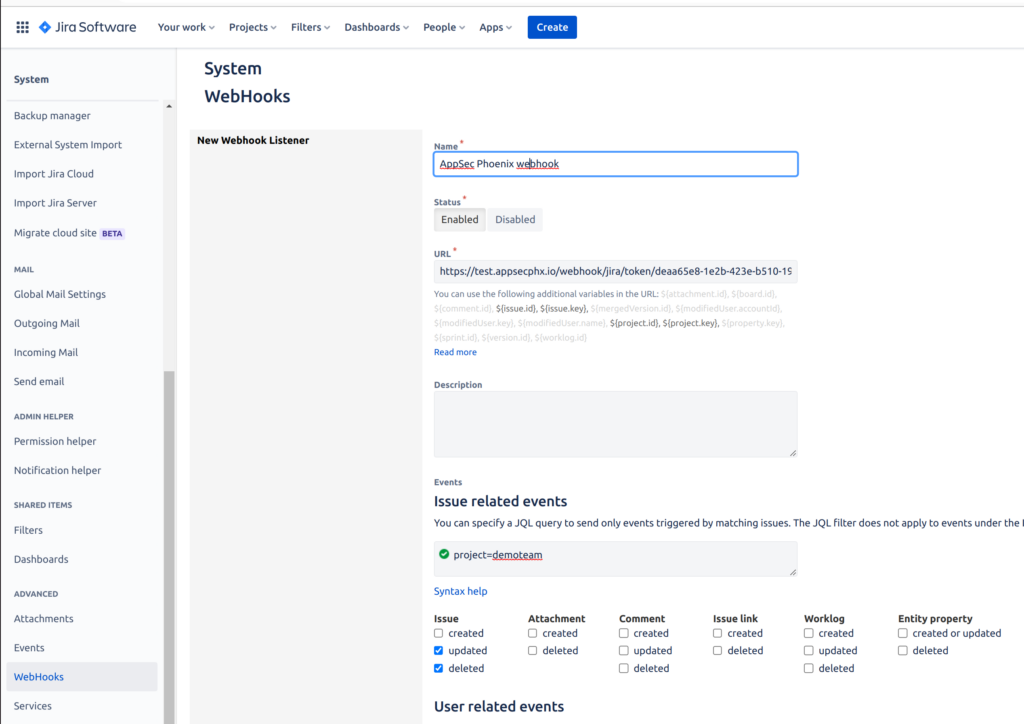
- Select to create a new webhook.
- Fill in the form:
- Name: a descriptive name.
- URL: the webhook URL shown in Phoenix Security under Integrations > Workflow, select the Jira integration this webhook is for. Each integration has its own URL.
- Issue related events: enter a JQL filter for the projects you’re connecting, for example project=demoteam. For more than one project, use project IN (“WEB”, “MOBILE”).
- Issue: tick updated and deleted. Leave created unticked, Phoenix Security creates the ticket, not Jira.
One more thing worth checking if updates still don’t arrive: Phoenix only accepts an inbound update if the Jira issue still carries the label Phoenix originally created it with. If that label gets removed or the ticket gets heavily edited outside Jira’s normal workflow, updates for that specific ticket stop silently, even though the webhook itself is working fine.
7. Best Practices & Recommendations
- Rotate the Jira Software API token before it expires. One year is the maximum Atlassian allows and the integration fails without warning once it lapses, so set a reminder ahead of whichever expiration date was chosen in Section 3.
- If you’re using the granular scope list from Section 3, keep it in sync with what the Workflow integration actually calls. A new endpoint added later needs its scope added here too, otherwise requests to it fail with a scope mismatch that won’t look related to permissions at first glance.
- Generate the token from a shared or service Jira account rather than a personal one. The token acts as whoever created it, so if that person leaves the team or their access changes, the integration breaks along with it.
