Introduction:
Welcome to our comprehensive guide on navigating the Environments Management section of our platform. This guide is designed to help you understand and effectively manage the tools and features available. We will provide you with step-by-step instructions including screenshots and explanations.
- A scanner must already be configured
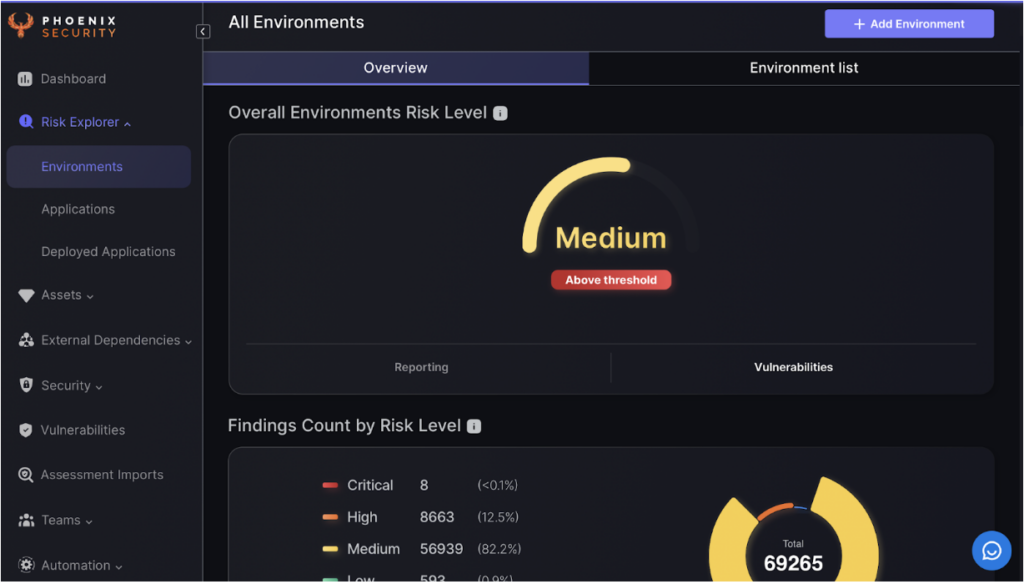
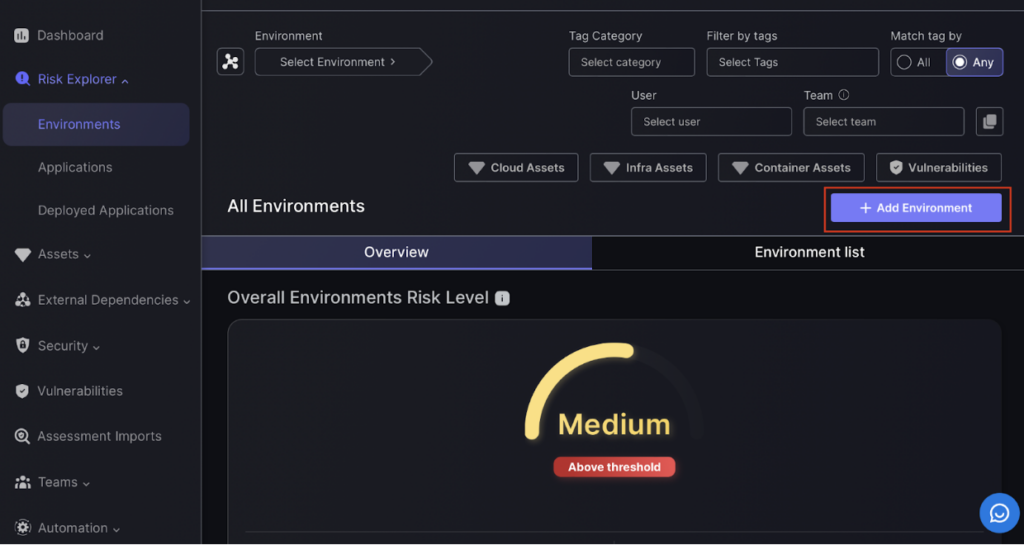
1. Environments Page Overview:
The Environments overview page gives insight into the Environment risk individually and as a whole.
This set of tools will allow you to drill down and explore the criticality of the Environment, making sure the most important issues are addressed.
The overview page provides insight into Environmental risk. There are multiple visual tools that give different breakdowns of risk.
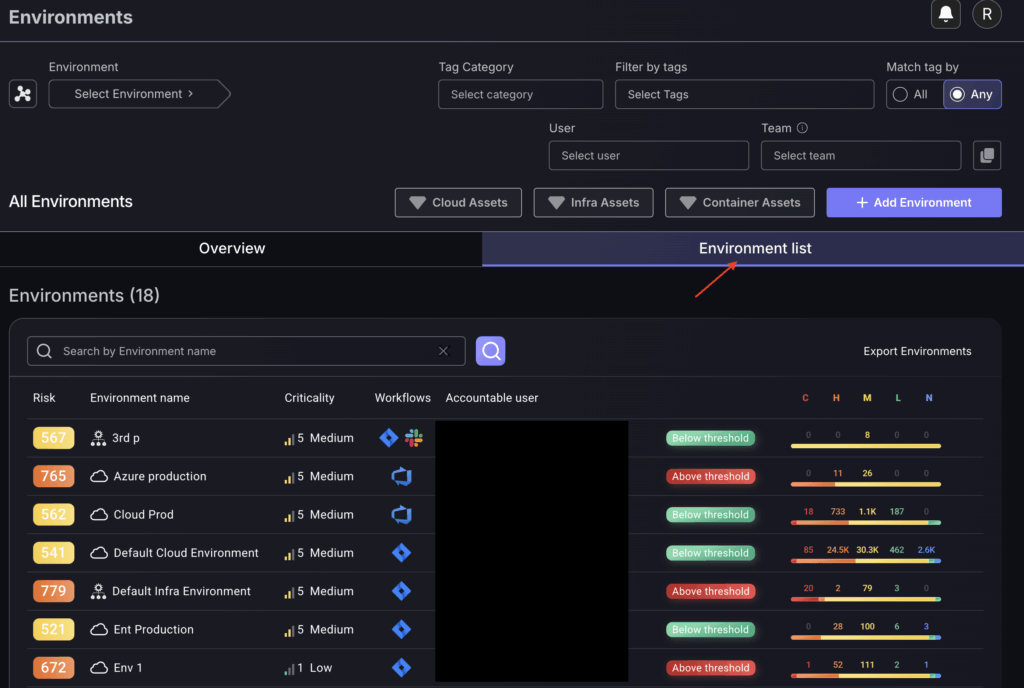
2. Environments list:
Click on the Environment List button to view the comprehensive list of environments.
Each environment can be broken down into Services. Manipulating services will be covered in the next section.
3. Visual Tools
Below are the tools you can use to explore and understand Environment risk. Click on the info button to learn more about each of the analysis tools. Alternatively, a brief description of each tool will also be covered.
Risk meter
The Application Risk dial is a simple tool that shows your application’s risk level on a single dial. It combines various security metrics to provide a clear overview of overall Risk of all Environments’ security.
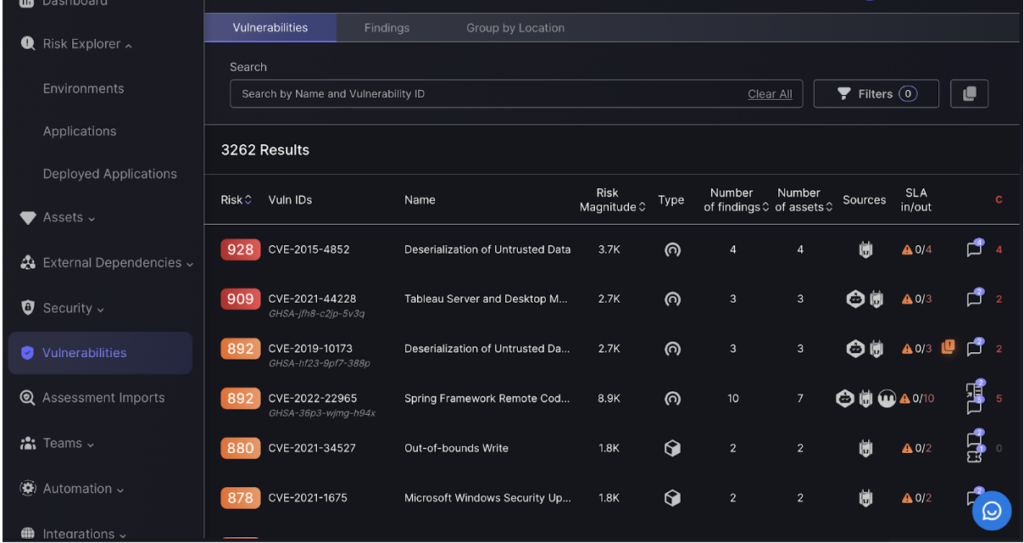
The vulnerabilities button takes you to detailed information about individual vulnerabilities, enabling focused analysis and remediation.
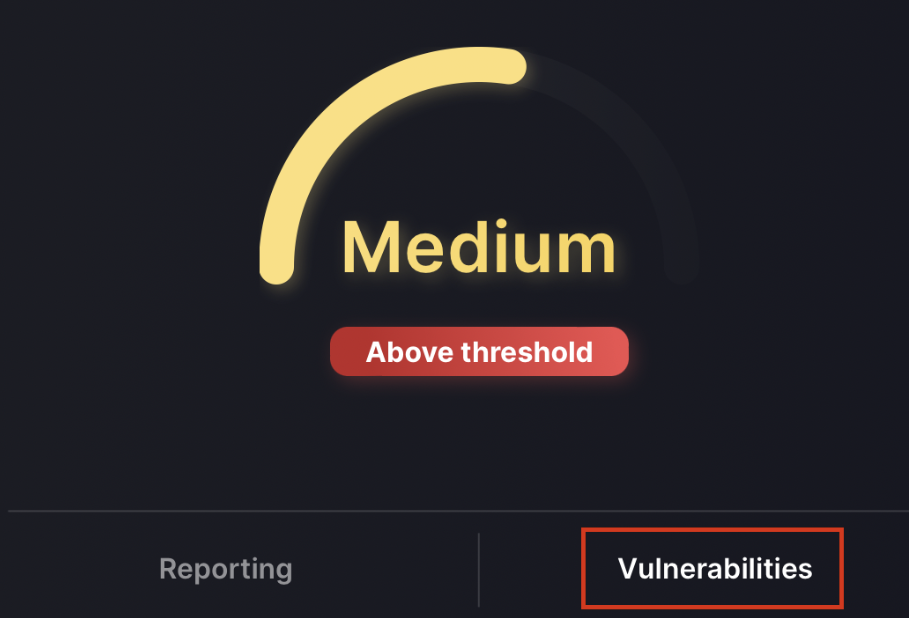
The vulnerabilities list provides detailed descriptions, severity levels, and remediation steps for each identified issue, helping users prioritise and address them effectively.
Findings by risk level
The pie chart categorises risky applications by severity, offering a clear visual breakdown to prioritise and address critical security issues.
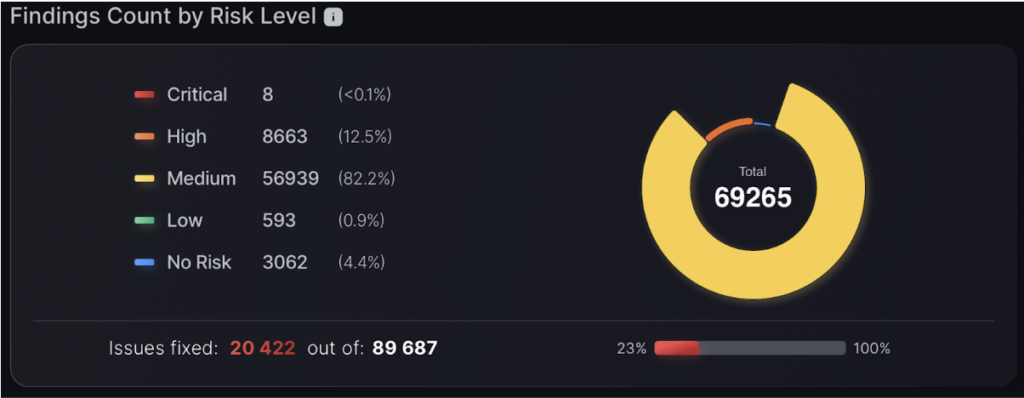
Findings by risk level
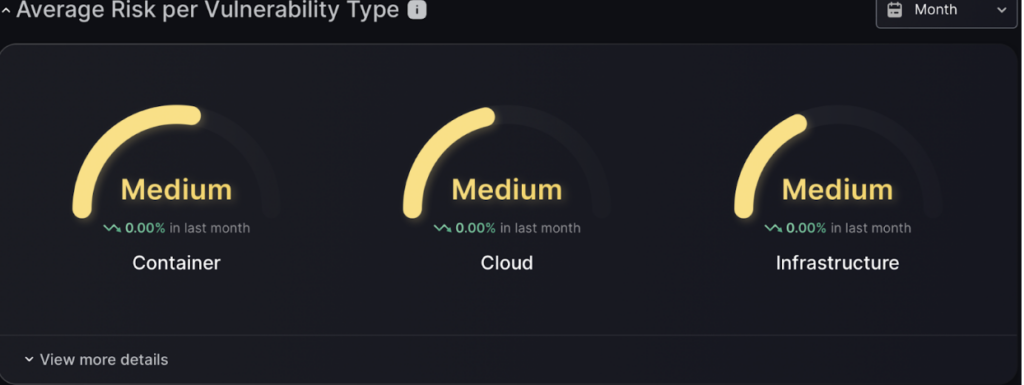
Risk assessment for each application type, displayed on a simple metre or dial. This feature gives a clear, real-time view of Environments’ risk levels based on attack surface, helping you manage and reduce potential threats effectively.
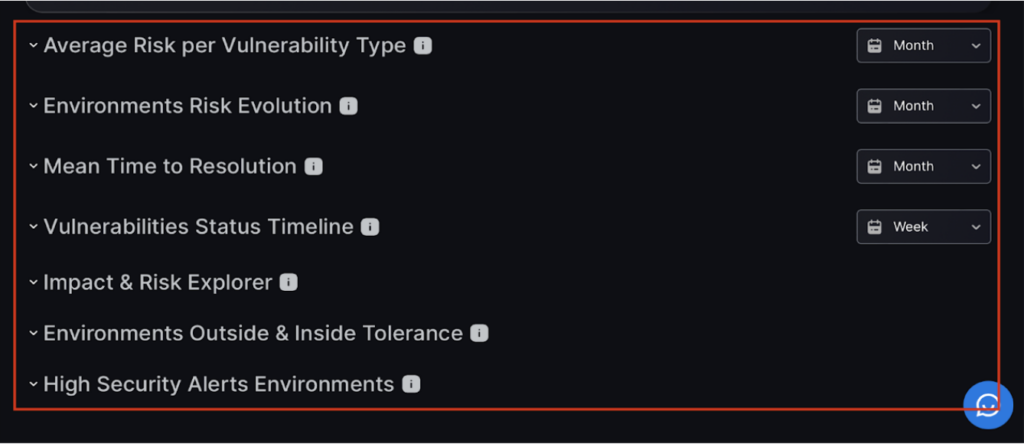
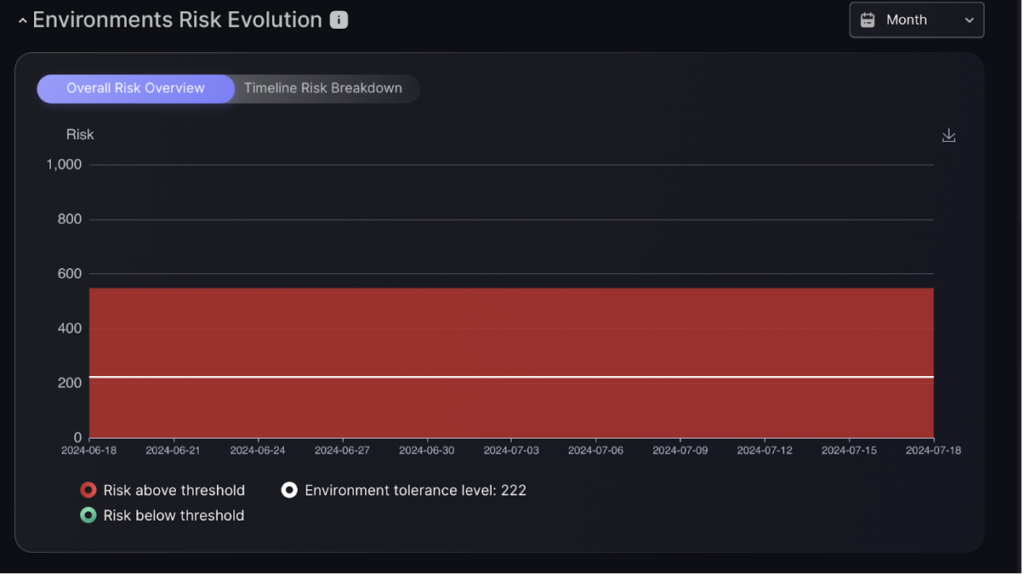
Environment Risk Evolution
Use the graph of environment risk over time to easily track and manage vulnerabilities. The graph displays risk levels against a set tolerances, highlighting periods when risk is above or below tolerance.
This graph also shows a risk timeline for each vulnerability level of vulnerability criticality.
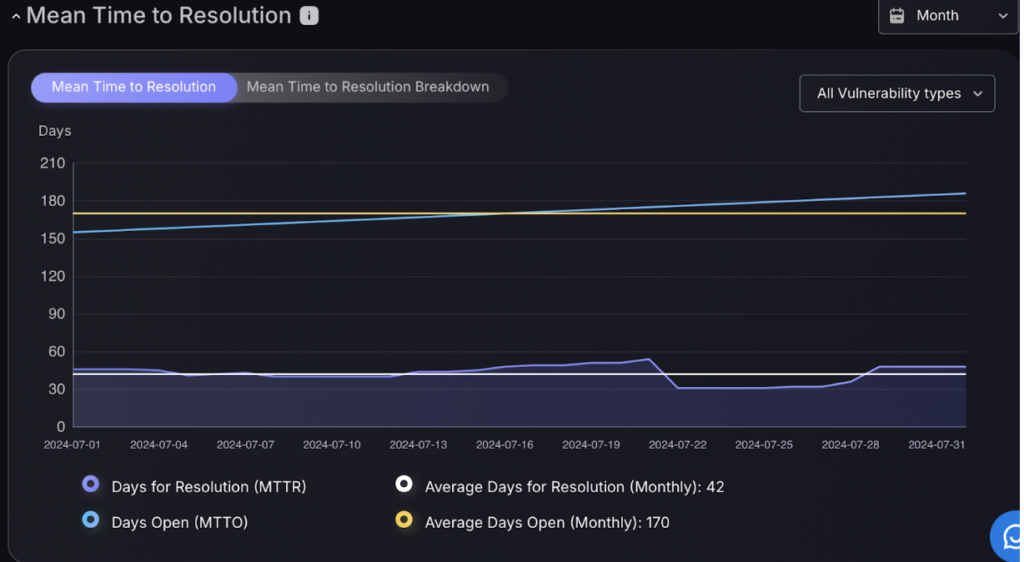
Mean Time To Resolution
This graph displays the average time taken to fix vulnerabilities, helping users understand their response efficiency. This visual tool highlights trends, identifies delays, and benchmarks performance against industry standards.
Alternatively the graph can be set to display average vulnerability age at time of closure.
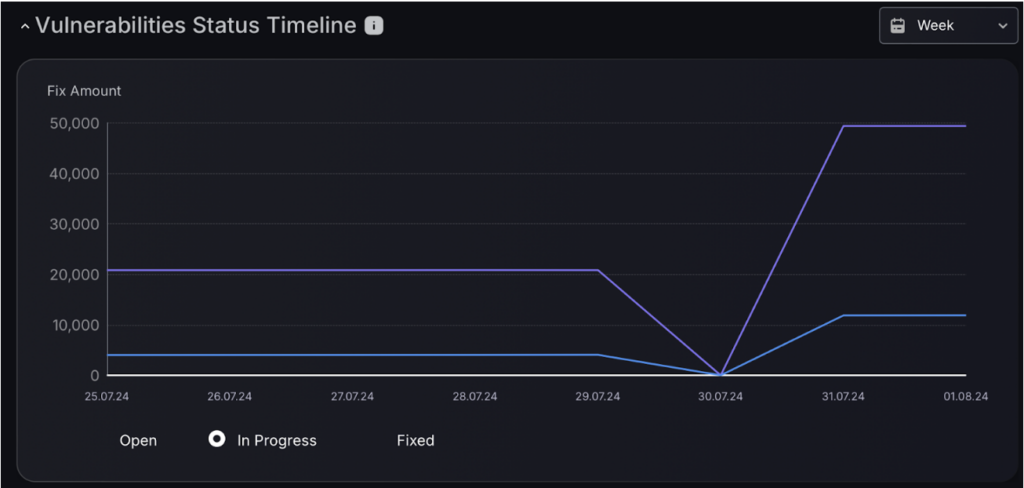
Vulnerability Status Timeline
The Vulnerabilities status timeline gives a comprehensive breakdown of the status of vulnerabilities. It shows the number of open vulnerabilities, those that are fixed, and those currently being addressed.
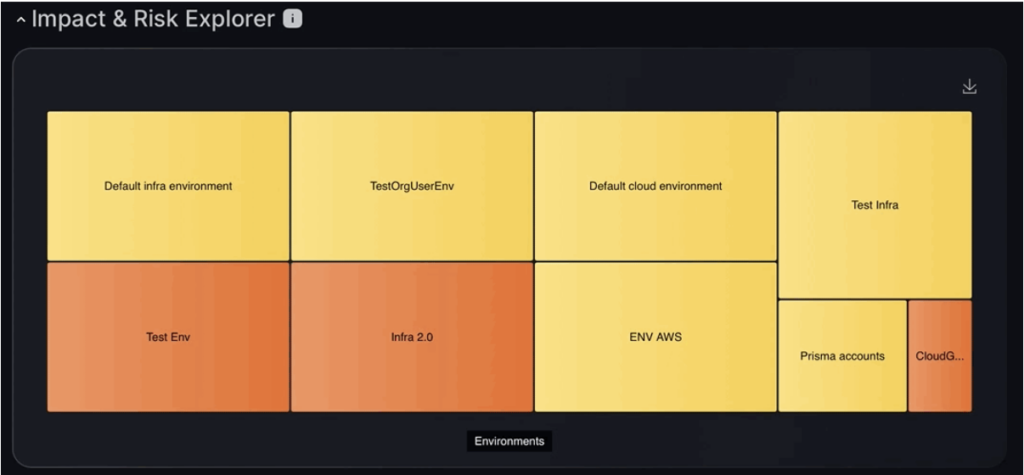
Impact & Risk Explorer
The risk and impact explorer allows you to visually explore different environments and their constituent parts. The size of the box represents the importance of the environment and the colour represents the chance of the vulnerability being exploited.
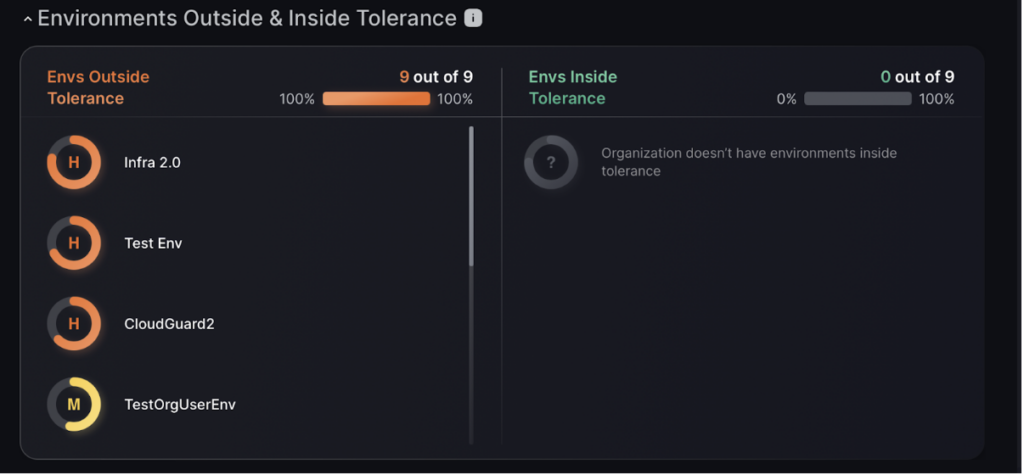
Environments Outside & Inside Tolerance
Below, are environments outside of tolerance, on the right are environments inside tolerance. This categorisation changes as the risk tolerance is changed.
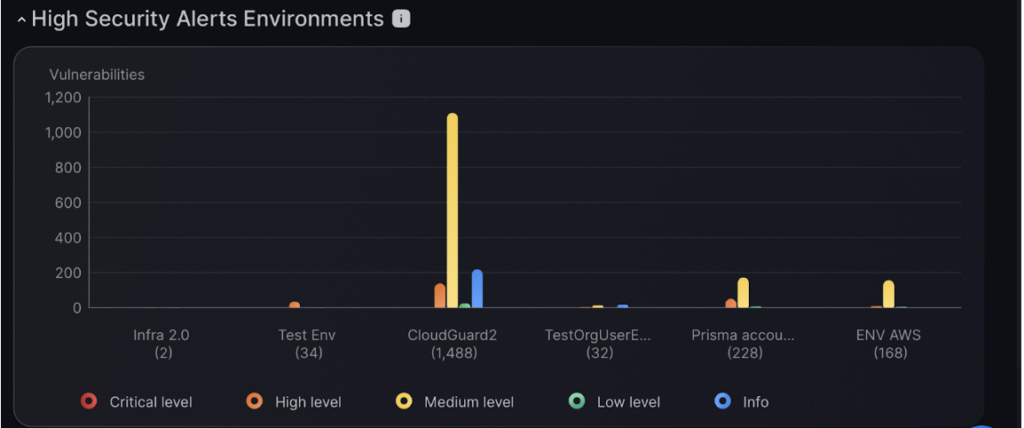
High Security Environments
The Security Environments graph gives vulnerability breakdowns of the six most important environments.
4. Creating a New Environment
Step 1:
First navigate to the environments page. Then select add environment
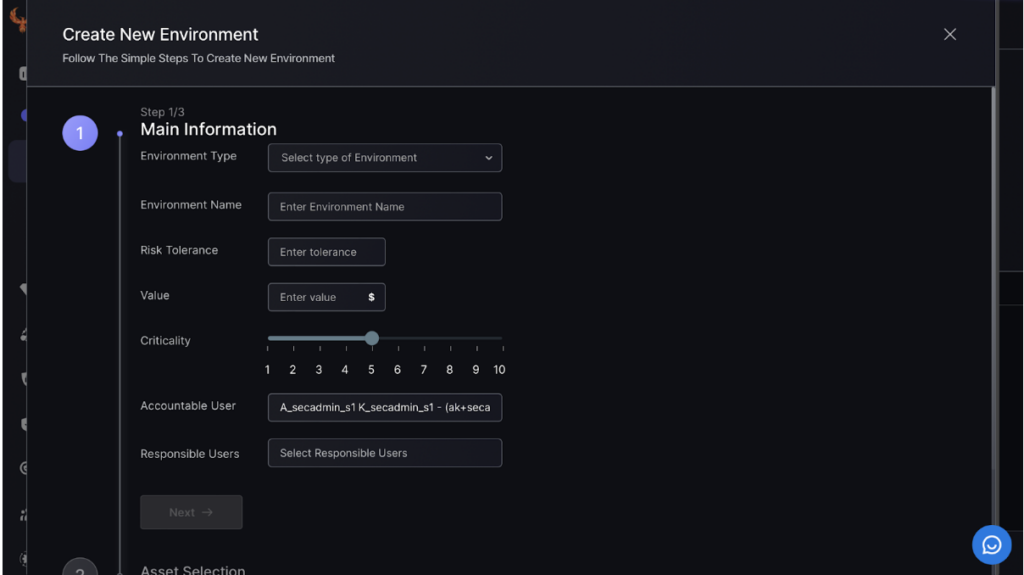
Step 2:
To create a new application entry, start by selecting the environment type, naming it, and setting risk tolerance and value. Adjust the criticality level and assign accountable and responsible users, then click “Next.”
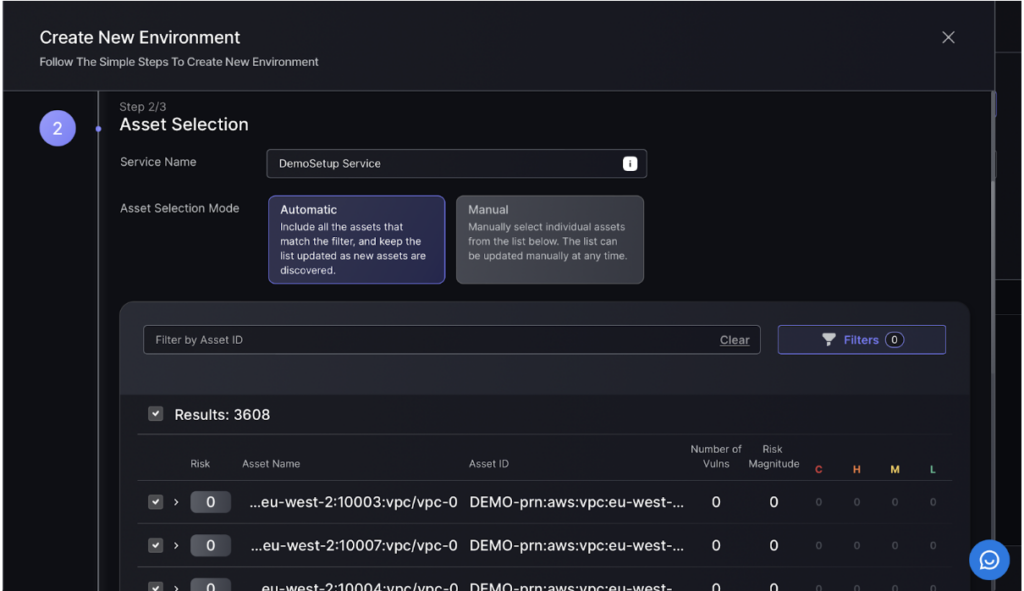
Step 3:
In the Asset Selection step, enter the service name and choose between automatic or manual asset selection. Use filters to refine the asset list and review the selected assets, ensuring they match your criteria.
Step 4:
Create tags to efficiently search for the service and link to notifications and issue tracking. This will ensure information on assets can be efficiently accessed and tracked.
Click “Create Environment” to finish the process.

5. Editing & Deleting Environments:
Edit or delete an environment by clicking on the three dots. From the drop down menu it is possible to perform these actions.
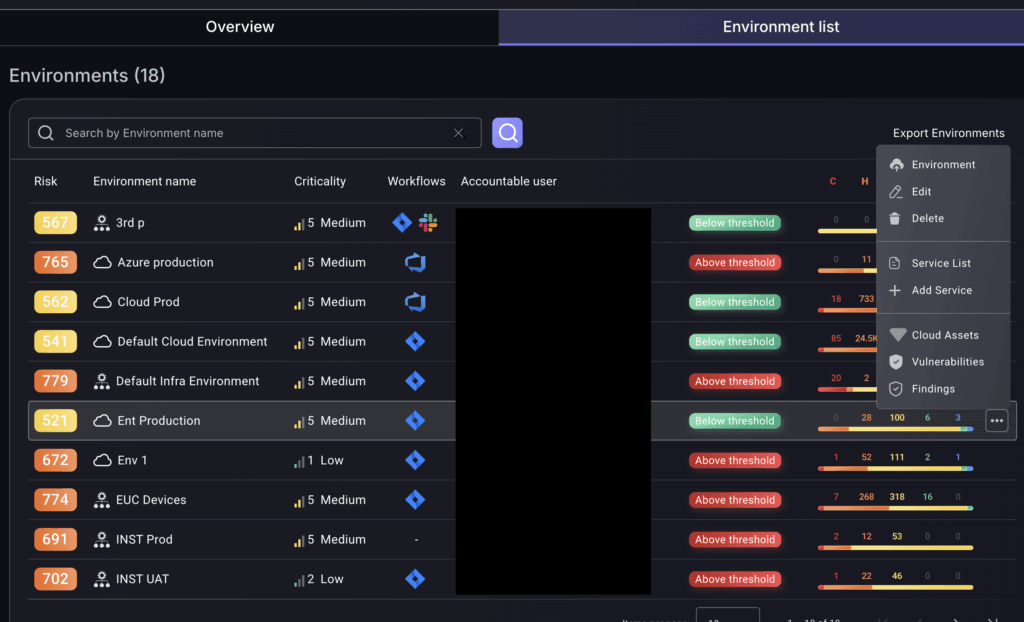
6. Export Environment:
Export environment data in the form of a CSV file.
Here you can access a comprehensive list of all applications. You are also able to filter and sort applications.
