1. Introduction
Our guide to application management guide will walk you through the essential processes of creating, deleting, and editing applications on the platform.
- User must have already set up a scanner (see integrations)
- User should be logged in as a admin
2. Application Page
Similar to the environments section, the Application overview page gives insight into environment risk individually and as a whole. The overview page provides insight into application risk. There are multiple visual tools that give different breakdowns of risk. Since these tools are similar in principle to the Application overview, we will not go over them in detail in this article.
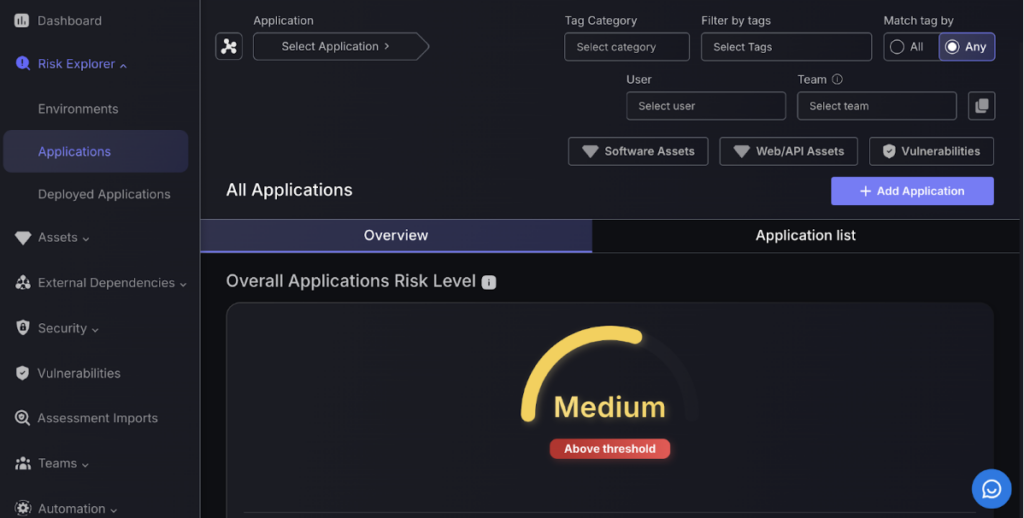
The Application Risk View page is divided into two parts: Overall Summary and Applications List.
The first part is the summary that provides an overview of the risk status of each of the Applications using a combination of speedometer-type dials and pie and doughnut graphs. Each of which are colour-coded with large text captions indicating the vulnerability status to catch your attention more easily.
3. Application List
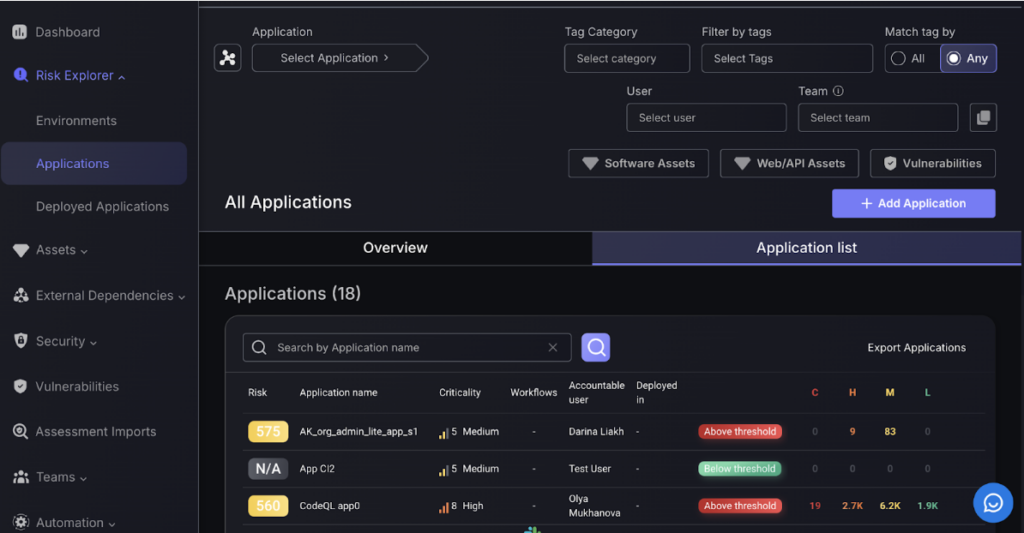
As with the environments page, you can view the comprehensive list of applications by clicking on the application list button.
Each application can be broken down into components, we will cover this in the Components Management section.
4. Adding an Application
Step 1:
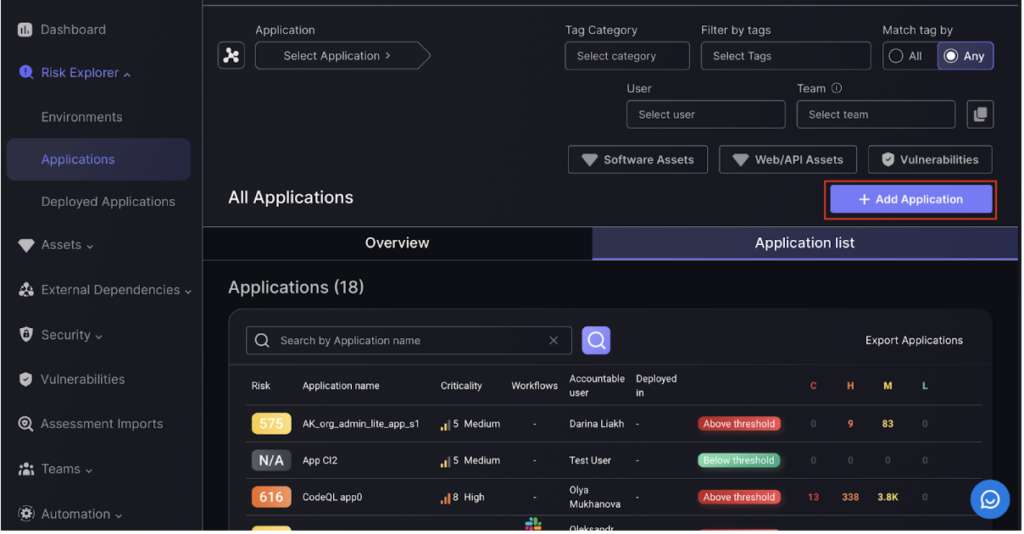
Navigate to the applications page. To add an application click on the Add Application button after navigating to the applications list.
Fill in the fields when prompted. There are three sections: basic information, asset selection and advanced configuration
Step 2:
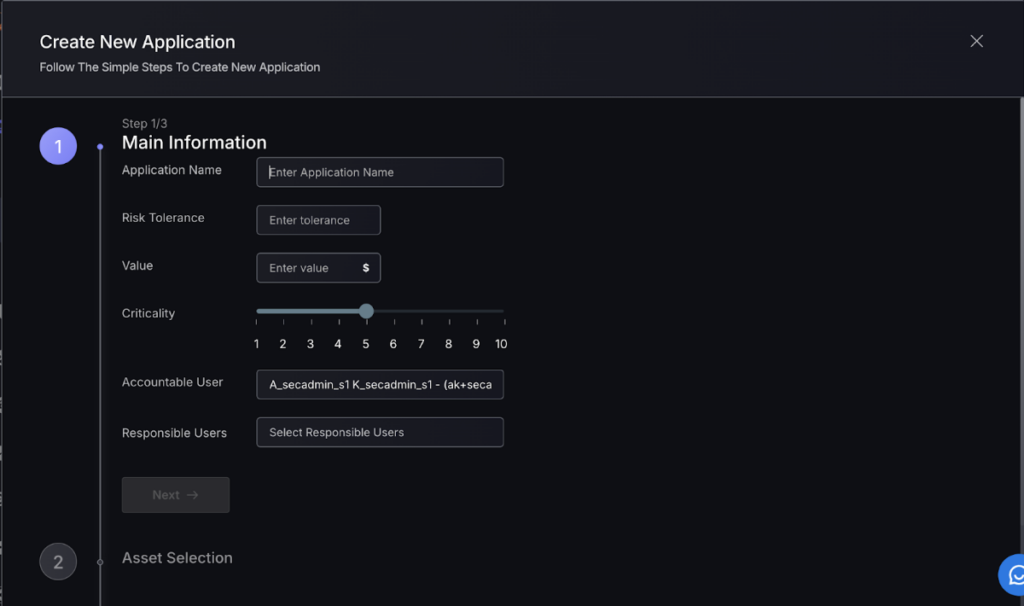
To create a new application entry, start by selecting the application type, naming it, and setting risk tolerance and value. Adjust the criticality level and assign accountable and responsible users, then click “Next.”
Step 3:
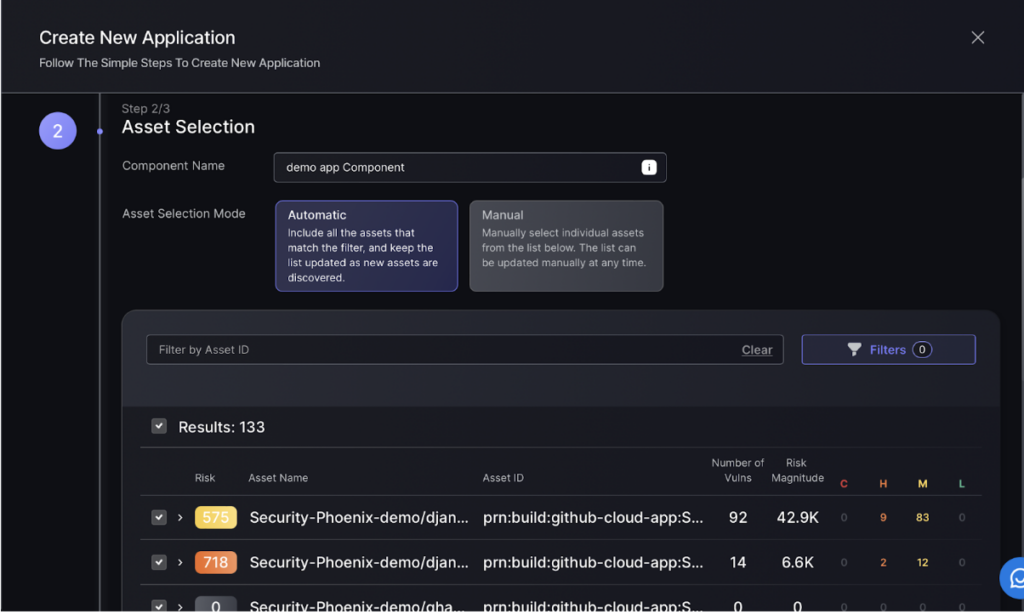
Next set up asset selection for the Component. Apply filters to select which assets are relevant to the component. Automatic selection is recommended as it ensures that when scanners pick up new findings, these are automatically added to the Component under the condition that it match the applied filtering conditions.
Alternatively select assets manually. New findings will have to be manually added.
These choices can be updated at any point.
Step 4:
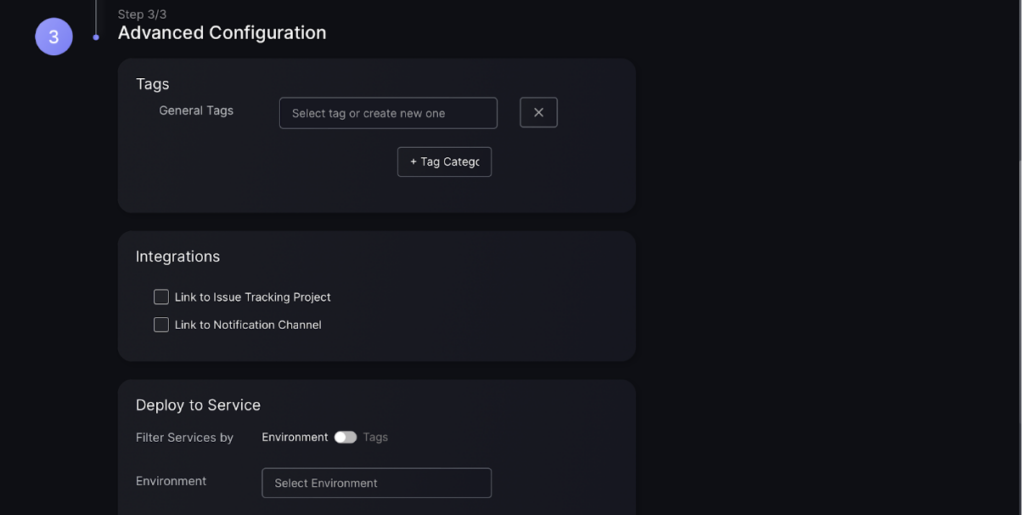
Create tags to efficiently search for the asset and link to notifications and issue tracking. This will ensure information on assets can be efficiently accessed and tracked.
- Tags – Phoenix automatically applies tags to findings, e.g. if a finding is weaponizable, but it is recommended that you also apply general tags if you have additional context about the Component.
- Integrations – leave these as they are unless you want this Component to be part of a different issue tracking project or Notifications channel as it’s parent Application.
- Deployment to Services – The default is to inherit this from the Application, which is the recommended setting unless you know that this Component is linked to specific services. Otherwise, the default is to inherit from the Services within the Environment that the parent Application of the Component is within.
Click “Create Application” to finish the process.
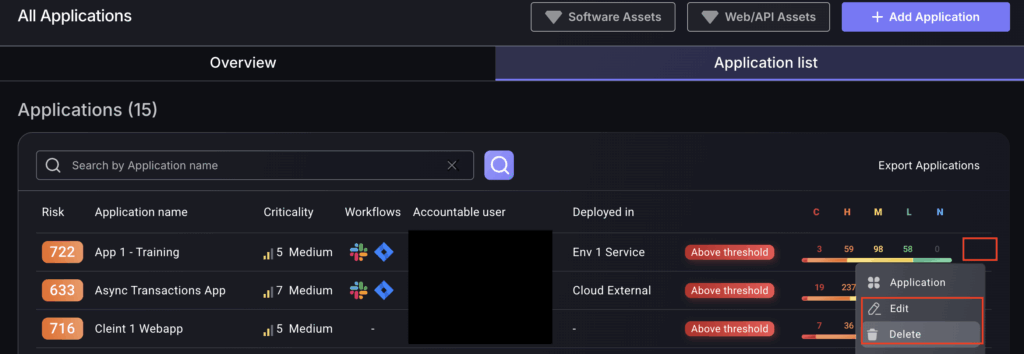
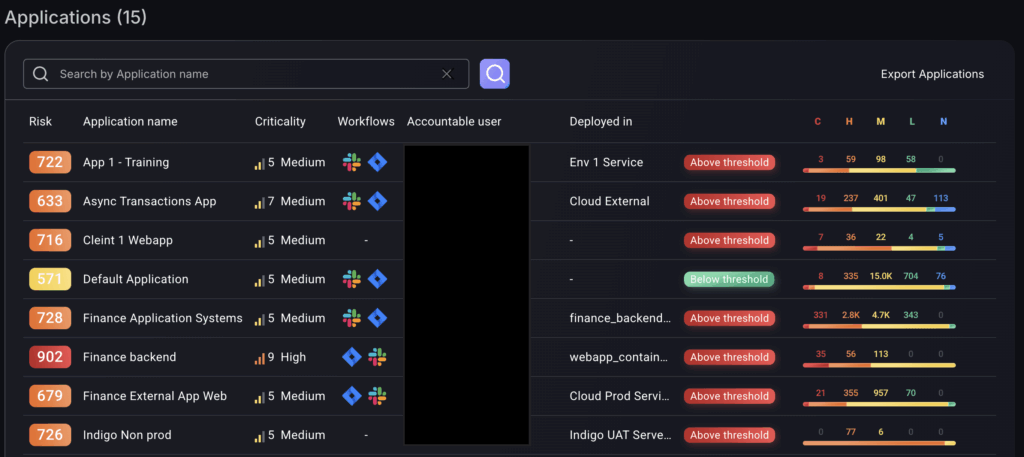
5. Export Applications
Export application information easily in CSV format to manage and analyse security data efficiently. This feature can help simplify reporting. This button is located on the top right of the Applications list as “Export Applications”.
6. Edit and Delete App
Navigate to the applications list and click on the three dots of the relevant application.
From here click on the edit or delete buttons in the dropdown menu that appears.