
This guide explains how to use Remediation Targets to decide which findings each team is asked to fix, review those picks on the Teams dashboard and hold back a group of findings that need Security’s attention before a team acts.
1. Introduction
A Remediation Target is an Objective that tells Phoenix which findings count and how many of them may stay open. Phoenix marks the findings that need fixing as “Suggested to fix” and shows them to the owning team.
1.1 What it does
You can expect Remediation Targets to provide:
- A rule that selects findings, such as “Risk Level is High or Critical”.
- A goal that sets how many matching findings per asset may stay open.
- Assignment to the organisation, or to specific applications, environments, components or services.
- A “Suggested to fix” view for each team on the Teams Dashboard and in the Vulnerabilities list.
- An optional exclusion, so that findings with a chosen custom status are left out.
2. Create an Objective
2.1 Define the Rule
- Navigate to Automation > Remediation Targets.
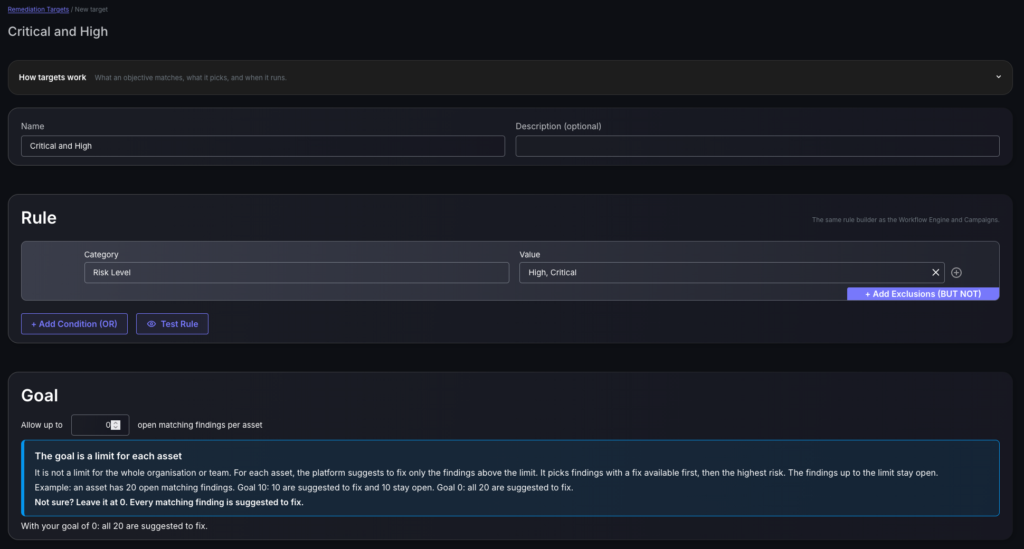
- Select “New Objective” and enter a name, such as “Critical and High”.
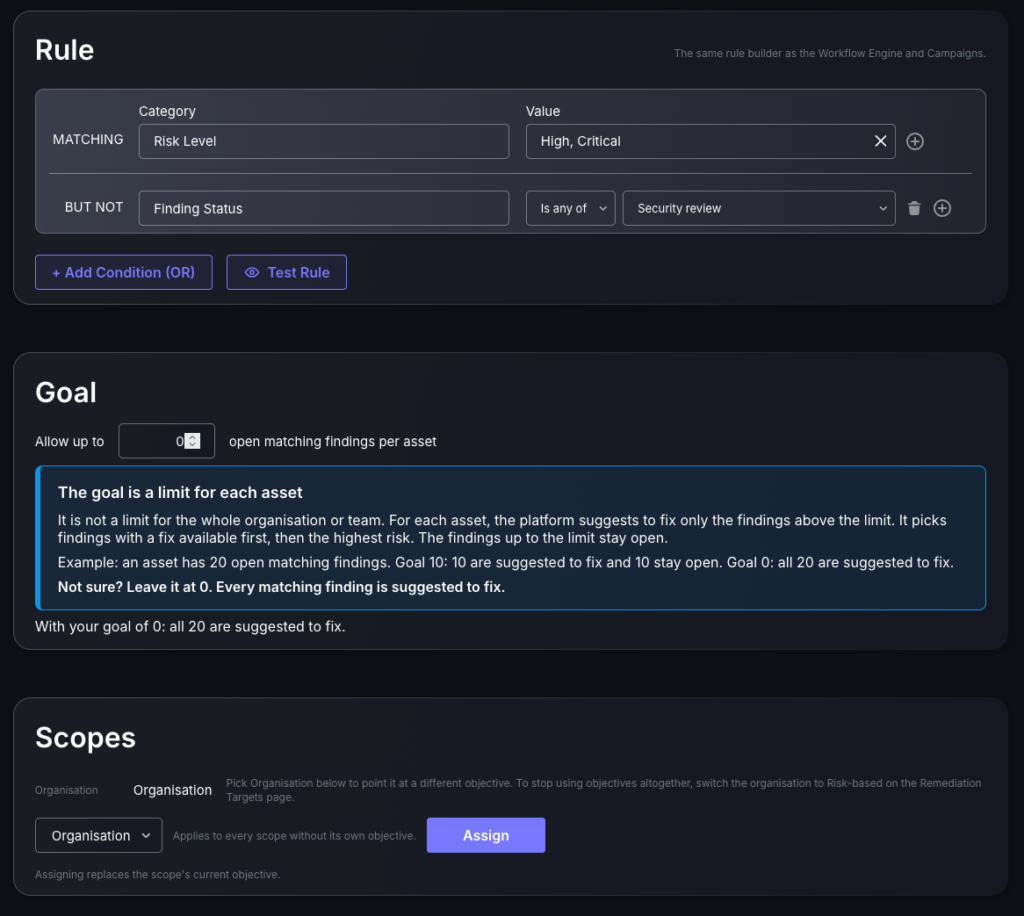
- In the MATCHING row, choose a category, such as Risk Level, and the values to include.
- Select “Test Rule” to see how many open findings match across the organisation.
The rule uses the same builder as the Workflow Engine and Campaigns. Risk exceptions, exclusions, duplicates and correlated service findings are not counted.
2.2 Set the Goal
The goal, “Allow up to N open matching findings per asset”, is a limit for each asset, not for the whole organisation or team.
- Goal 10 with 20 open matching findings: 10 are suggested to fix and 10 stay open.
- Goal 0: every matching finding is suggested to fix.
Findings with a fix available are picked first, then the highest risk.
2.3 Assign the Objective
Select “Save target”, then use the Scopes card on the Objective to assign it.
- The Organisation Objective applies to every application or environment without its own Objective.
- An Objective can also be assigned to an application, environment, component or service.
- The nearest assignment wins: component or service, then application or environment, then Organisation.
- Assigning an Objective replaces the scope’s current Objective.
2.4 Run the Selection
- On the Remediation Targets page, set the mode to “Objective-based”.
- Select “Re-run selection”.
- Wait until “Last run” shows Succeeded.
Phoenix also runs the selection after new scan data is processed, when you switch mode, when you assign a scope and when you save an Objective that is already assigned. Creating an Objective does not start a run.
3. Review What Teams Are Asked to Fix
3.1 Open the Team Dashboard
- Navigate to Teams > Dashboard and select the team.
- Keep the switch on “Suggested to fix”.
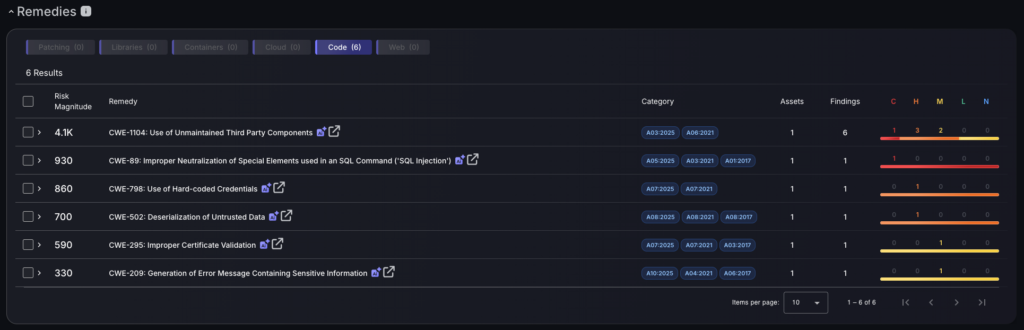
- Open the Remedies tab.
The Findings Count card counts only the findings suggested to fix, and the Remedies list shows the remedies that cover them. Select “All” to see the team’s findings without the Objective.
3.2 Identify a Suggested Finding
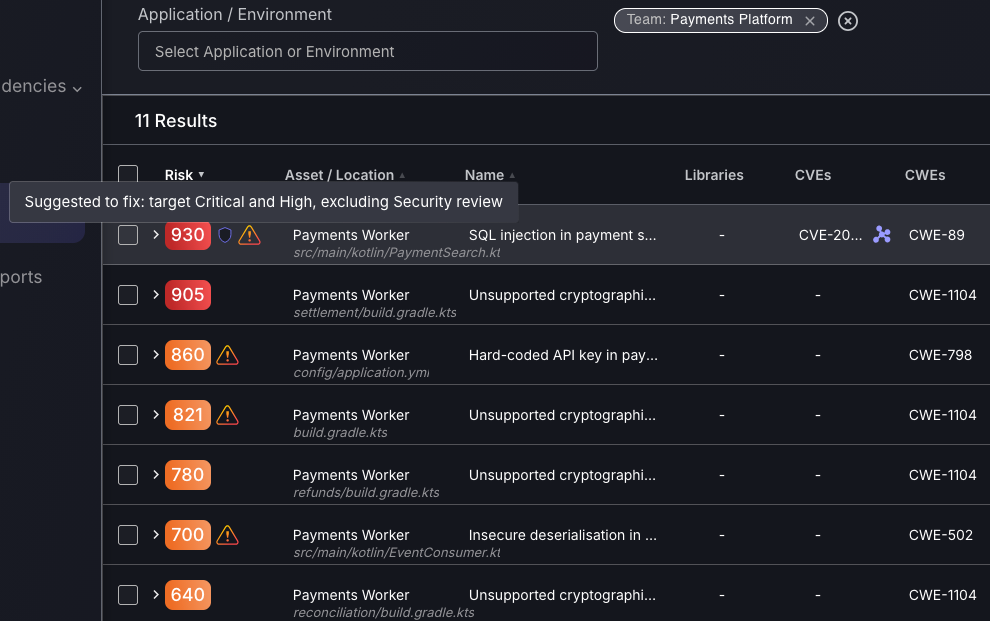
In Vulnerabilities > Findings, a finding that is “Suggested to fix” carries a marker next to its risk score. Hover over the marker to see the Objective that selected it.
4. Hold Back a Theme with a Custom Status
Some findings are not ready for a team. You can mark them with a custom status and exclude that status from the Objective.
4.1 Create & Apply the Status
- Navigate to Settings > Organization > Configuration.
- Under Custom Status Configuration, select “Add Status”, enter a name such as “Security review”, choose a colour and select “Confirm”.
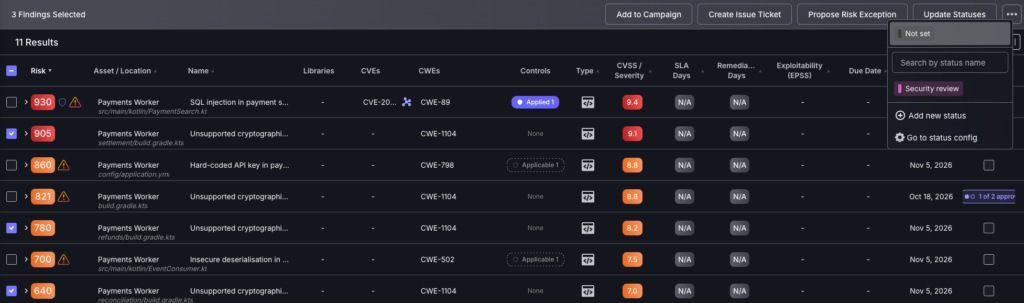
- Navigate to Vulnerabilities > Findings and select the findings that belong to the theme.
- Select “Update Statuses” and choose the status.
4.2 Exclude the Status in the Objective
- Open the Objective and select “Add Exclusions (BUT NOT)”.
- Set the category to Finding Status, choose “Is any of” and select the status. “Name contains” is also available.
- Select “Test Rule” to see how the match count changes.
- Select “Save target”, then “Re-run selection” on the Remediation Targets page.
Phoenix now leaves the labelled findings out of the Objective. They are no longer suggested to fix and are no longer counted on the team’s dashboard.
4.3 Review the Held Findings
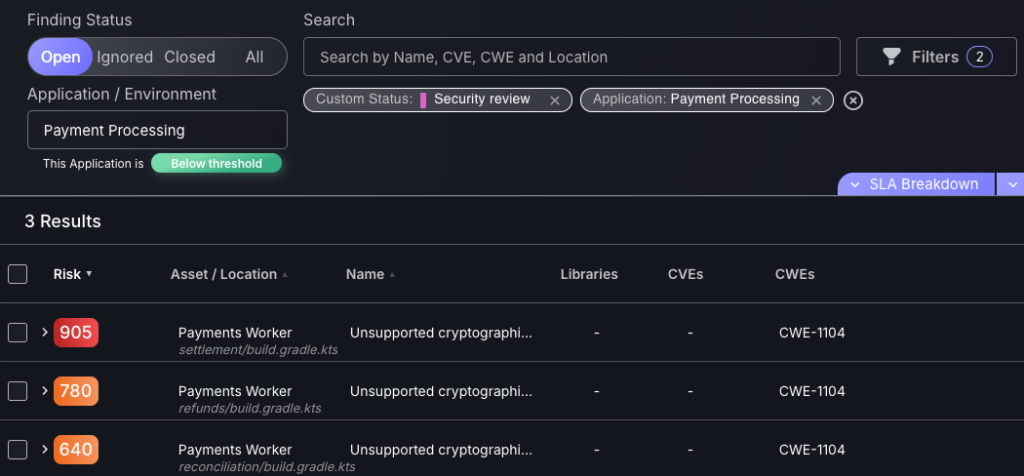
- Navigate to Vulnerabilities > Findings and select “Filters”.
- Under Custom Statuses, choose the status and select “Apply Filters”.
To exclude the status from a list instead, select “Show Excluded options” in the same dialog.
5. Release the Findings
When guidance is ready, remove the status from the findings, or remove the exclusion from the Objective, and select “Re-run selection”. The findings become suggested to fix like any other.
